5. Inside the Team Workspace
A complete guide to navigating a dedicated Team Dashboard, tracking projects, managing sub-teams, and utilizing powerful analytics widgets.
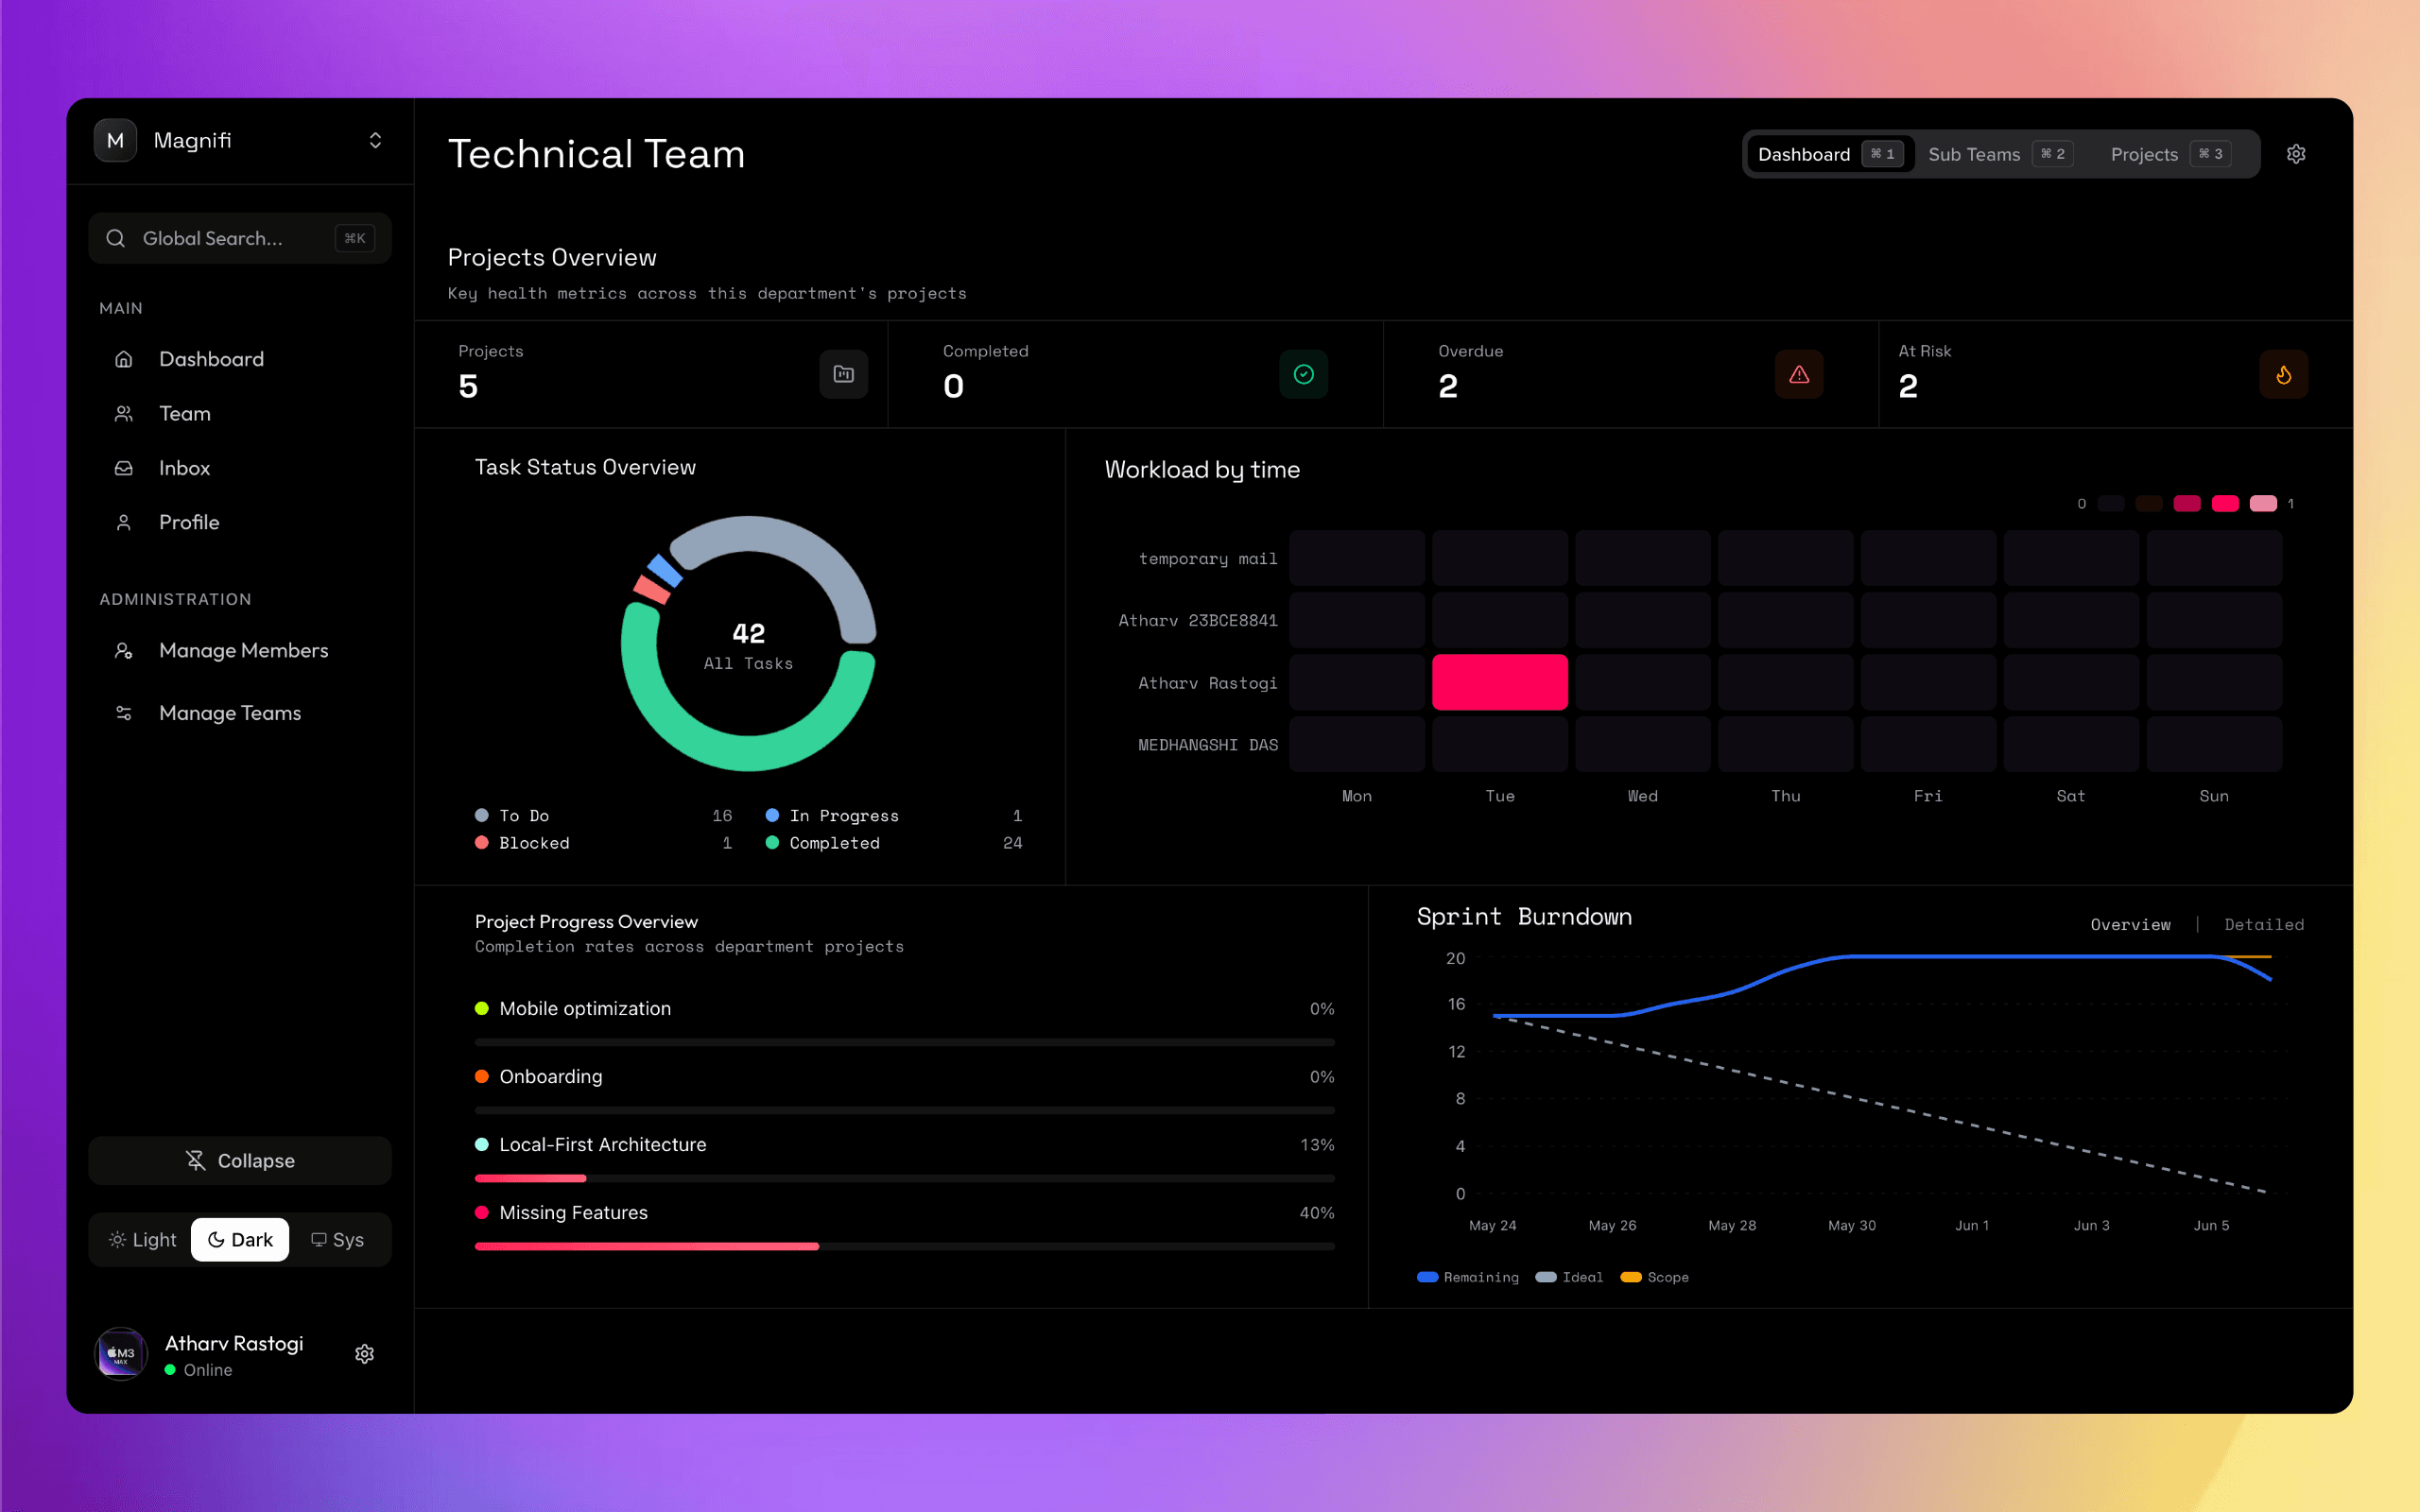
Once you navigate into a specific team from the overview page, you'll enter the dedicated Team Workspace. This workspace is divided into three primary tabs, giving you complete visibility over what the team is working on.
5.1. Quick Navigation
The team workspace has three main tabs that you can click to access:
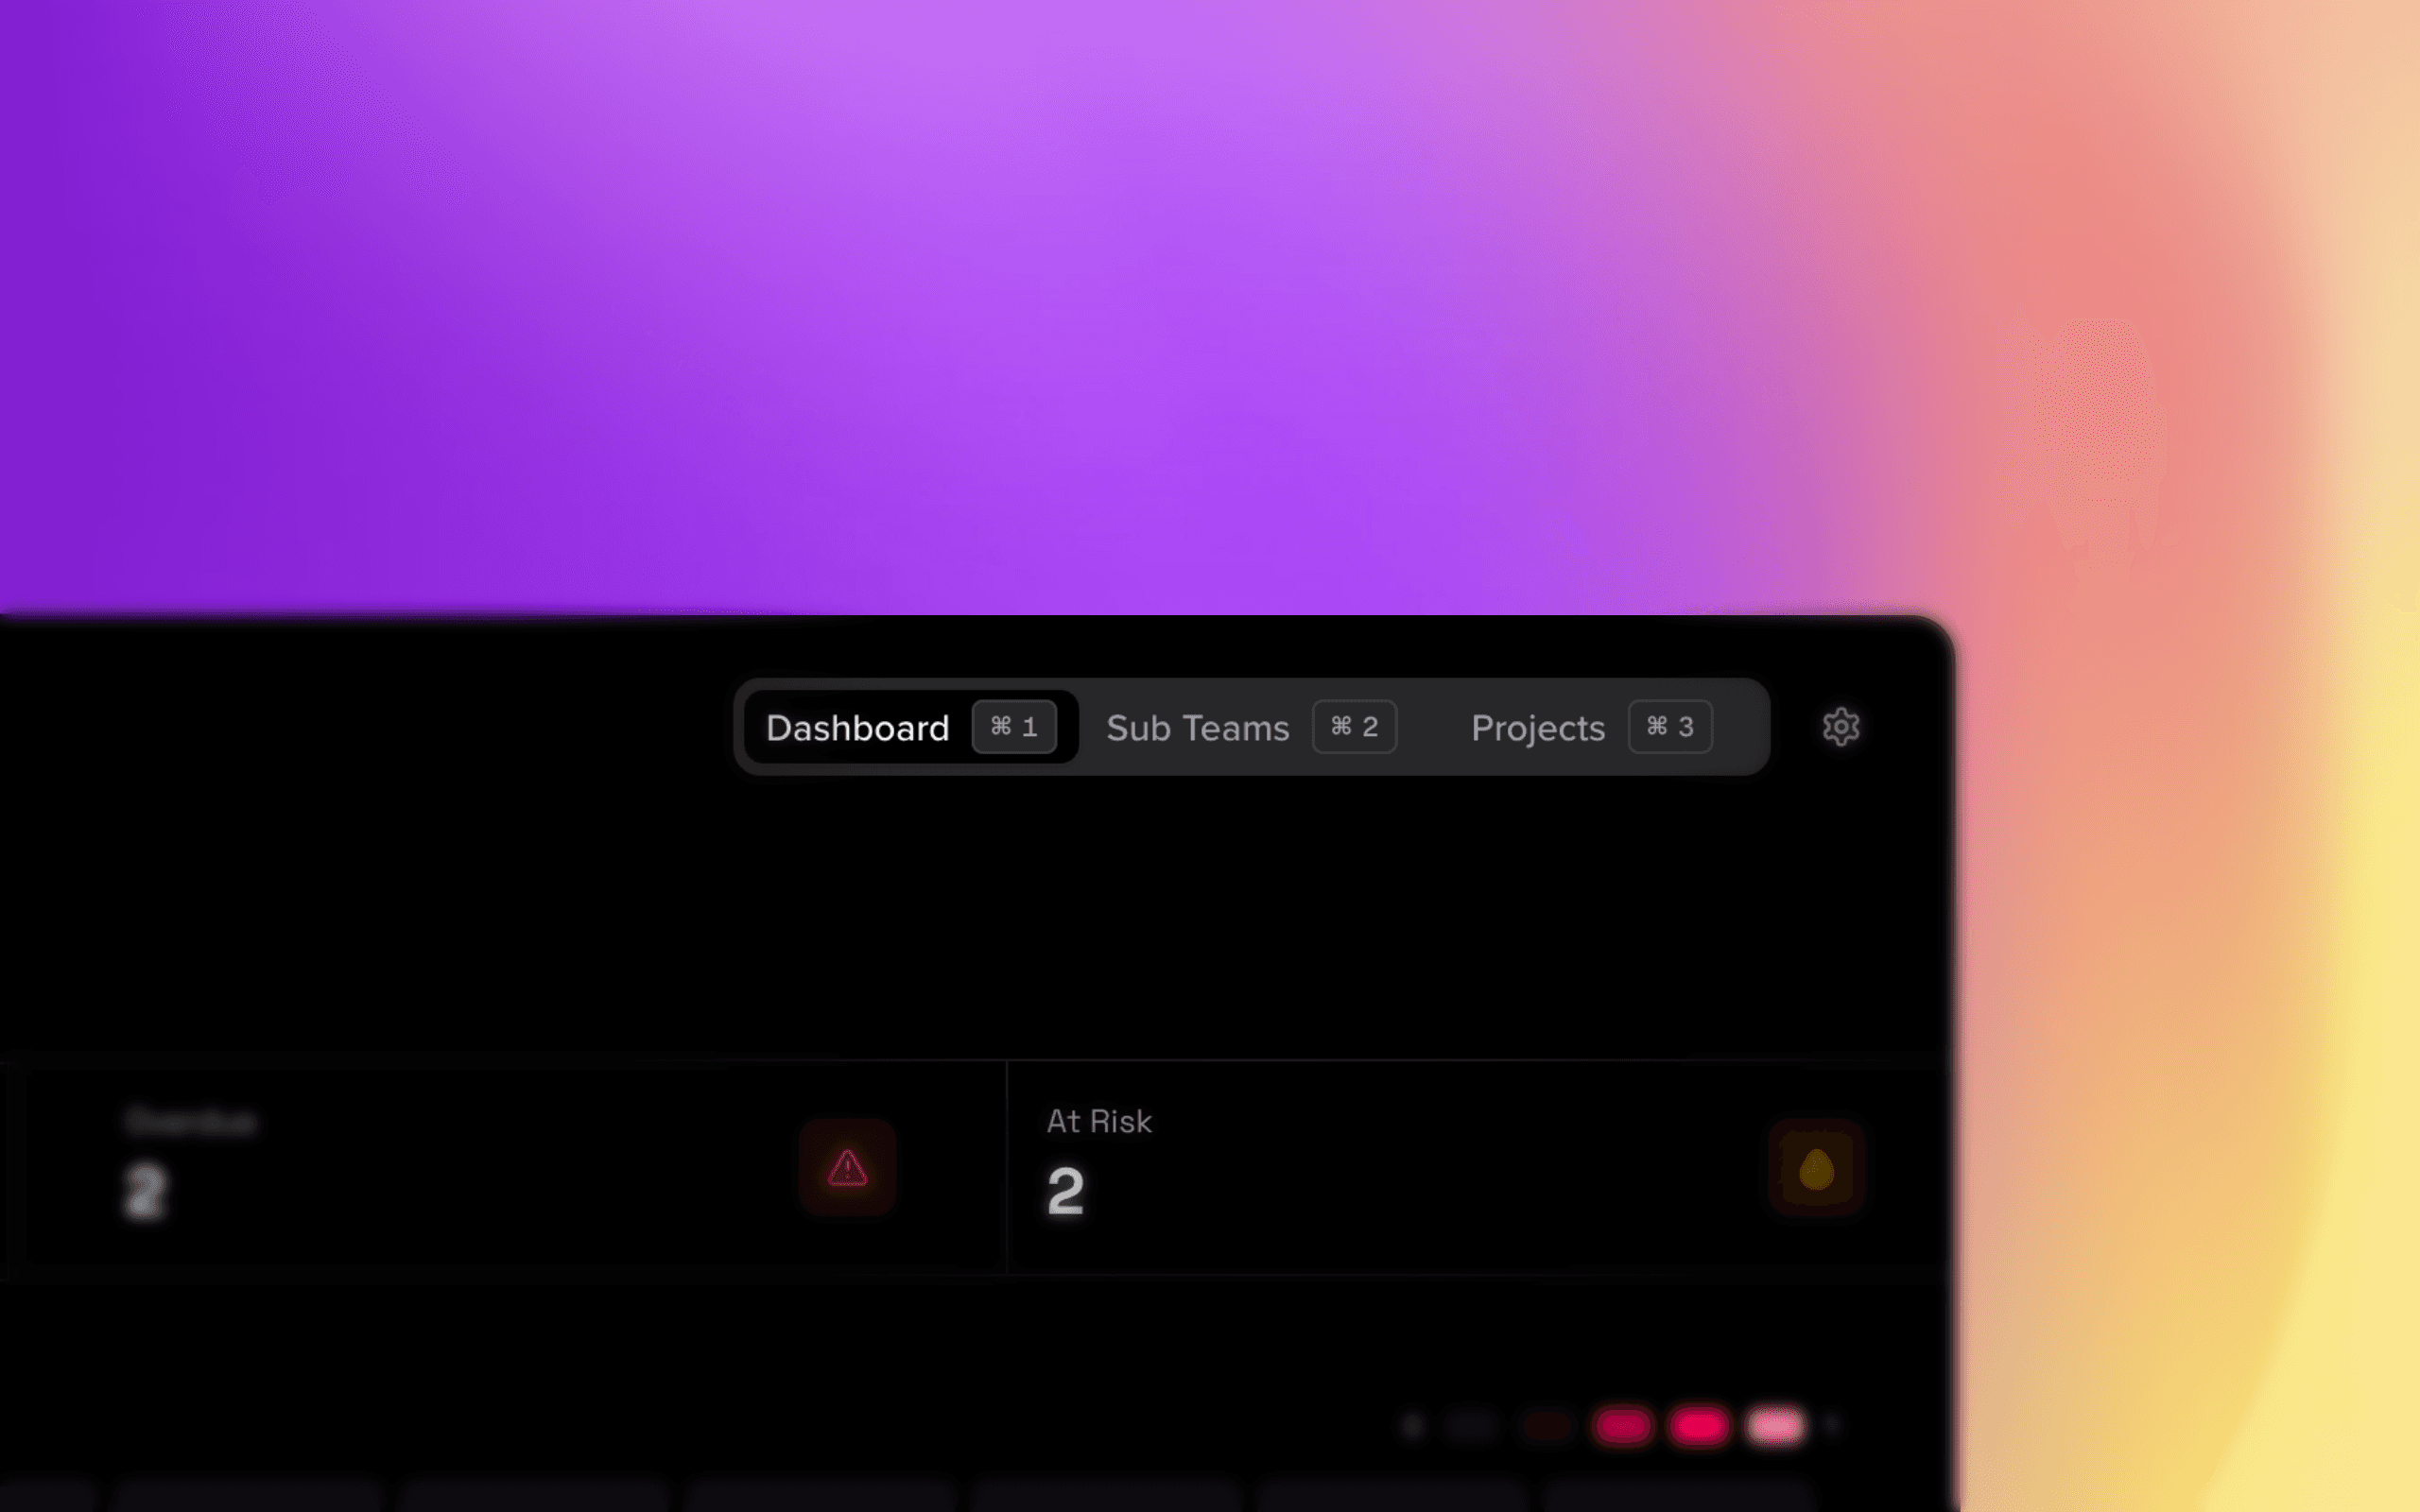
- Dashboard: View analytics, KPIs, and workload distribution.
- Sub Teams: Manage and view nested departments within this team.
- Projects: View, filter, and create projects assigned to this team.
Settings Access: If you are an Admin or Team Manager, you can click the gear icon to manage team members and permissions.
5.2. The Dashboard
The Dashboard tab is your command center for team productivity. It contains several interactive widgets:
Projects Summary

At the top, you'll see a high-level summary of your projects, including:
- Total Projects
- Completed Projects
- Overdue Projects
- At-Risk Projects (Projects with looming deadlines or no assigned owners)
Task Status Overview
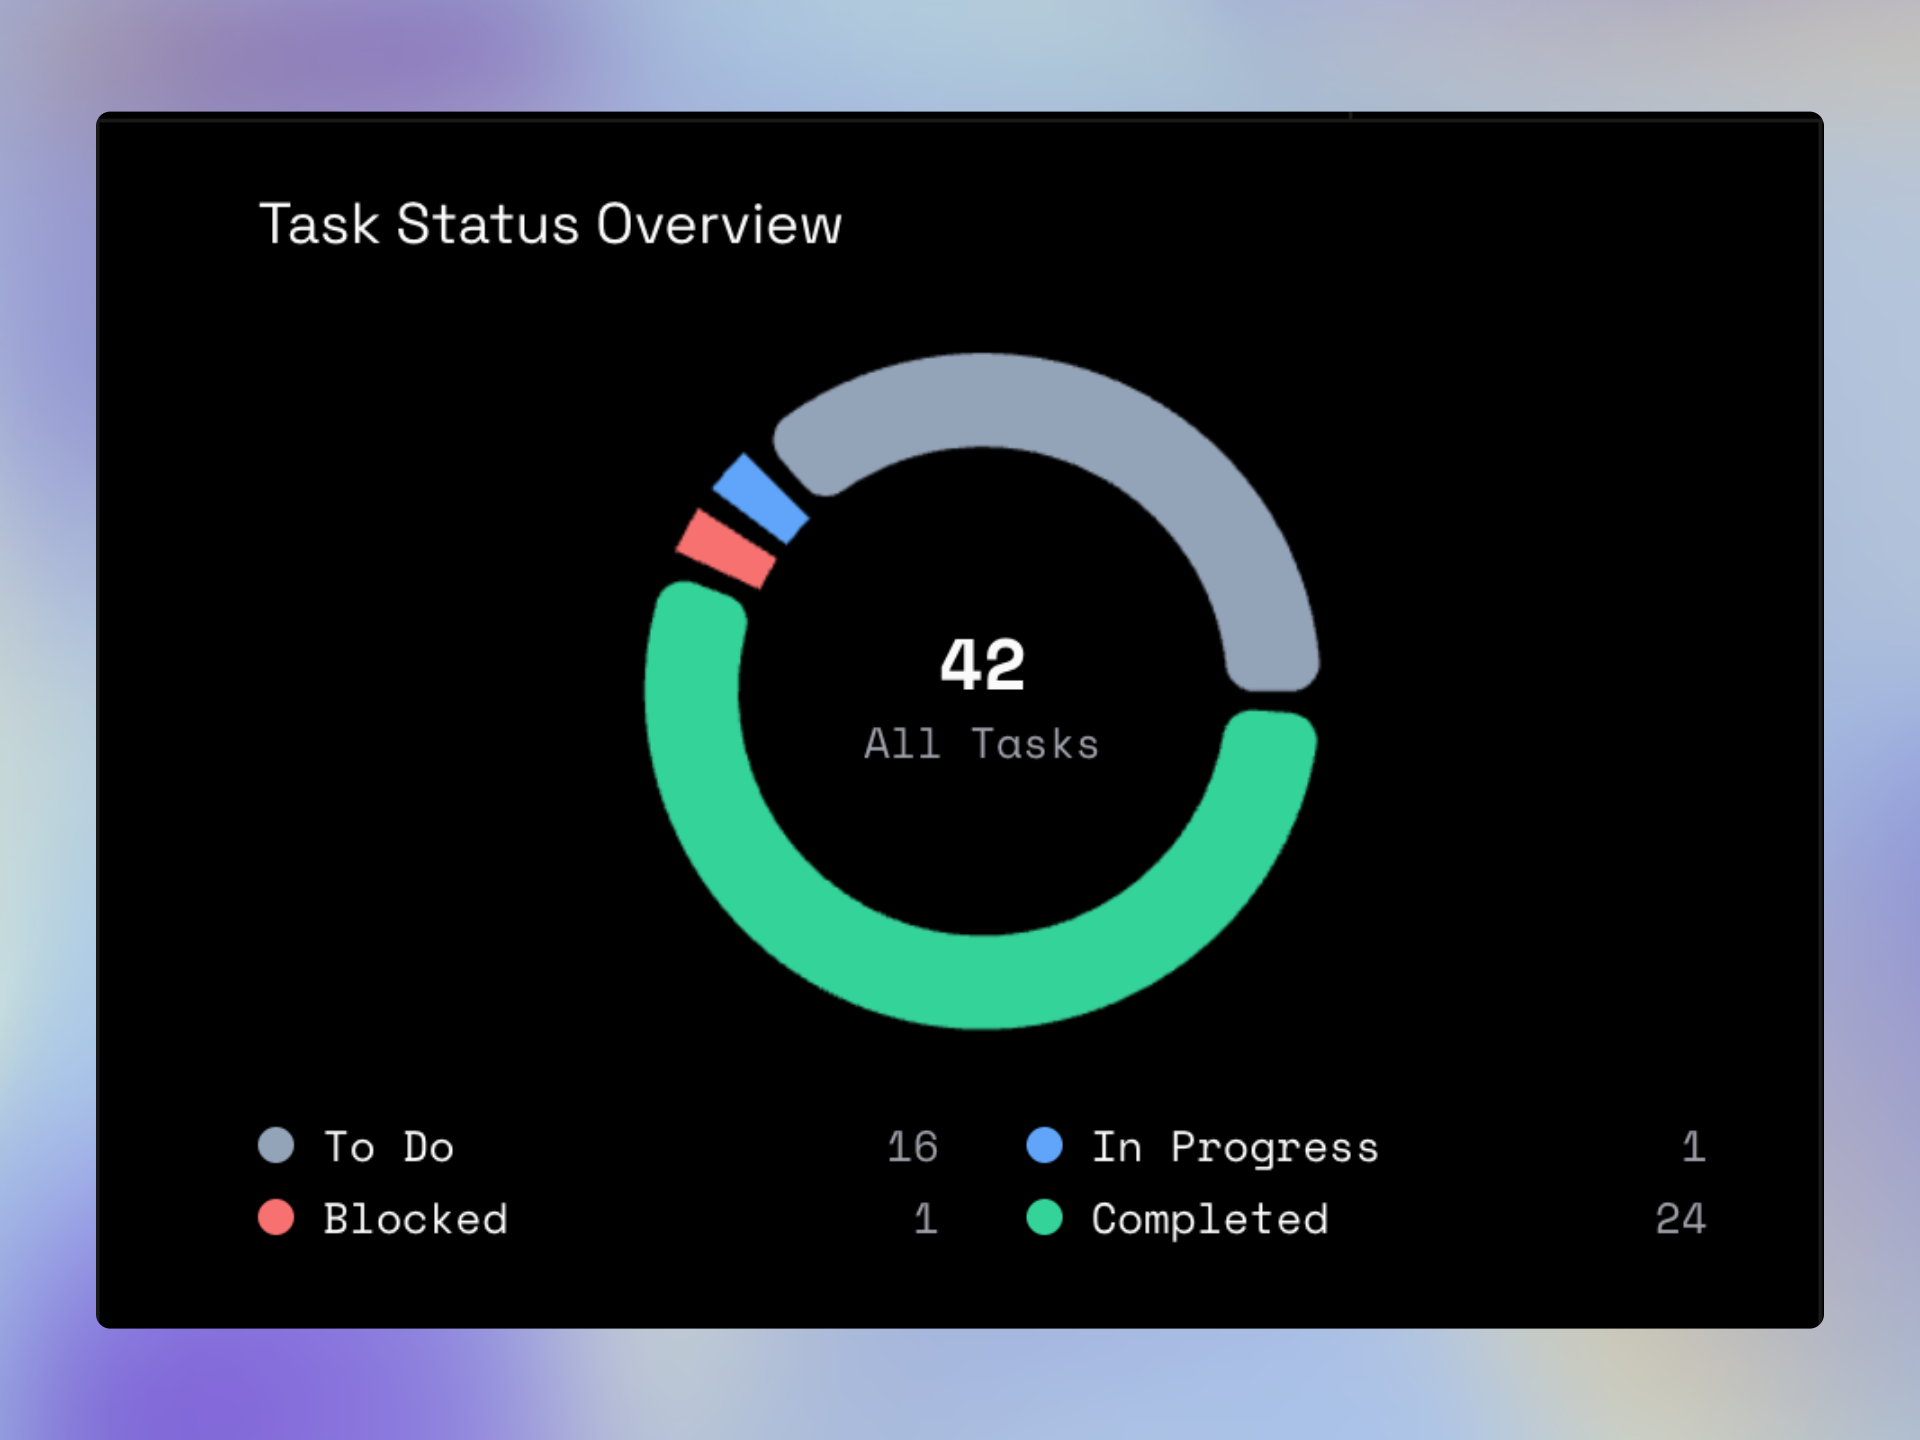
A visual donut chart breaks down all tasks within the team by their current status (e.g., Todo, In Progress, Completed). This gives you an immediate sense of the team's momentum.
Workload Heatmap

The Fluoro Workload Heatmap visually distributes tasks across team members over time. Darker colors indicate higher concentrations of work, helping you spot bottlenecks and prevent team burnout.
Progress & Upcoming Deadlines
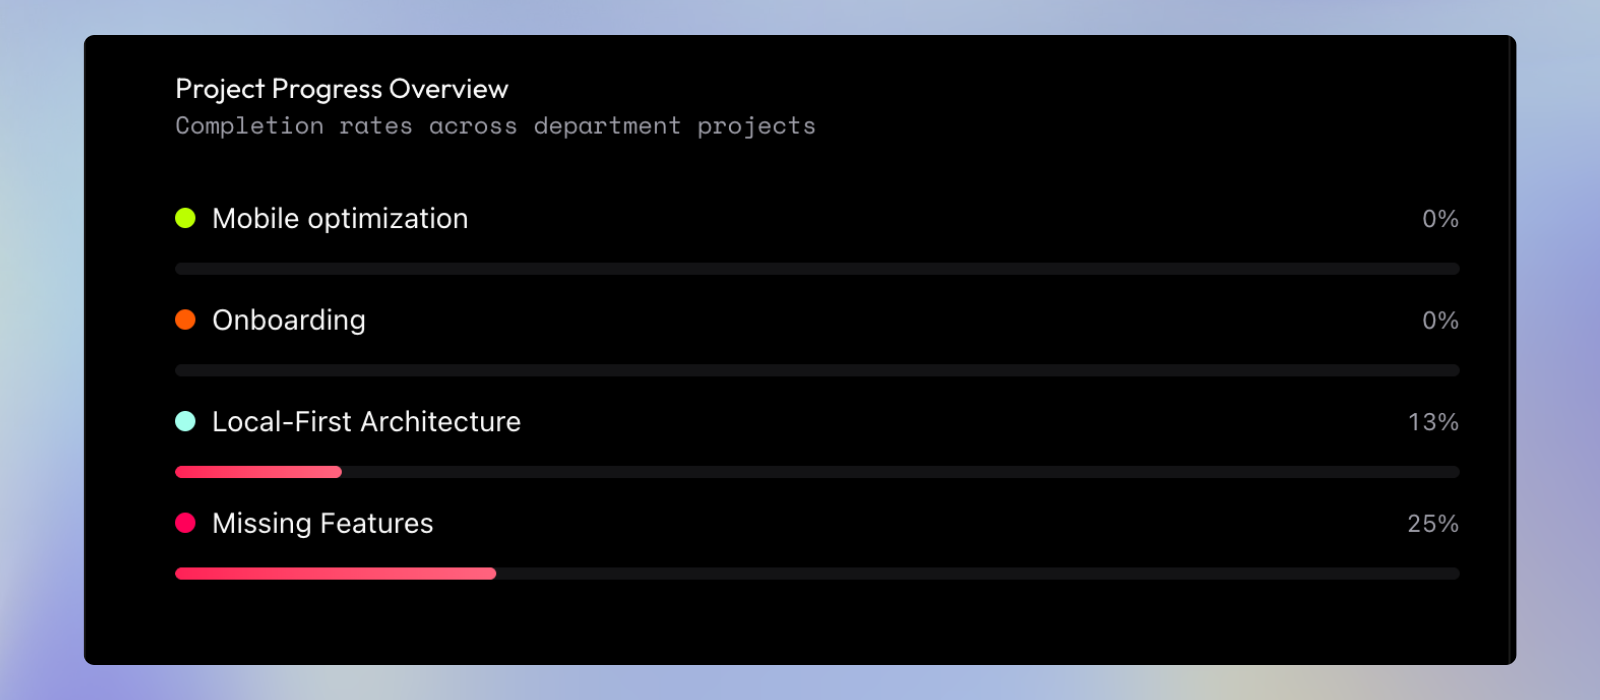
This widget highlights project progress bars and flags any critical deadlines approaching within the next 14 days.
Sprint Burndown Chart
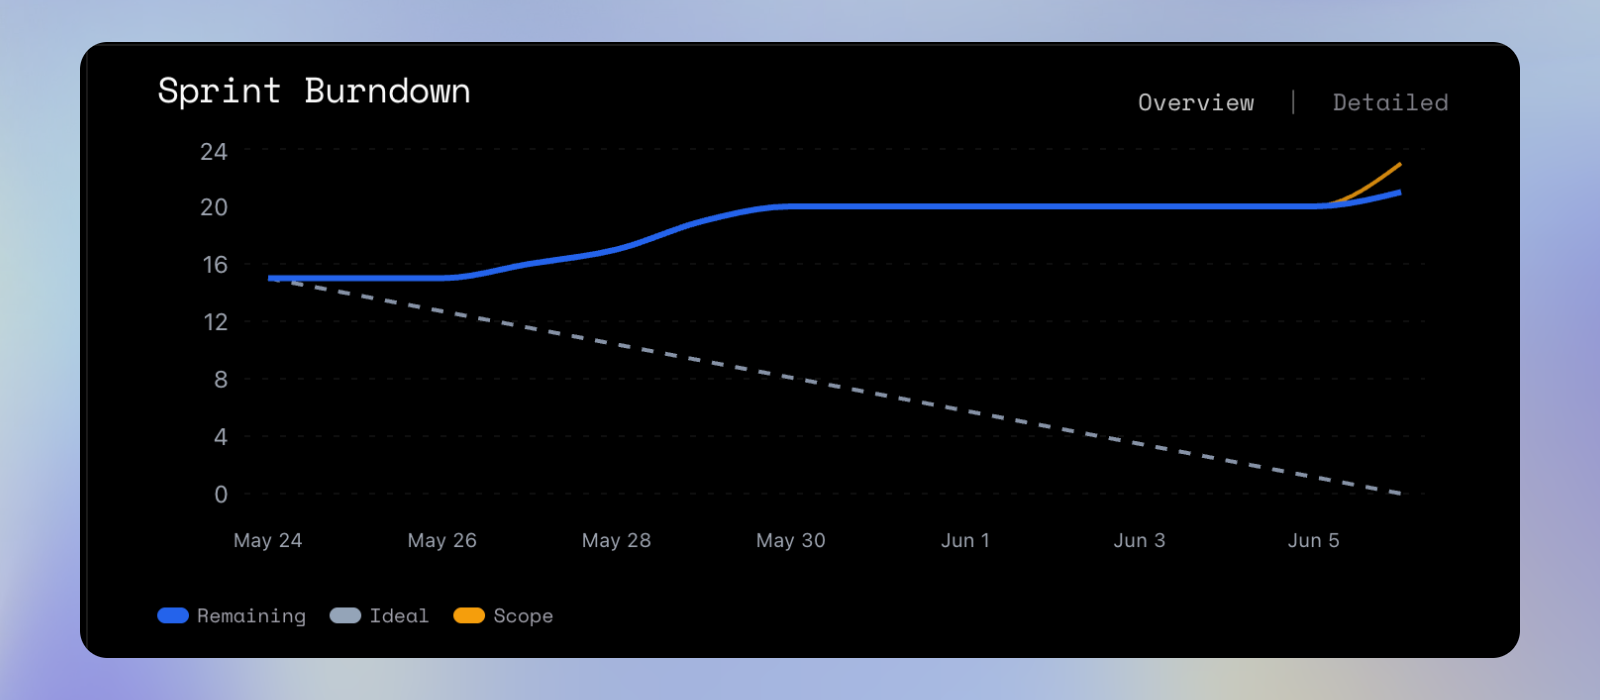
The Burndown Chart provides a daily snapshot of remaining tasks over the last 7 days against your ideal trajectory. It features two powerful modes:
- Overview Mode: Tracks the total Remaining tasks, your Ideal completion trend, and the total Scope of work over the week.
- Detailed Mode: Breaks down the remaining tasks by individual projects, allowing you to see exactly which project is falling behind or moving ahead of schedule.
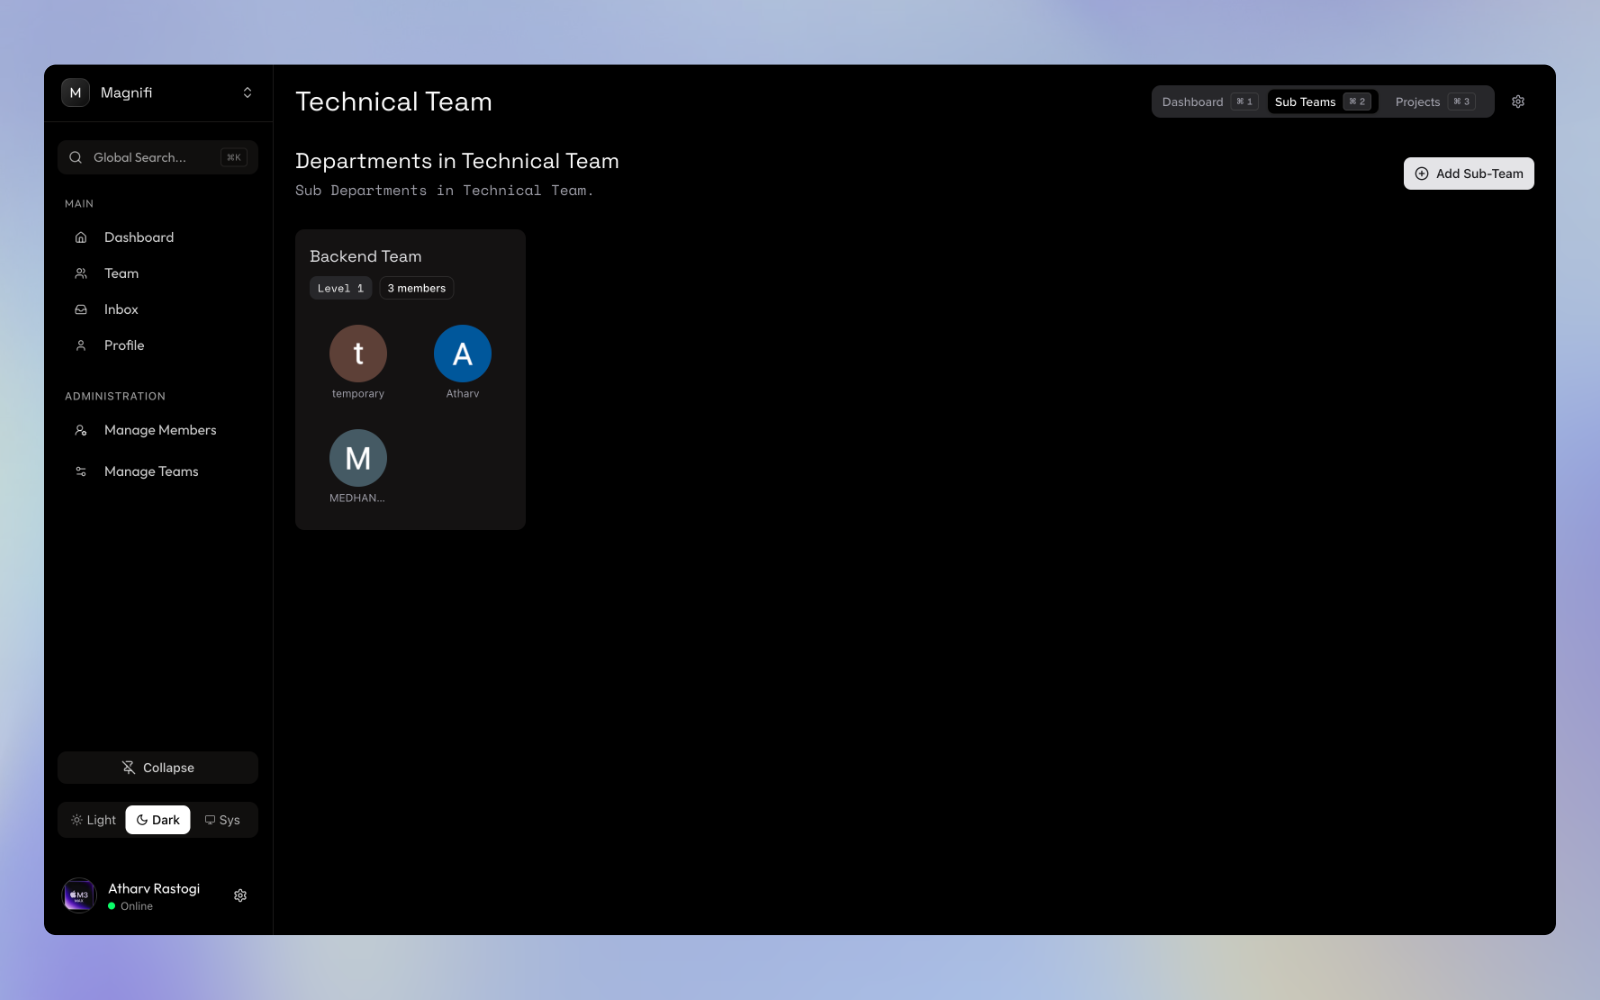
5.3. Managing Sub Teams (OPTIONAL)
If your team is broken down into smaller, specialized units (like Frontend and Backend inside Engineering), you'll find them under the Sub Teams tab.
When you navigate to this tab, what you see depends on whether your team already has sub-teams set up:
- If sub-teams exist: You will see them displayed as cards. You can click into them just like navigating main teams.
- If no sub-teams exist yet: You'll be greeted with a prompt to create your first sub-department.
Creating a Sub Team
Initiate Creation Click the Create First Sub-Department button in the center of the screen, or the Add Sub-Department button in the top right corner.
Enter Details In the dialog that opens, enter the Name for the new sub-team, and optionally, a brief Description.
Assign Members (Optional)
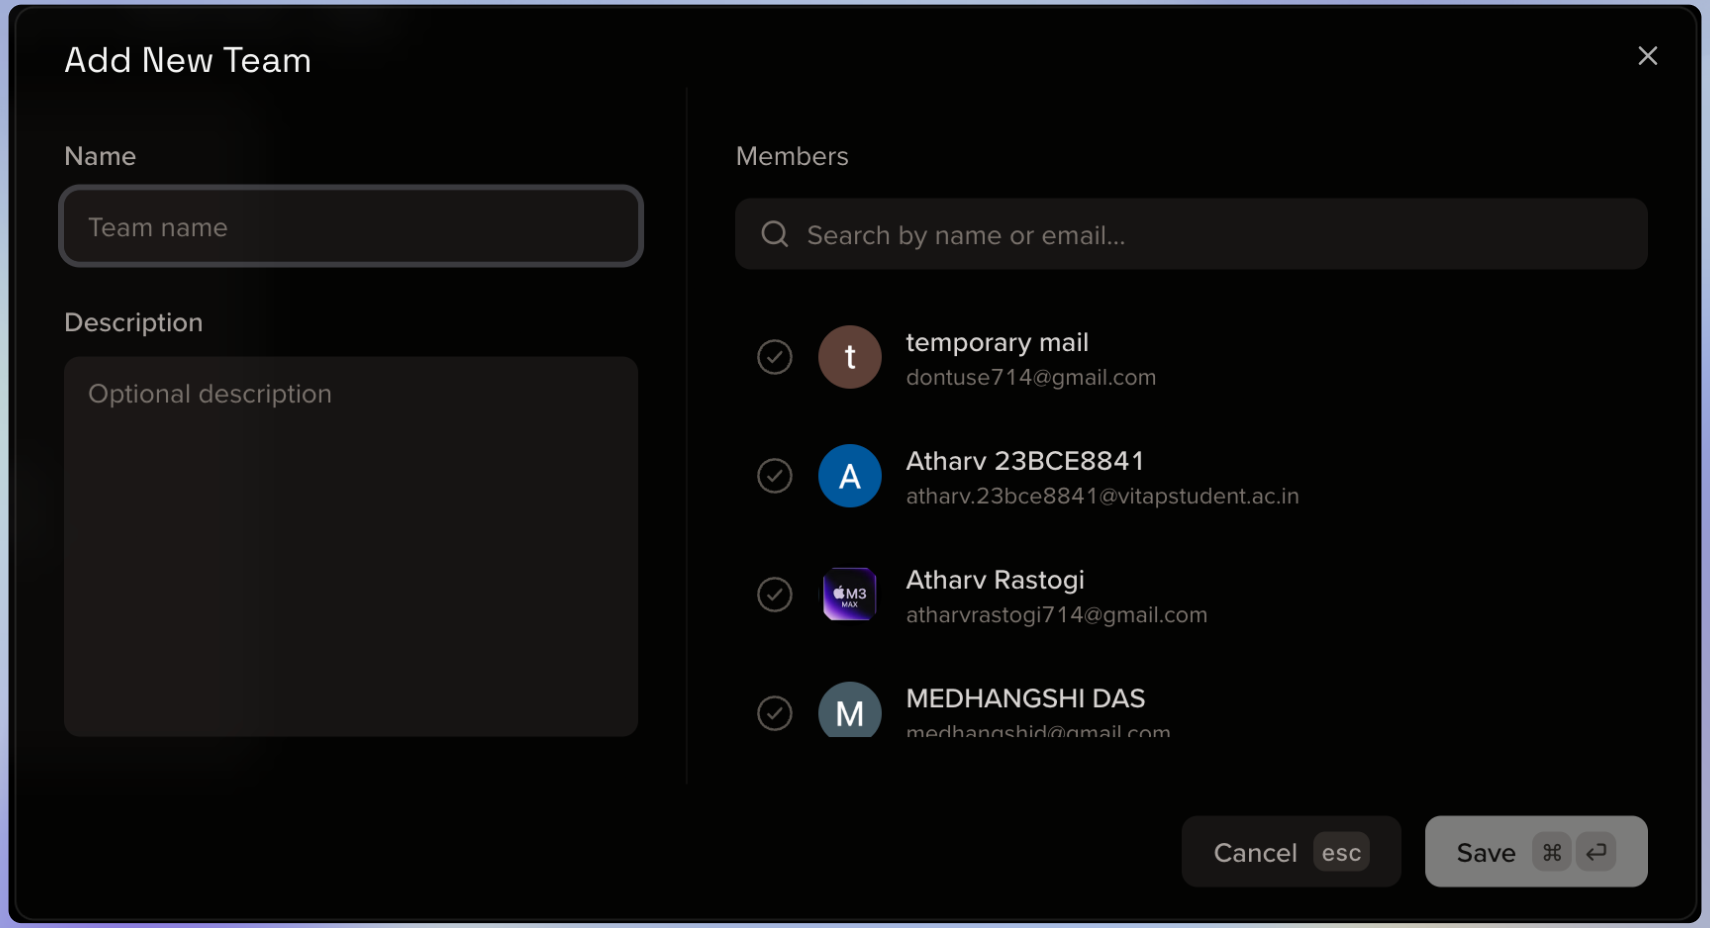
You can use the search bar to immediately find and add members or team controllers to this new nested department right during creation.
Save Click Create (or Save) to instantly generate the new workspace under the current team. It will appear on the screen immediately.
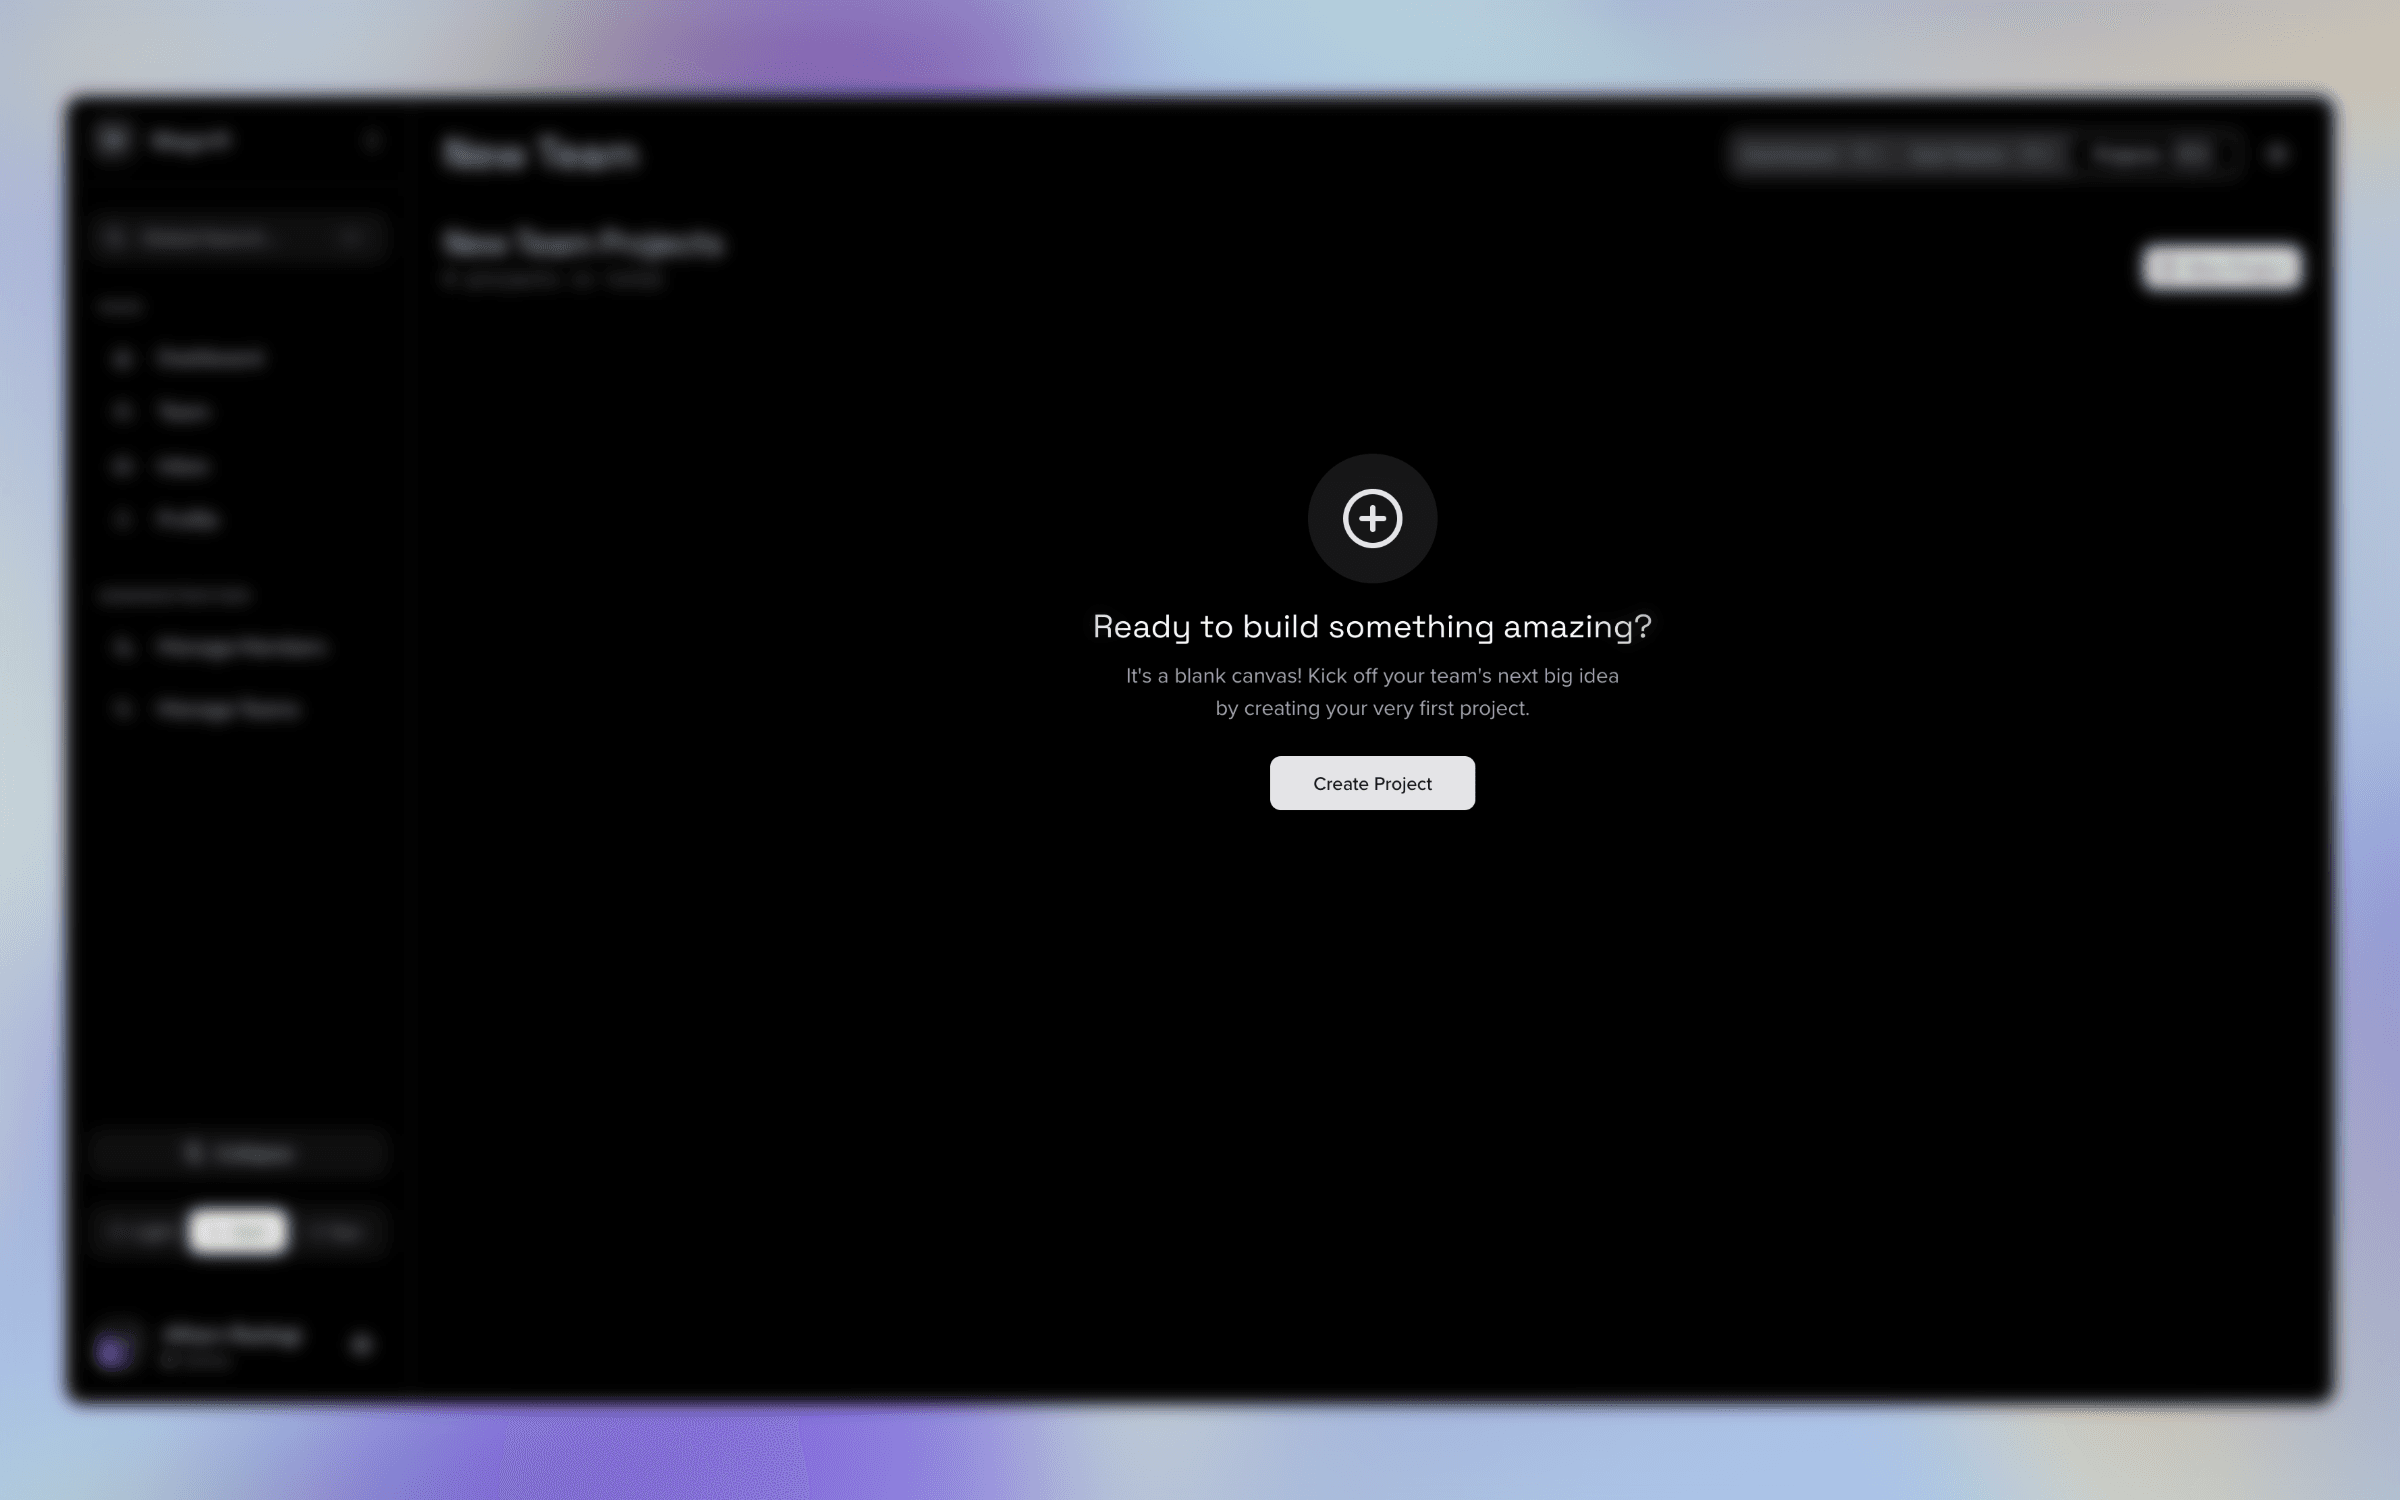
5.4. Managing Projects
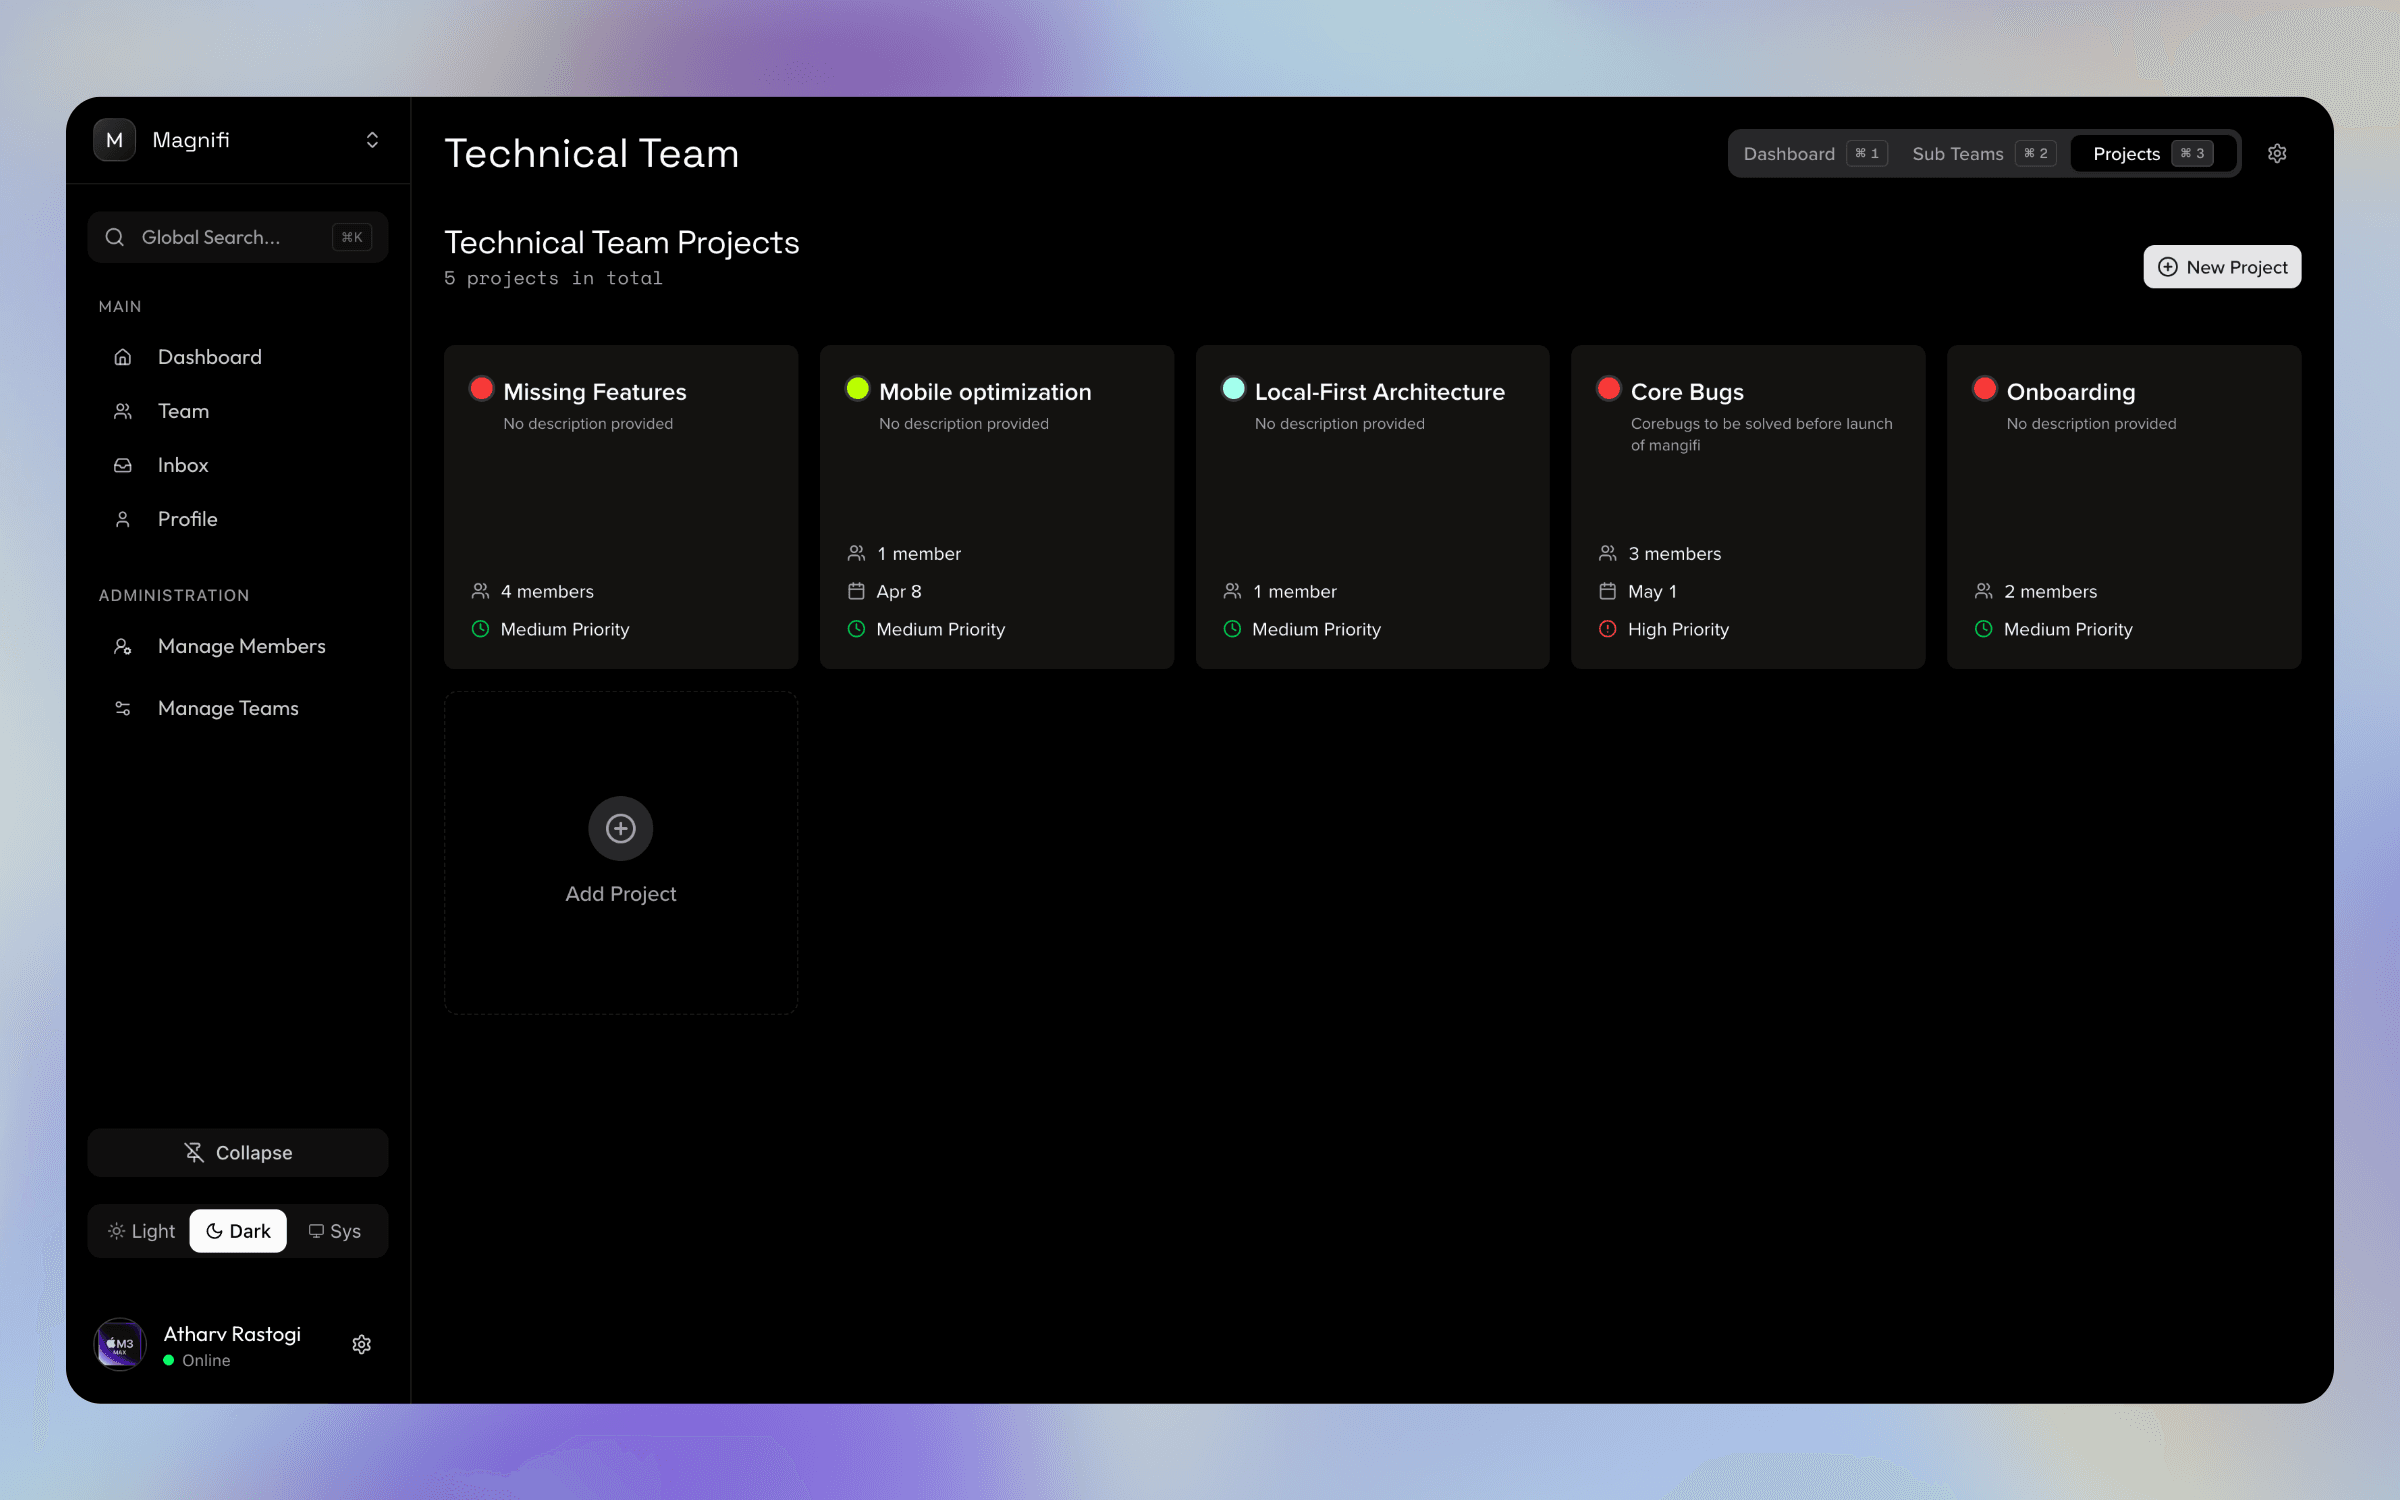
The Projects tab lists every initiative the team is currently undertaking.
Viewing Projects
The way you view projects automatically adapts to your screen size:
- Grid View: On desktops, projects are displayed as cards.
- List View: On mobile devices, projects are displayed in a compact list.
Creating a New Project
Click the New Project button.
Enter the project Name and Description.
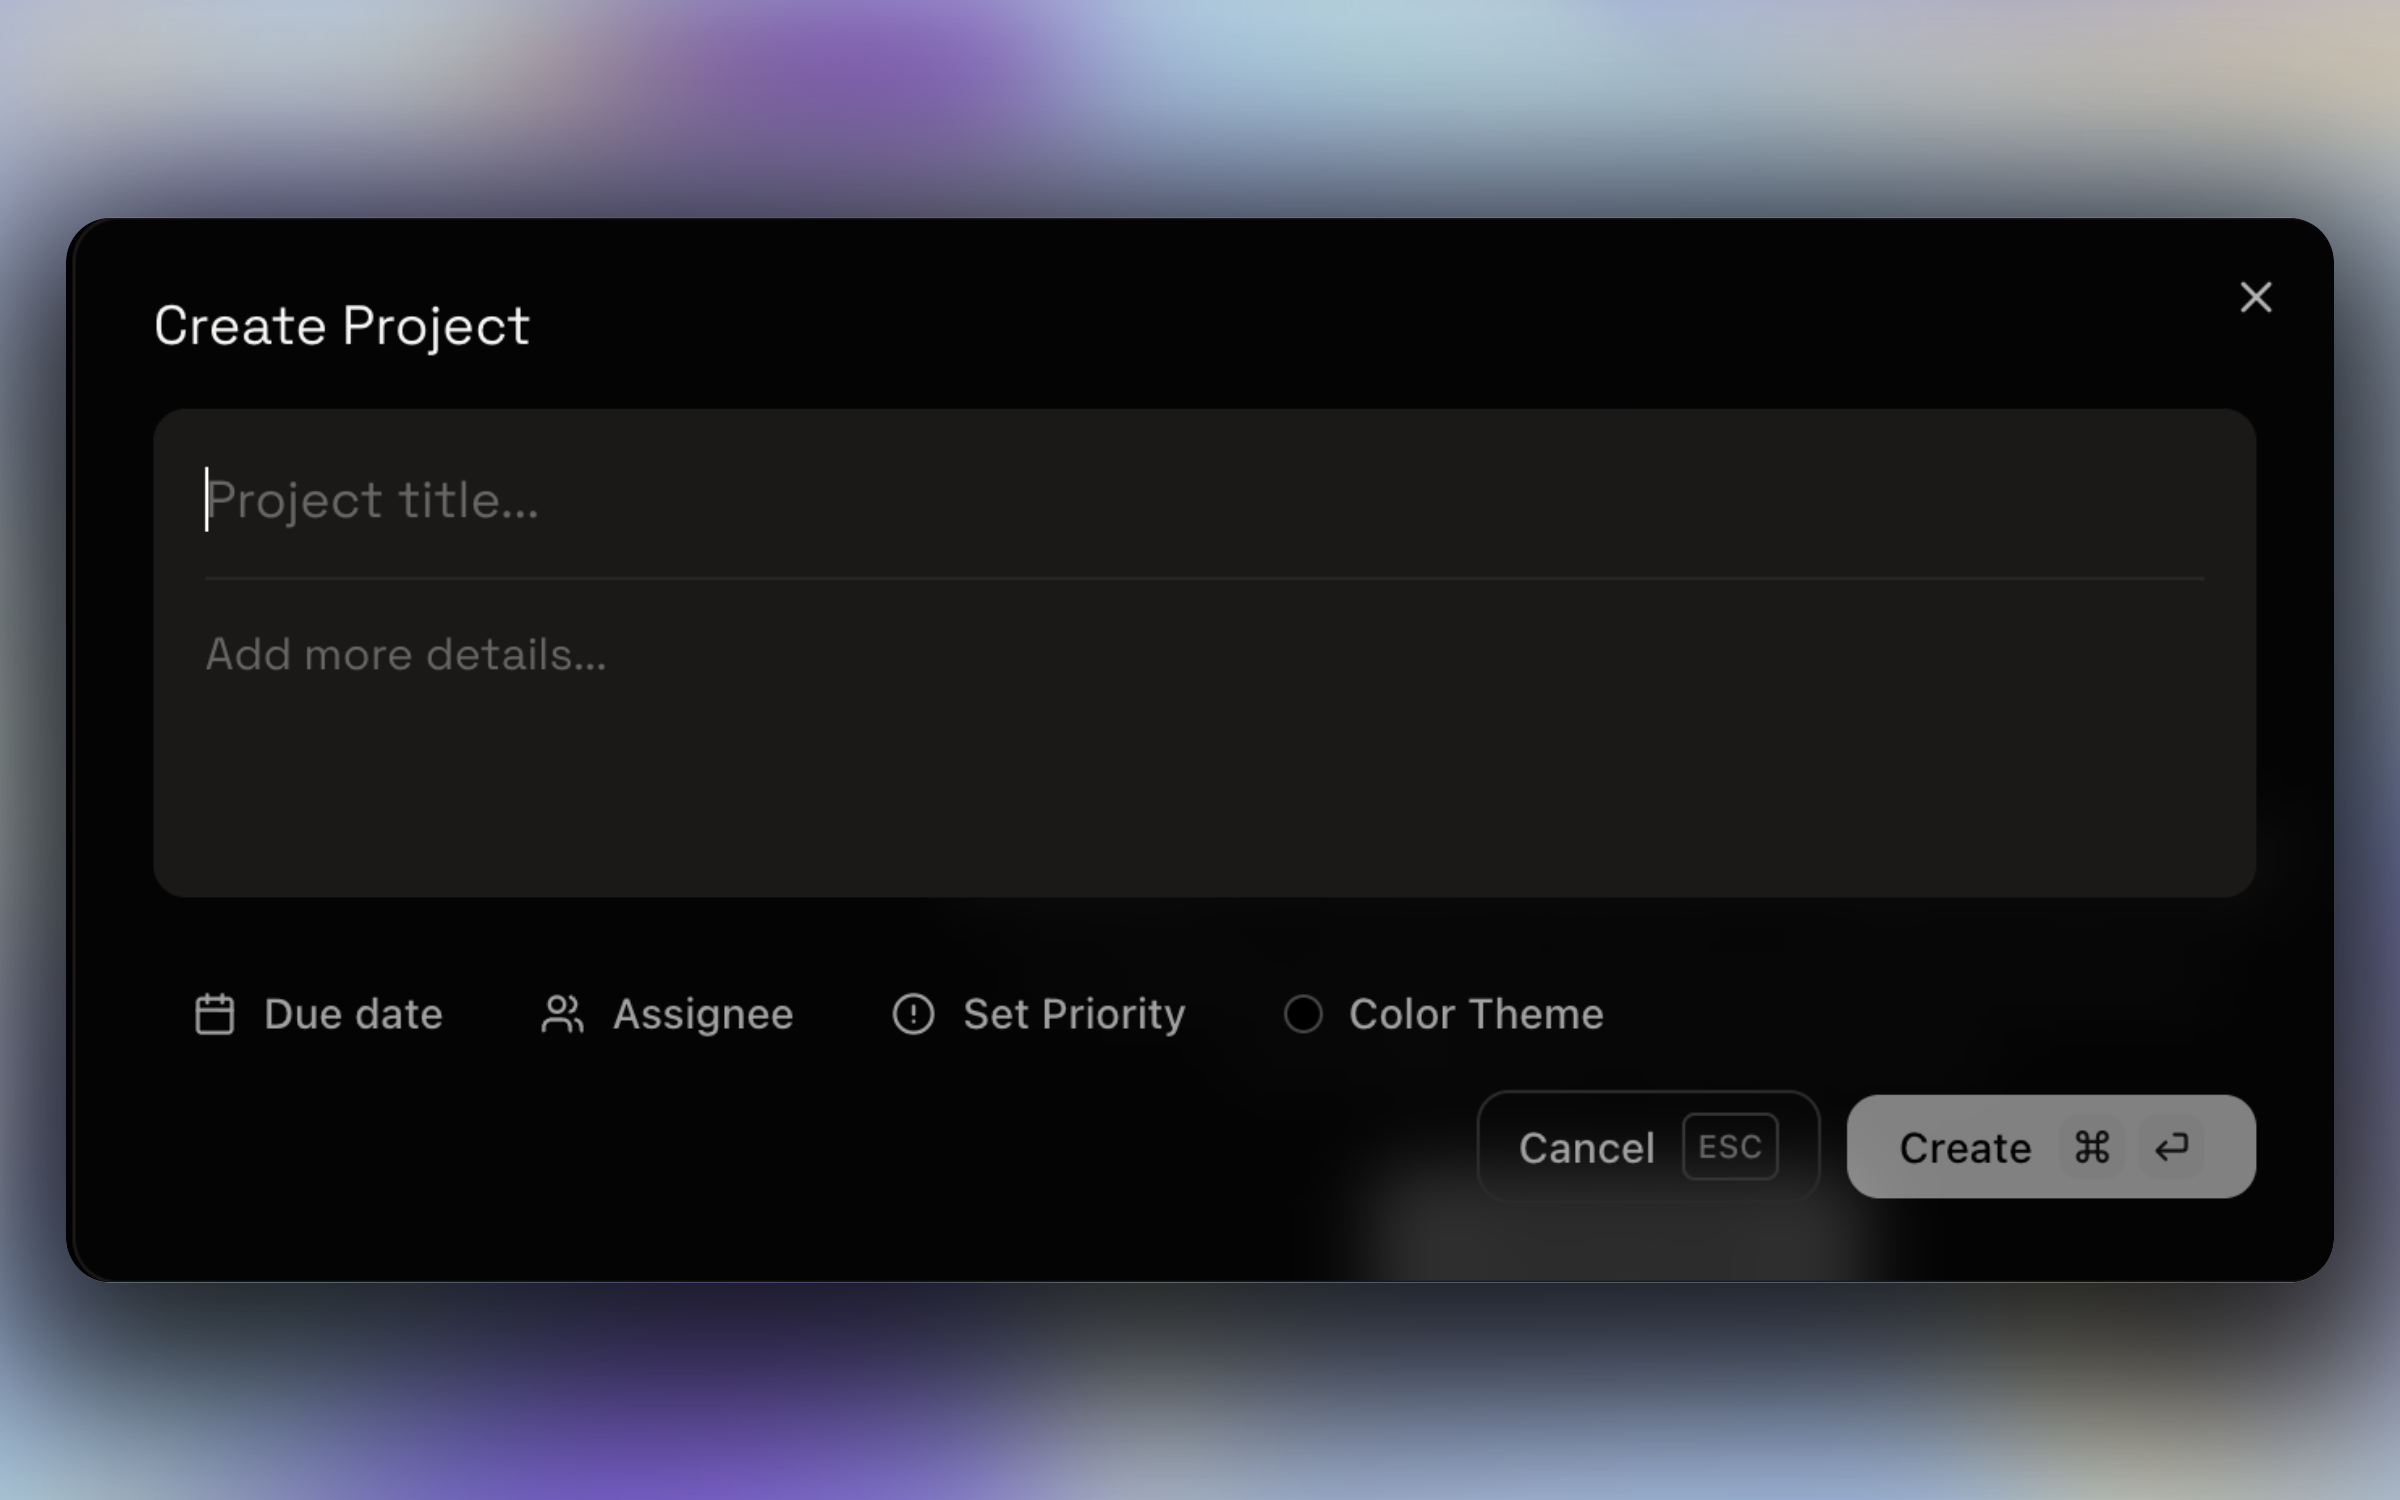
Select a Color to visually distinguish it, and set the Priority (Low, Medium, High).
Pick a Due Date and Assign Members from the current team.
Click Save to create the project and notify the assigned members.
Project Visibility for Members: By default, the project visibility toggle is turned on (defaulting to "My Projects") for regular team members. This means they will only see the projects they are assigned to.
- Admins, Owners, and Team Managers see all projects by default.
- Team Members can manually turn the toggle off to view "All Projects" or turn it back on to filter to "My Projects".
5.5. Team Settings
If you are a Team Manager or an Organization Admin/Owner, you have access to the Team Settings by clicking the gear icon in the top right corner of the workspace.
Settings Access: Regular members do not have access to these settings. Managers and Organization Admins always retain full access regardless of how permissions are configured.
General Settings
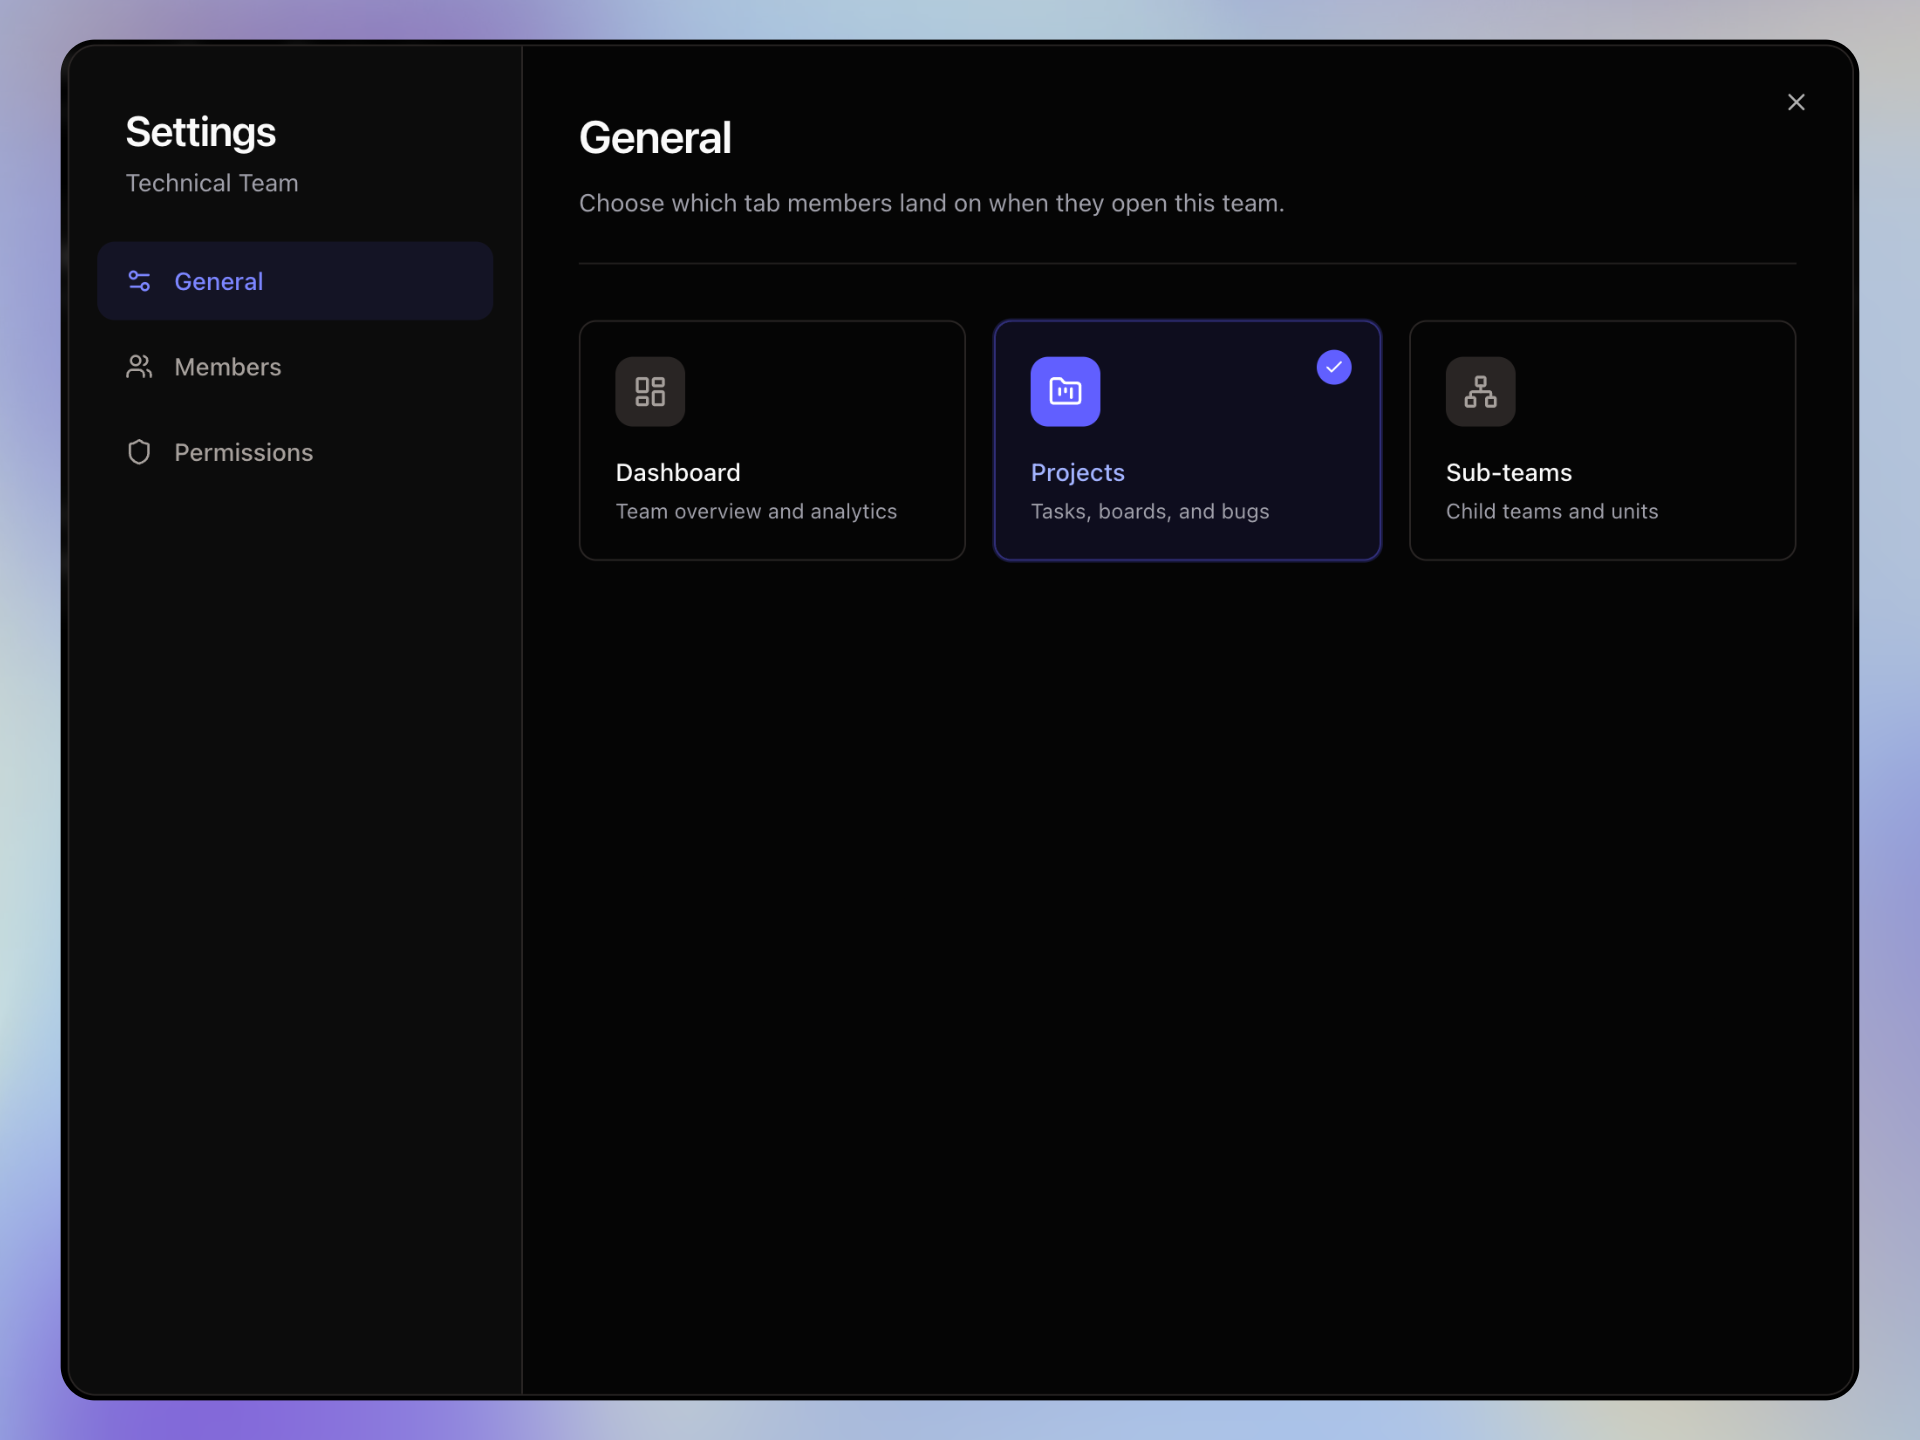
- Default Tab: Choose which tab (Dashboard, Projects, or Sub-teams) members land on when they first open this team workspace.
Managing Members
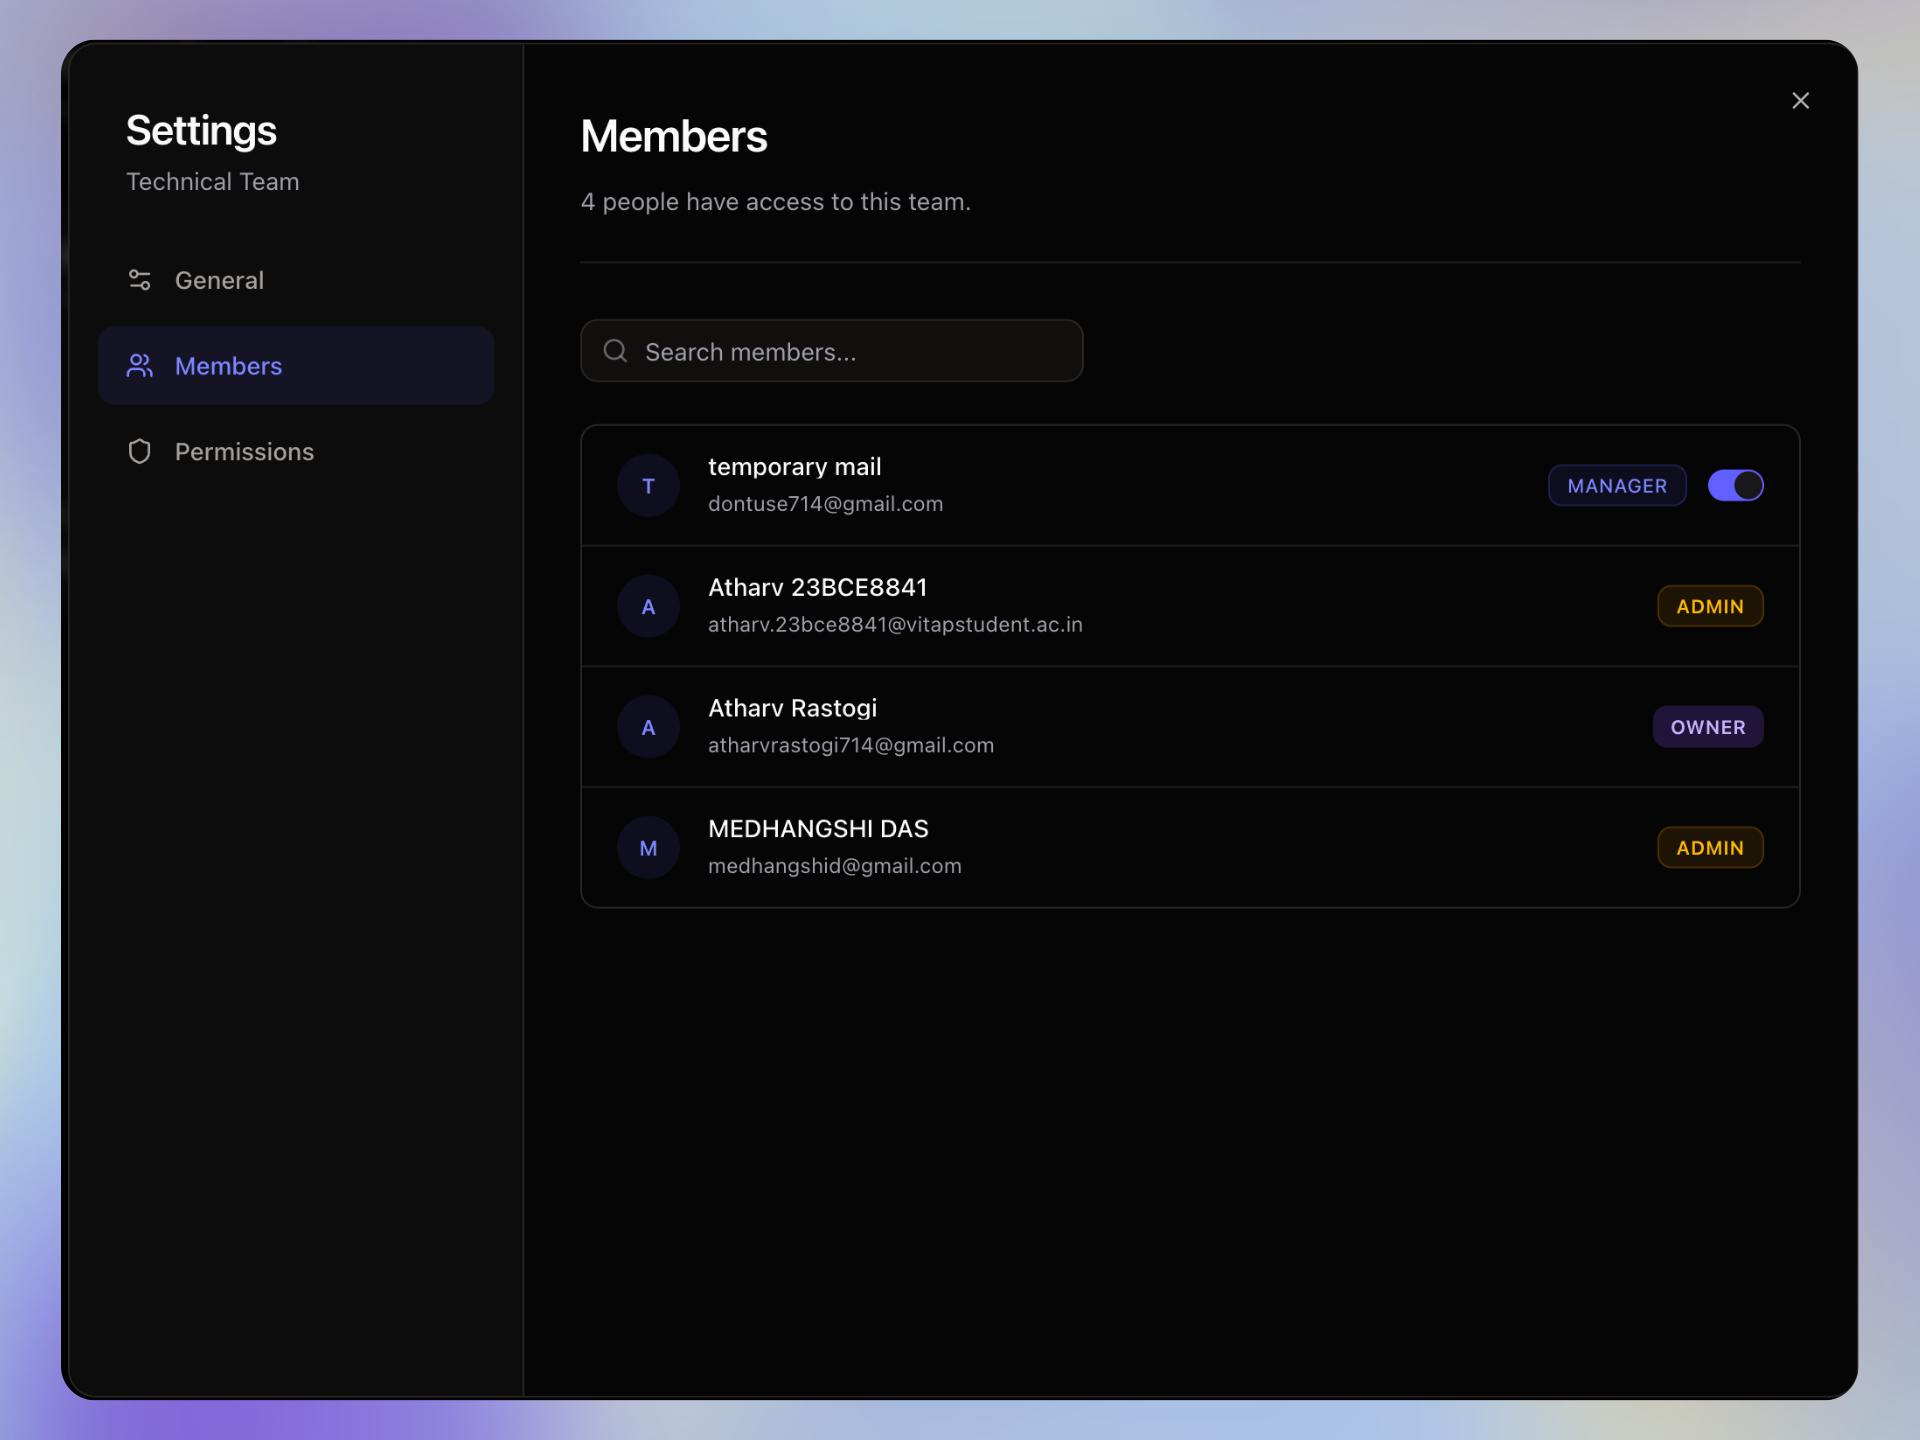
- Search and View: Search through members and see their roles (Owner, Admin, Manager, Member).
- Assign Managers: Easily promote a team member to a Manager by toggling the switch next to their name.
What does a Manager unlock?
Promoting a member to Manager gives them full administrative control over this specific team workspace. They will be able to:
- Access these Team Settings to change the default tab.
- Promote other regular members to Manager.
- Configure team-wide permissions.
- Always retain full access to create, edit, and delete all projects within the team.
Permissions
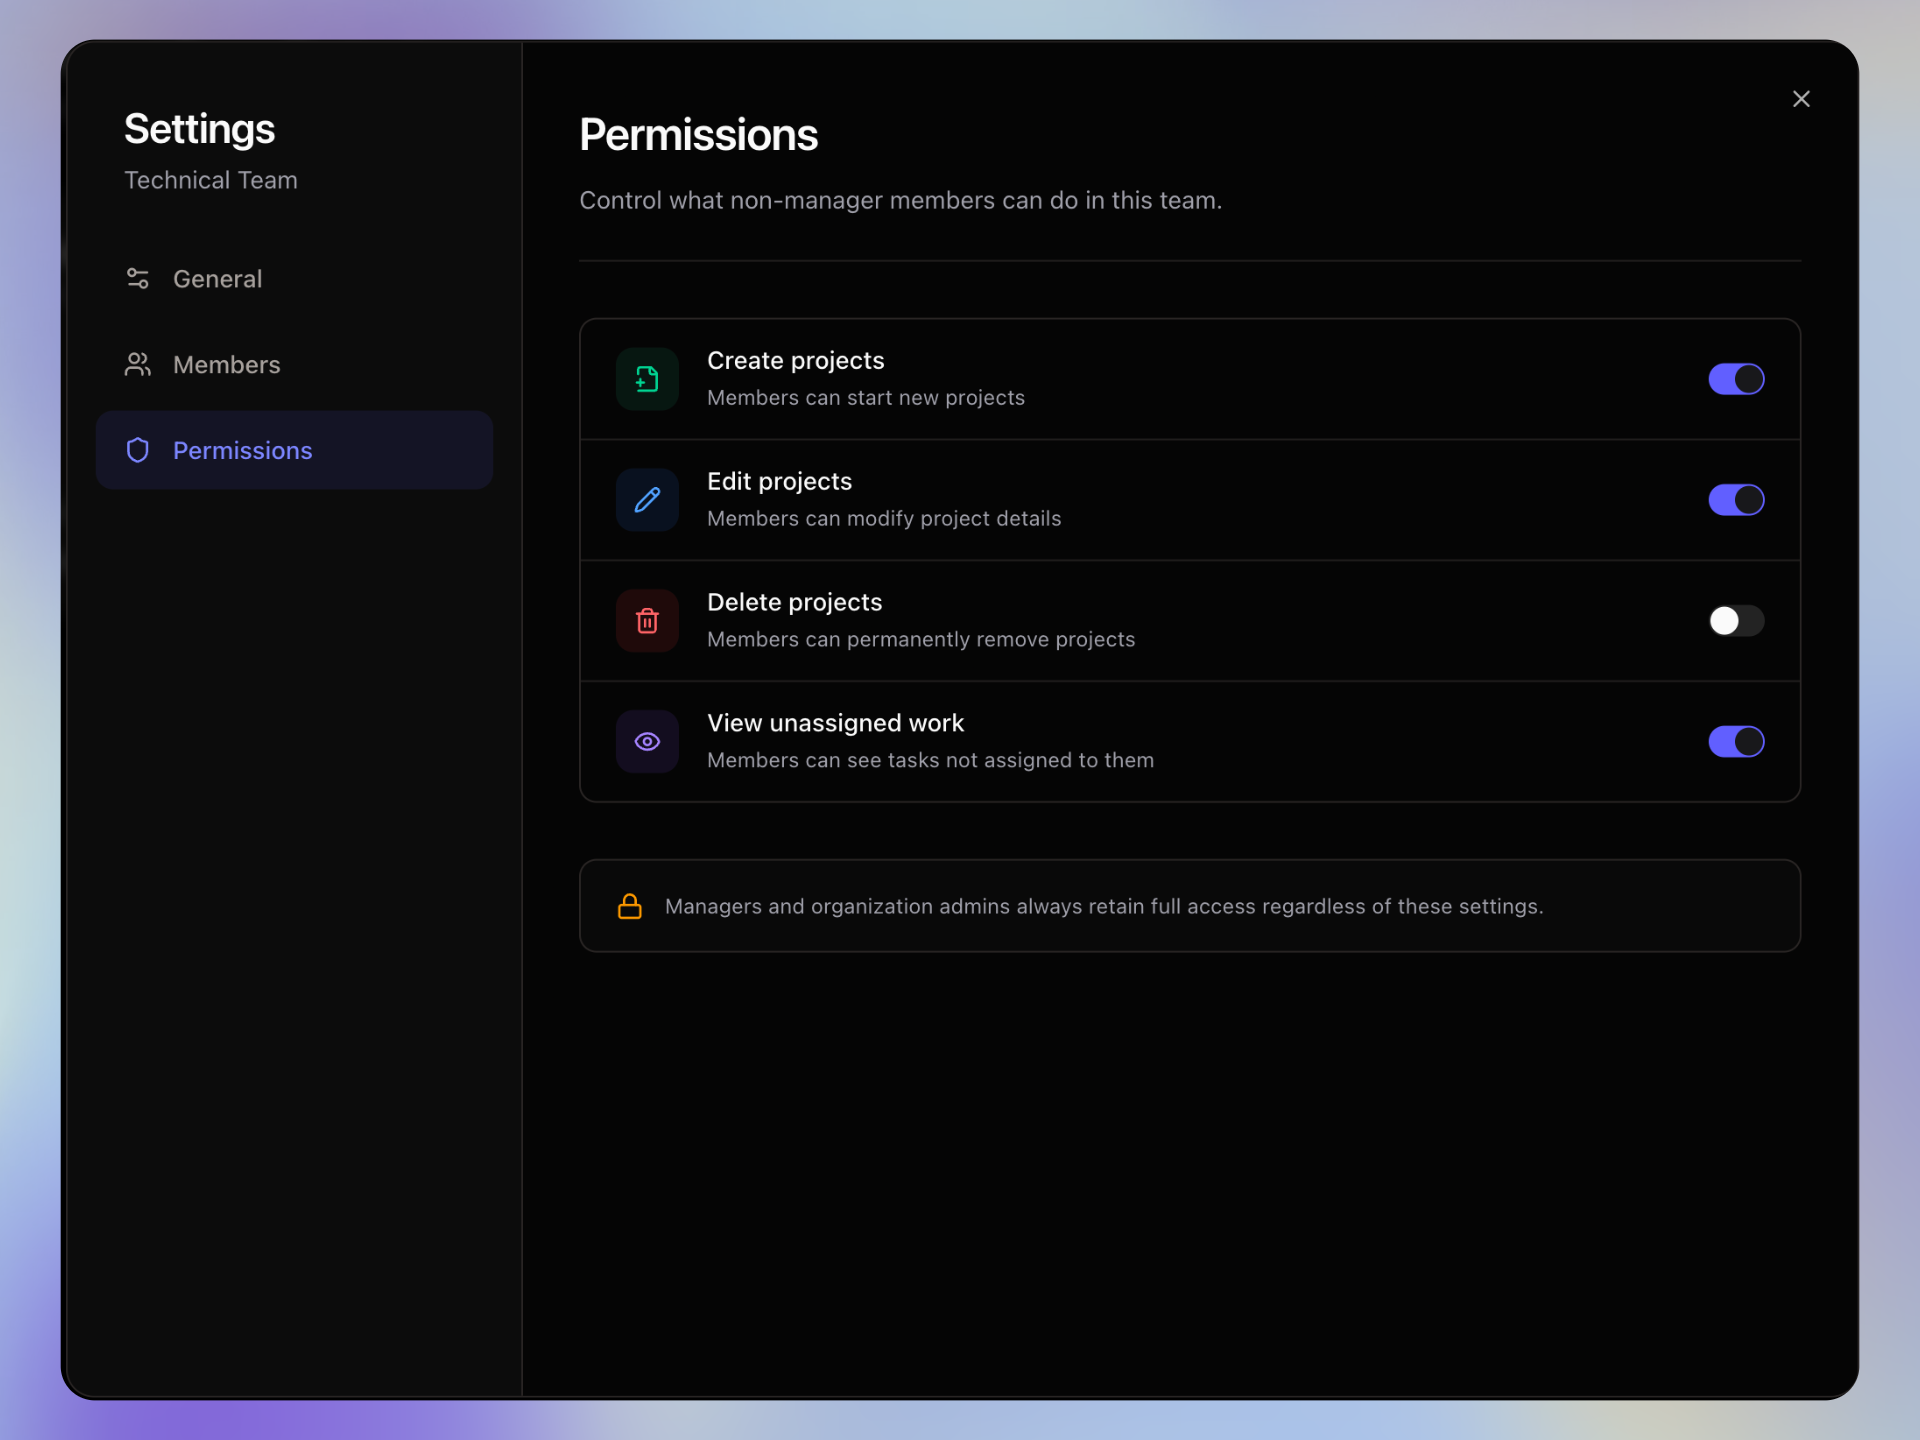
Control what non-manager members are allowed to do within this team:
- Create projects: Allow members to start new projects.
- Edit projects: Allow members to modify project details.
- Delete projects: Allow members to permanently remove projects.
- View unassigned work: Allow members to see tasks that are not assigned to them.
What's Next?
Now that you're familiar with the team workspace, dive into your assigned projects, or explore how to configure personal settings in the next guides.