3. Inviting & Managing Members
Learn how to invite colleagues, manage workspace permissions, assign teams, and revoke member access.
Adding colleagues to your Magnifi workspace allows you to coordinate tasks, share projects, and centralize team updates. This guide covers how to invite new members, customize user roles, and manage team access.
To assign a colleague or yourself to a team immediately, skip to the Managing Roles & Teams section.
Workspace Roles & Permissions
Only workspace Owners and Admins can invite new users and manage roles.
Magnifi uses three main permission levels to keep your workspace organized and secure:
- Owner: Full workspace, administration, and billing control. Only an Owner can promote other users to Owner, transfer workspace ownership, or modify another Owner's status. Each workspace can have multiple Owners, but we recommend keeping just
one. - Admin: General administrative access. Admins can invite new team members, edit designations, assign teams, and remove standard members. Admins cannot modify or remove Owners or other Admins, they also cannot make other members Admin or Owners.
- Member: Standard collaborative access. Members can view projects, join assigned teams, and update tasks, but they cannot access administration dashboards or invite new users.
3.1. Navigating to Members Directory
To view your team list, go to the sidebar and select Manage Members under the Administration heading.
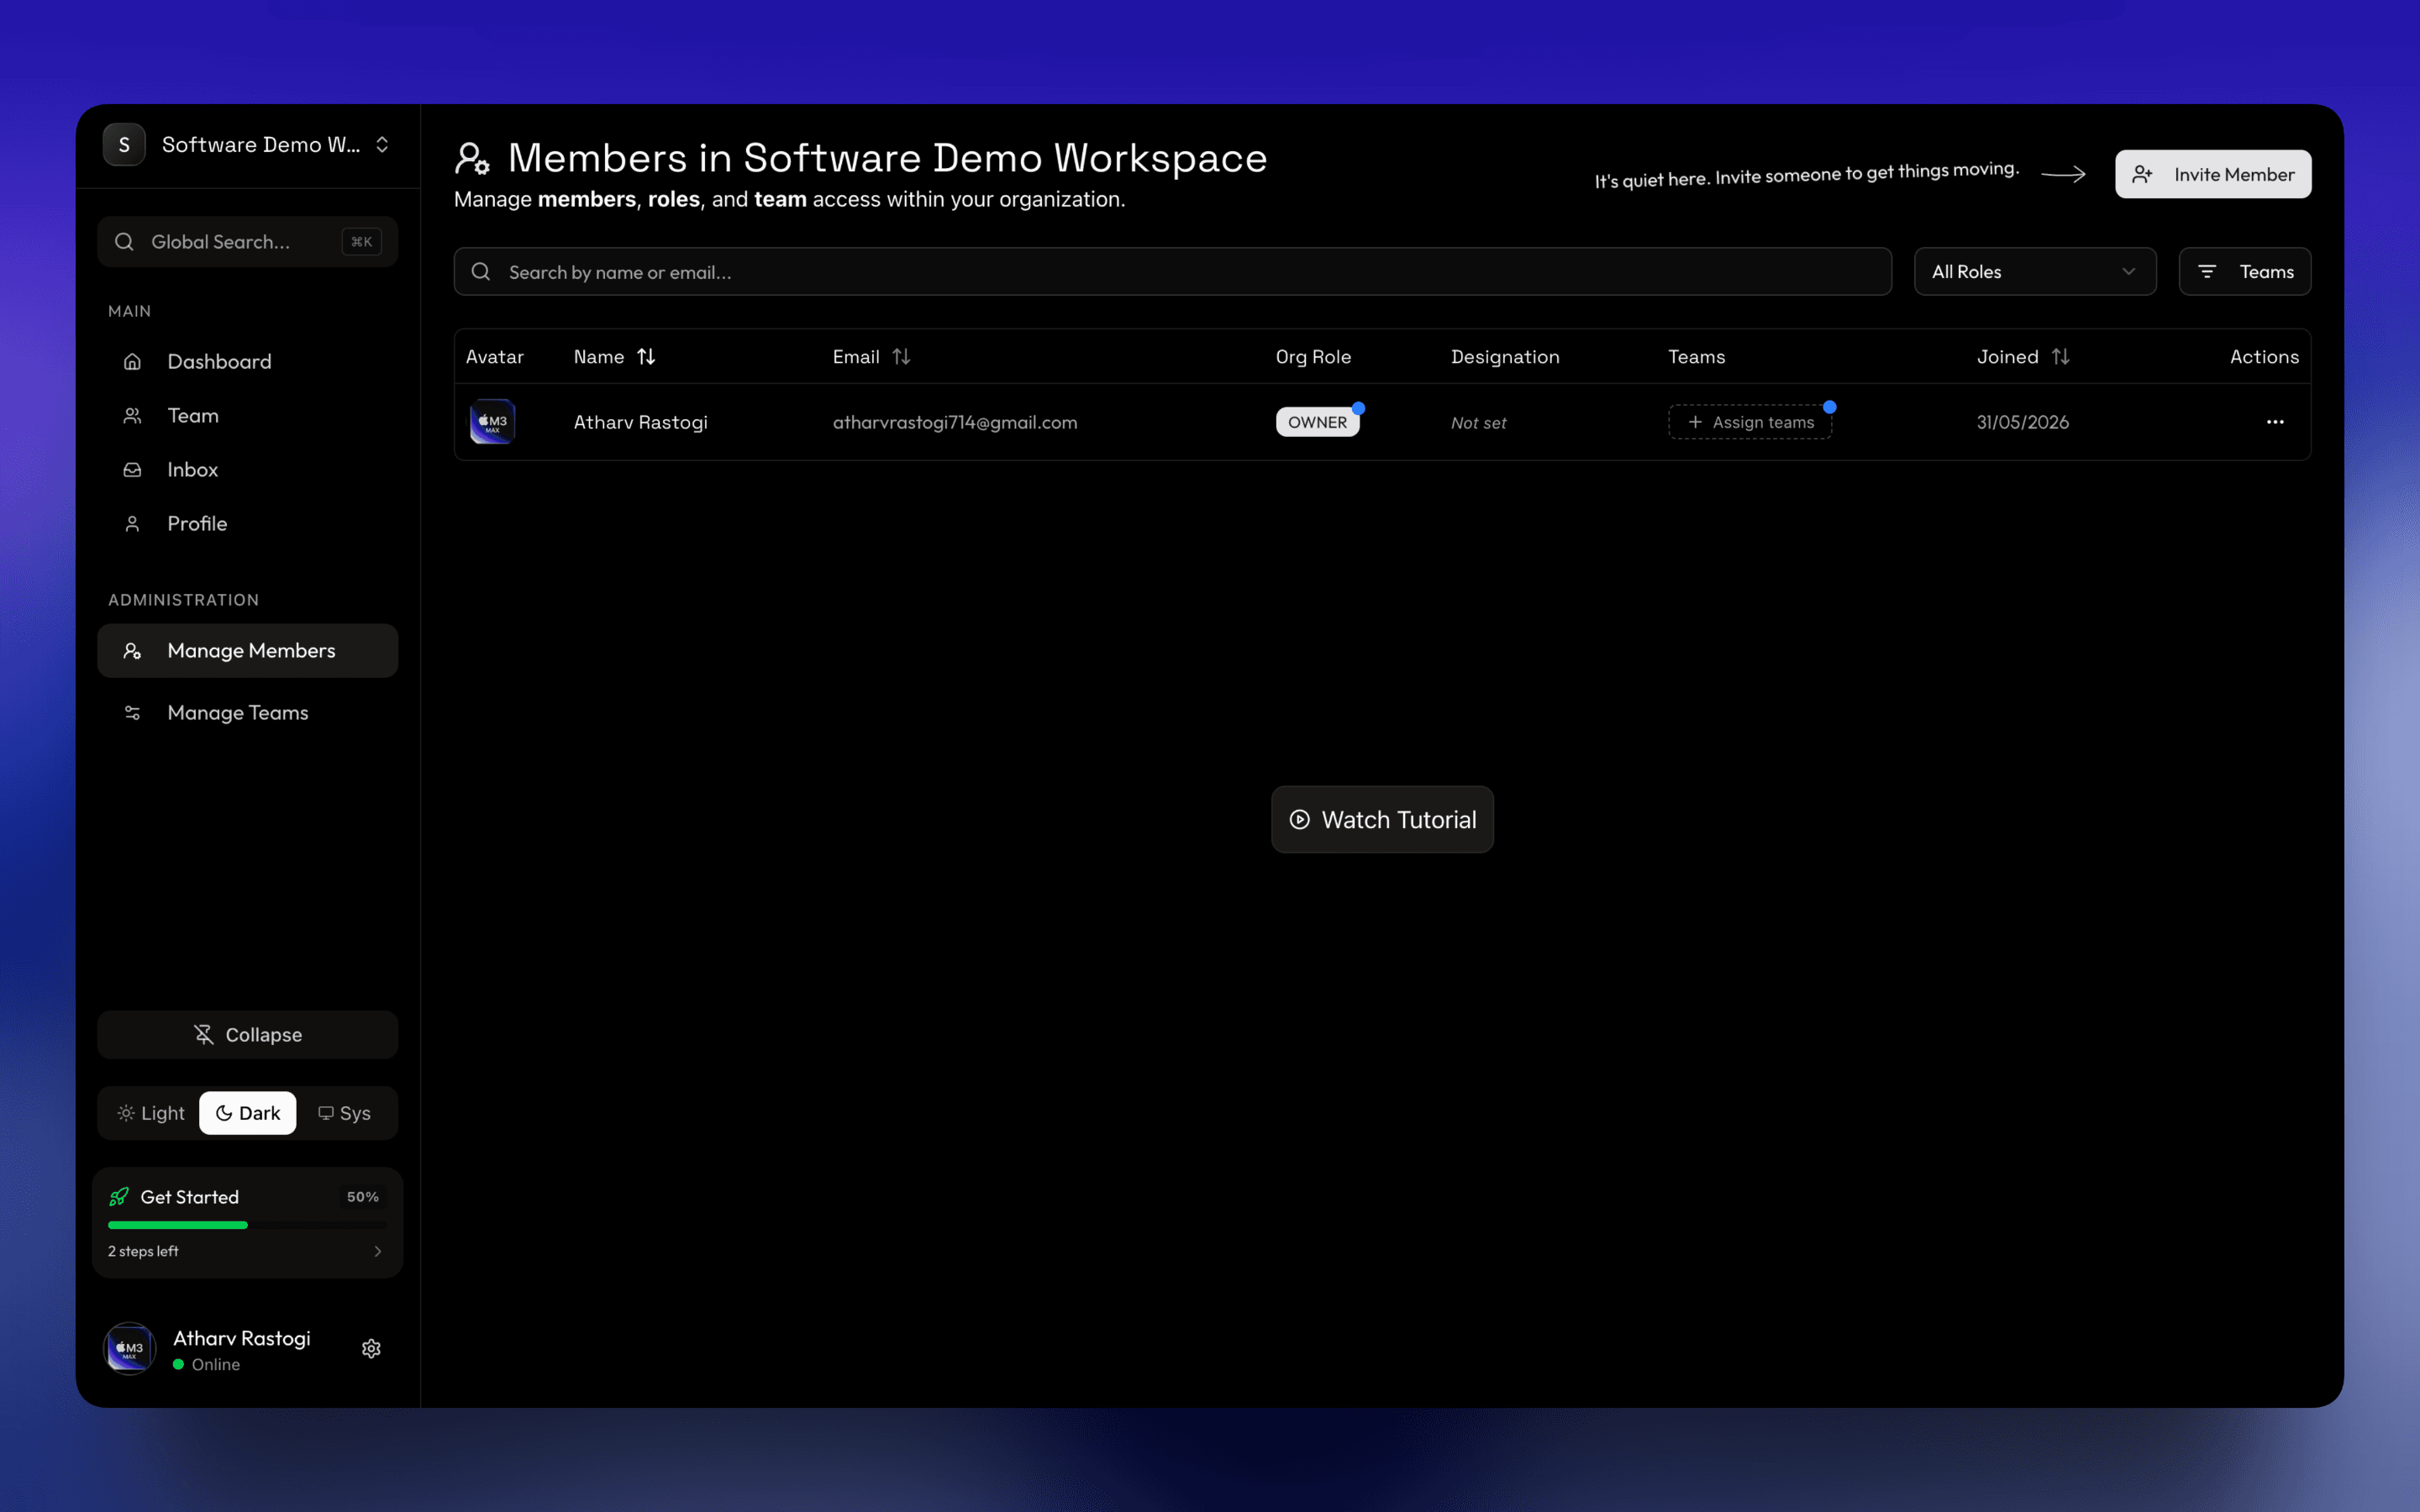
This directory lists your active team members, their organization roles, job titles, team assignments, and join dates.
Onboarding Tips for New Workspaces
If you are the only user in your newly created workspace, Magnifi displays helpful setup prompts:
- Watch Tutorial: Click the centered Watch Tutorial button to view a video walk-through of the initial setup.
- First Invitation: A guiding indicator in the top header highlights the invite button to help you bring in your first colleague.
- Profile Setup: A pulsing blue indicator next to your name prompts you to assign your own initial team.
3.2. Inviting Coworkers
To add colleagues to your workspace:
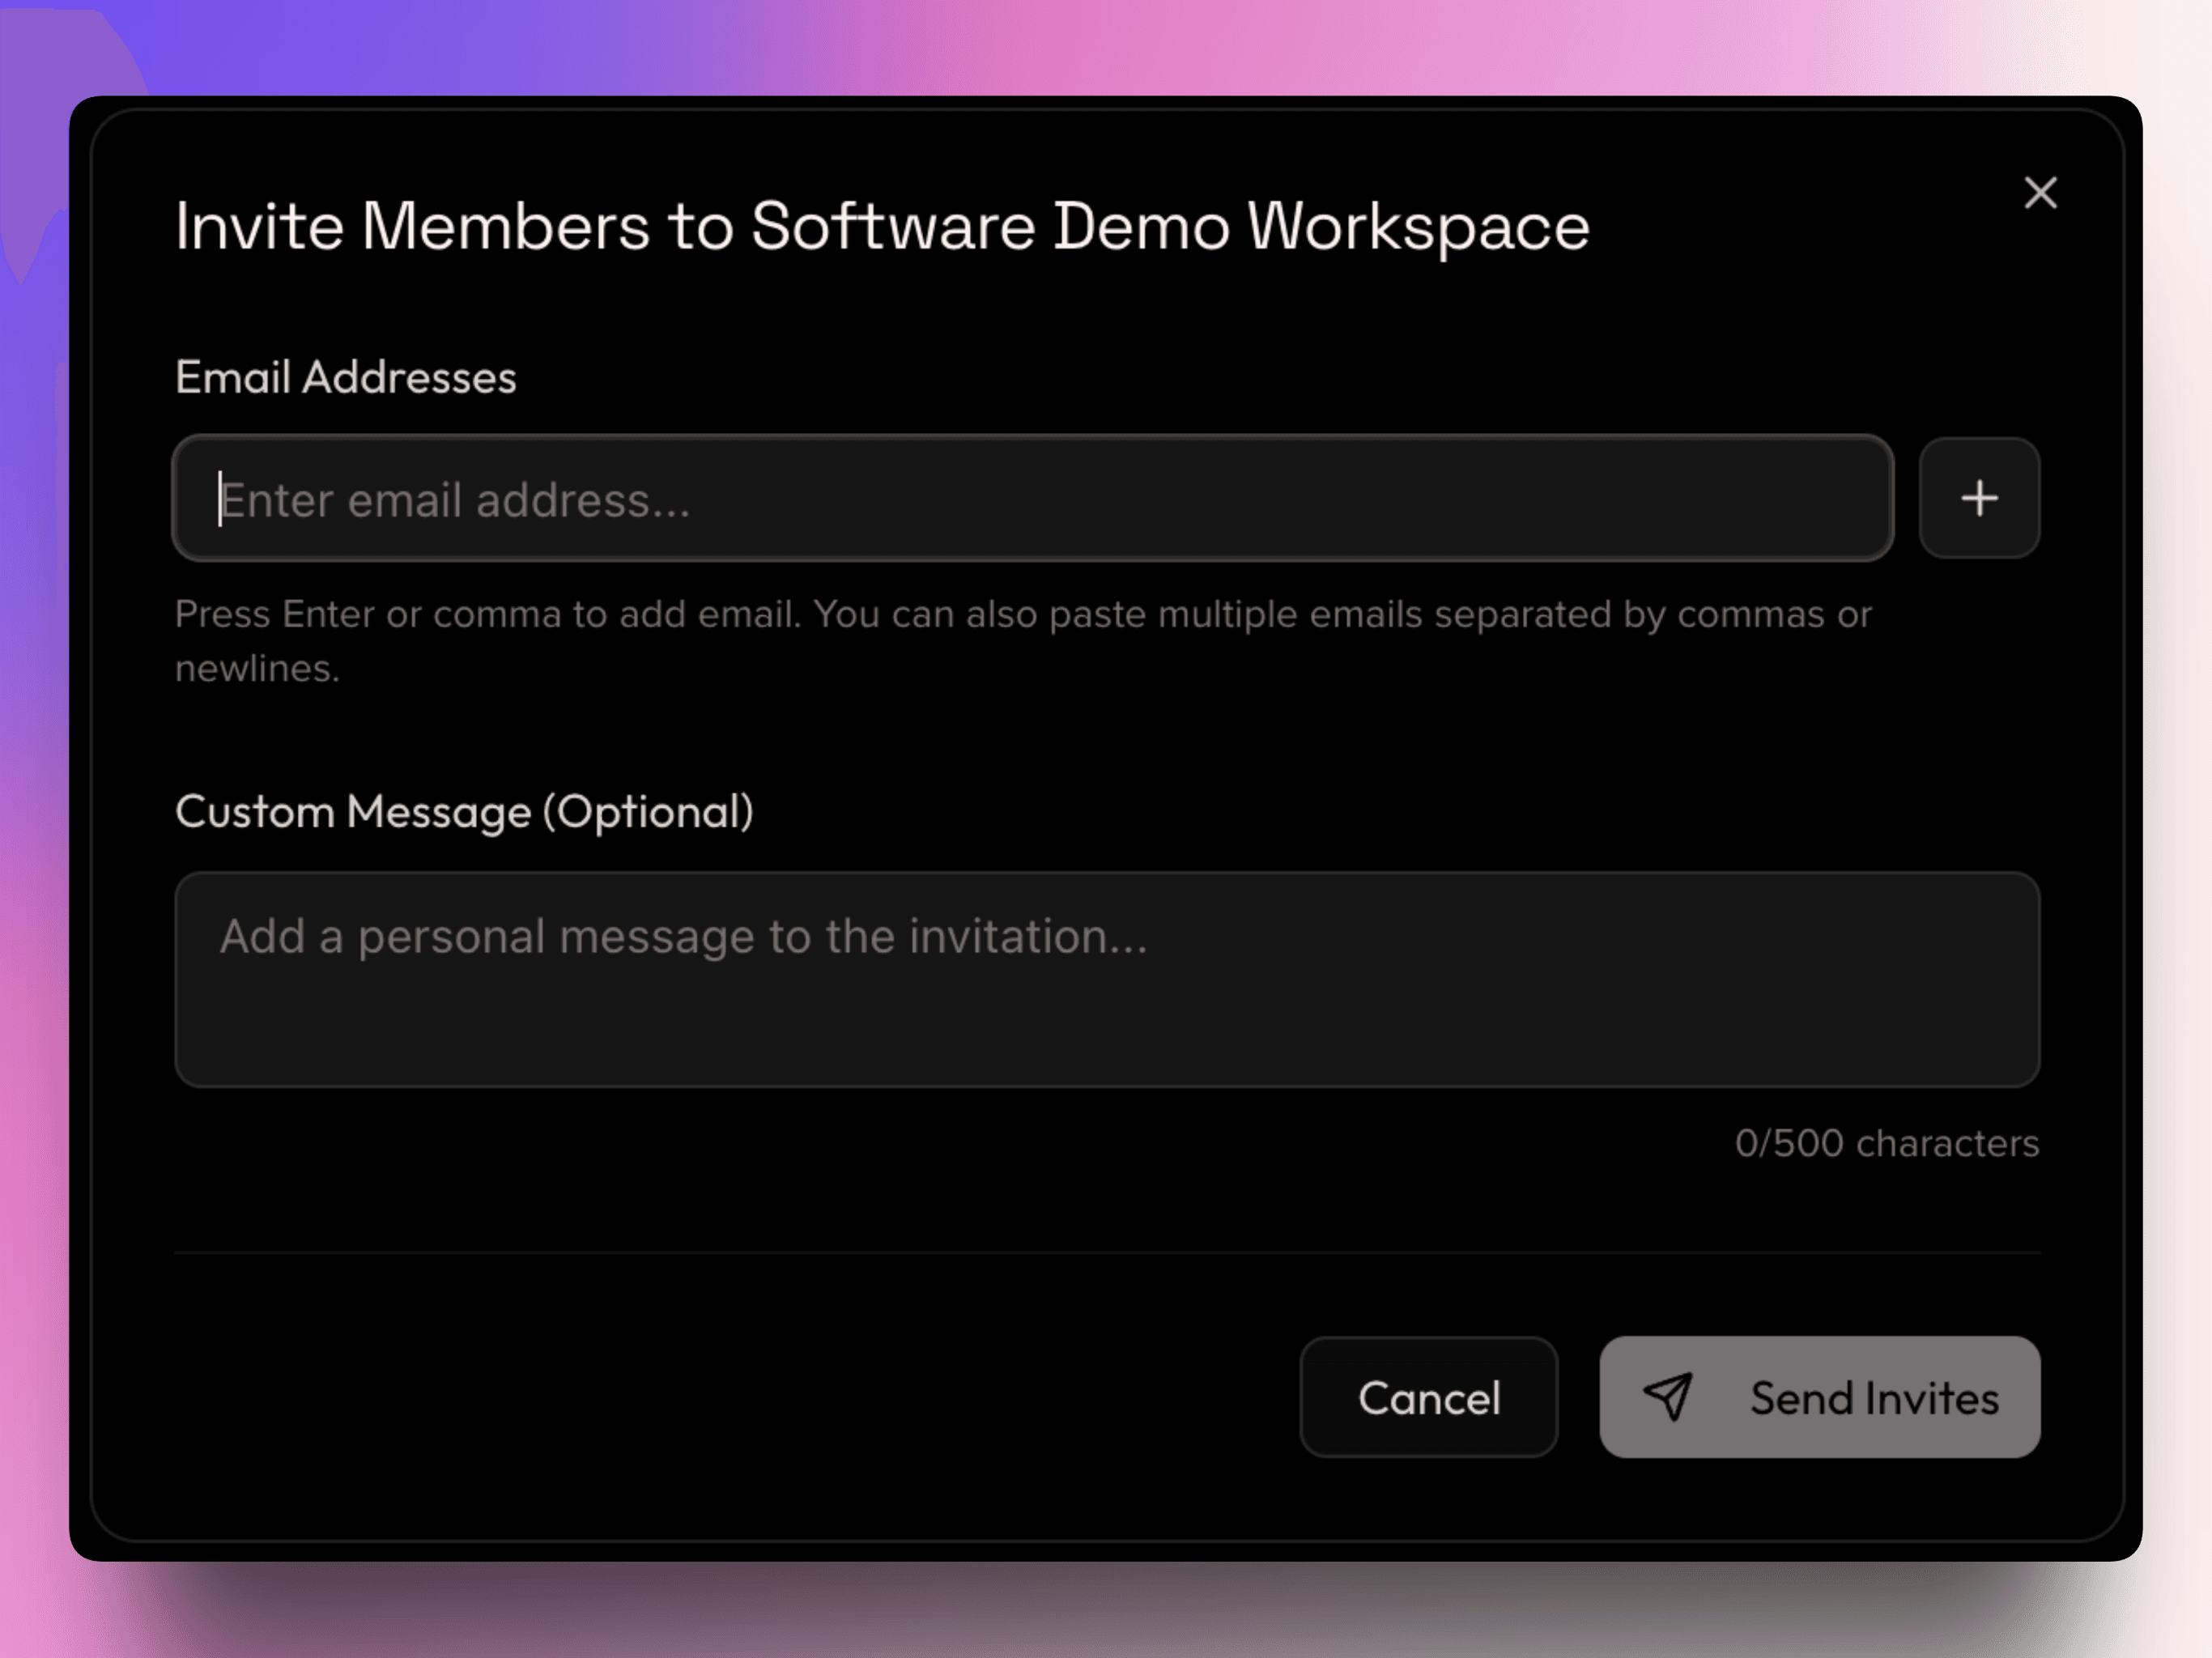
Add Email Addresses
Type your colleague's email address and press Enter or , (comma) to confirm it.
- Bulk Addition: You can copy and paste a list of emails directly into the input field. The system automatically parses commas, spaces, or newlines, filters out duplicates, and formats them into a clean list.
Batch Limit: You can invite up to 25 email addresses per day.
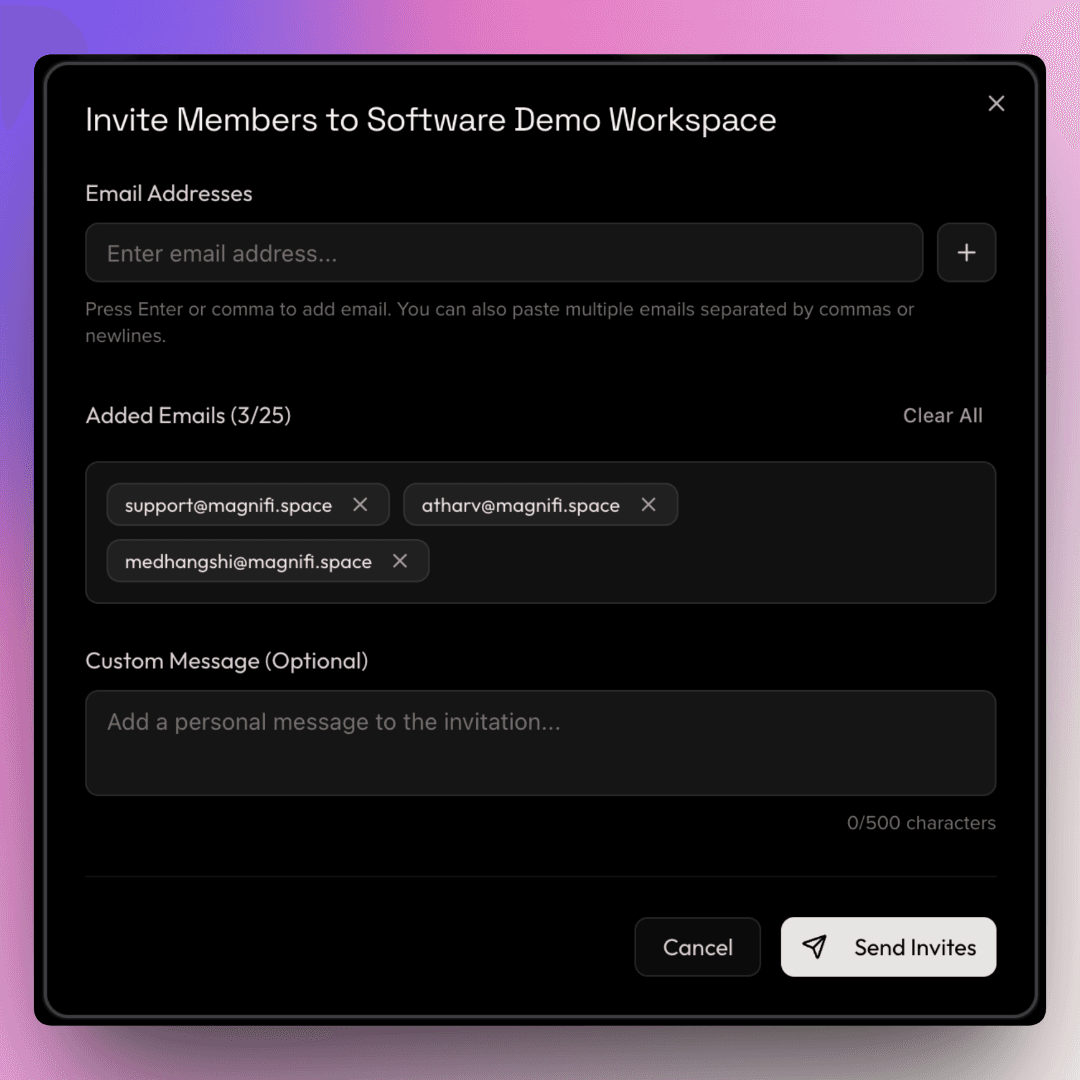
Include a Personal Message (Optional)
Write a custom welcome note (up to 500 characters) to be included in the invitation email.
Send Invites
Click Send Invites. Your colleagues will receive an invitation email containing a secure link to join your workspace along with your organization's unique Invite Code.
You can also copy your workspace's Invite Code directly from the dashboard and share it with your team. They can enter this code during signup to join instantly.
Workspaces can send up to 25 invitations per day.
3.3. Managing Roles & Teams
After a member joins, you can assign their job title, permission tier, and teams. You can make adjustments through quick inline changes or the detailed configuration menu.
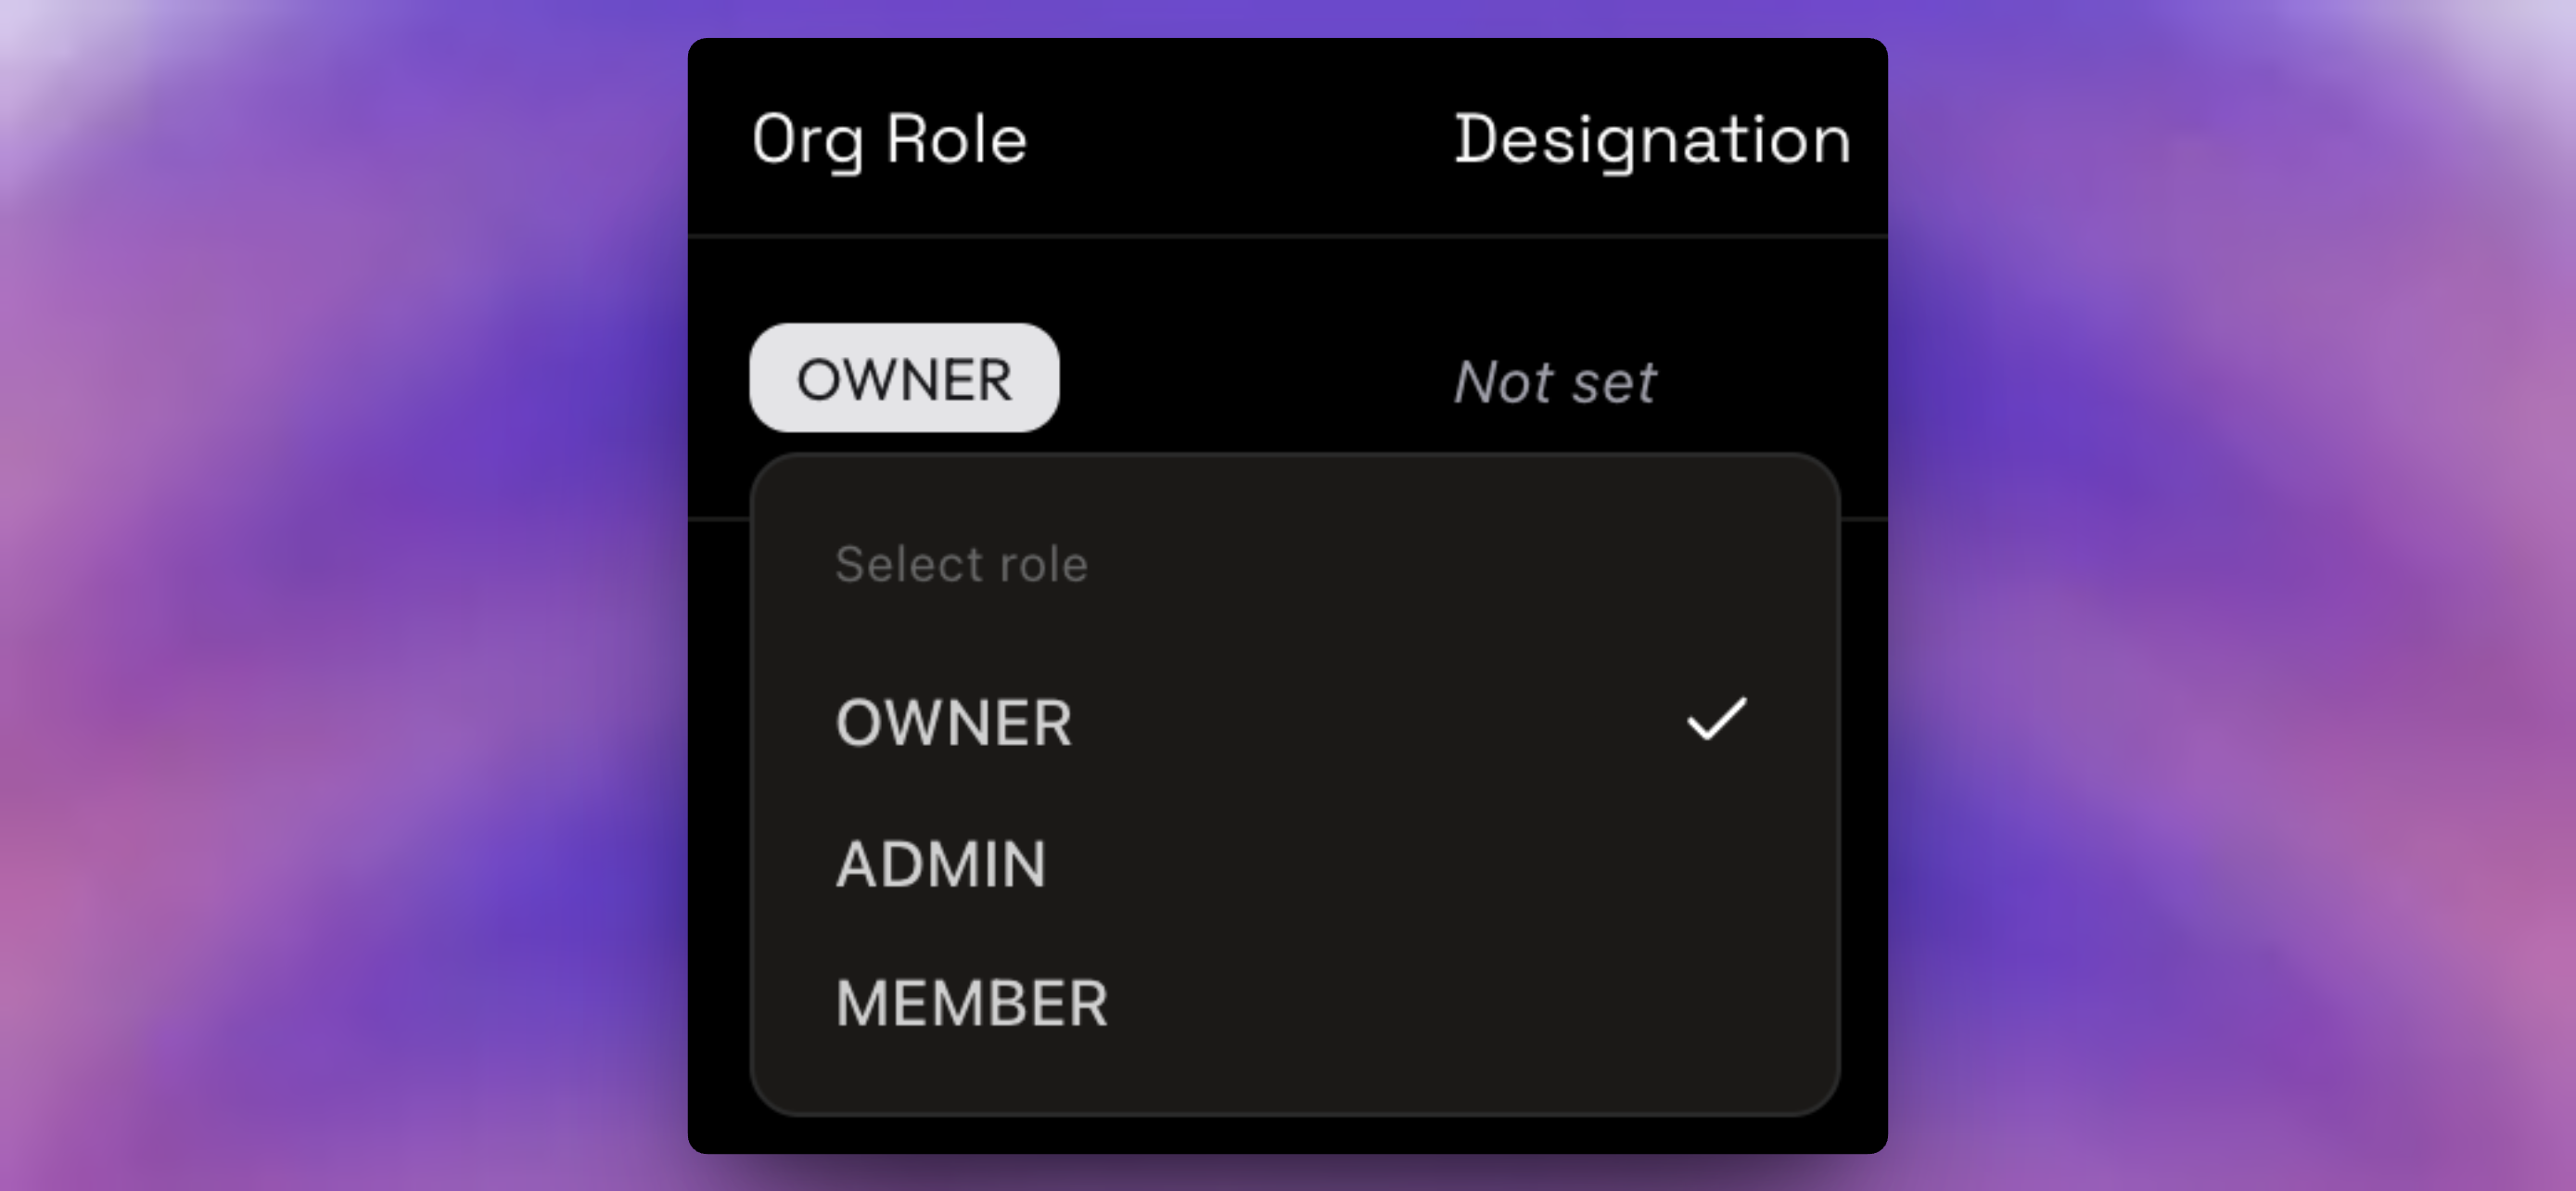
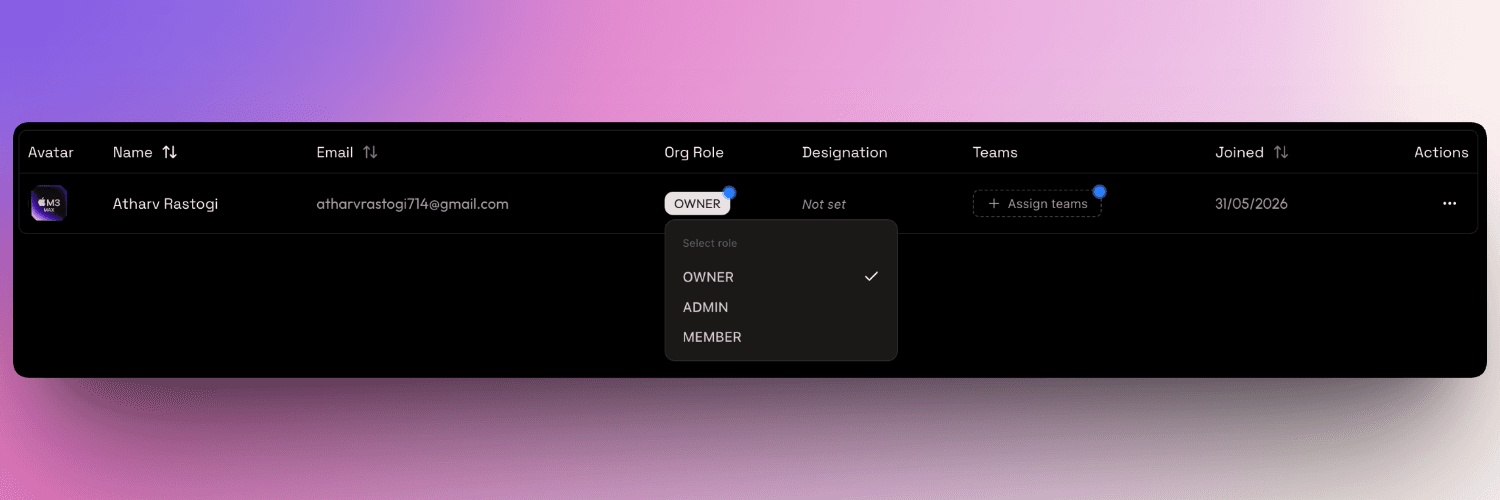
Option A: Quick Inline Changes (Fastest)
You can update your directory on the fly without leaving the main table:
-
Change Permission Tier: Click the Org Role badge next to any member to instantly select a new role from the dropdown menu.
-
Assign Teams: Click the member's team list (or the + Assign teams button) to open a quick search dropdown. Check or uncheck teams to update their departmental access.
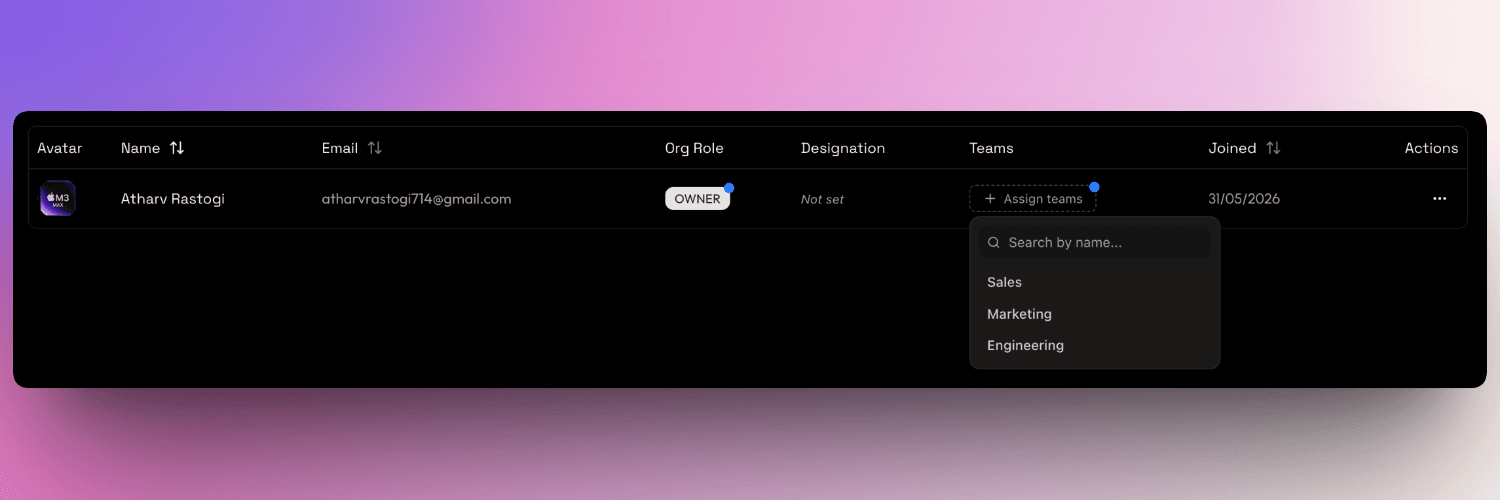
Sub-teams cannot be selected from this dropdown. Sub-team assignments must be managed directly within the individual team page. To learn more about setting up teams and sub-teams, refer to the Creating Teams & Sub-teams guide.
Option B: Detailed Configuration Menu
For a complete profile update:
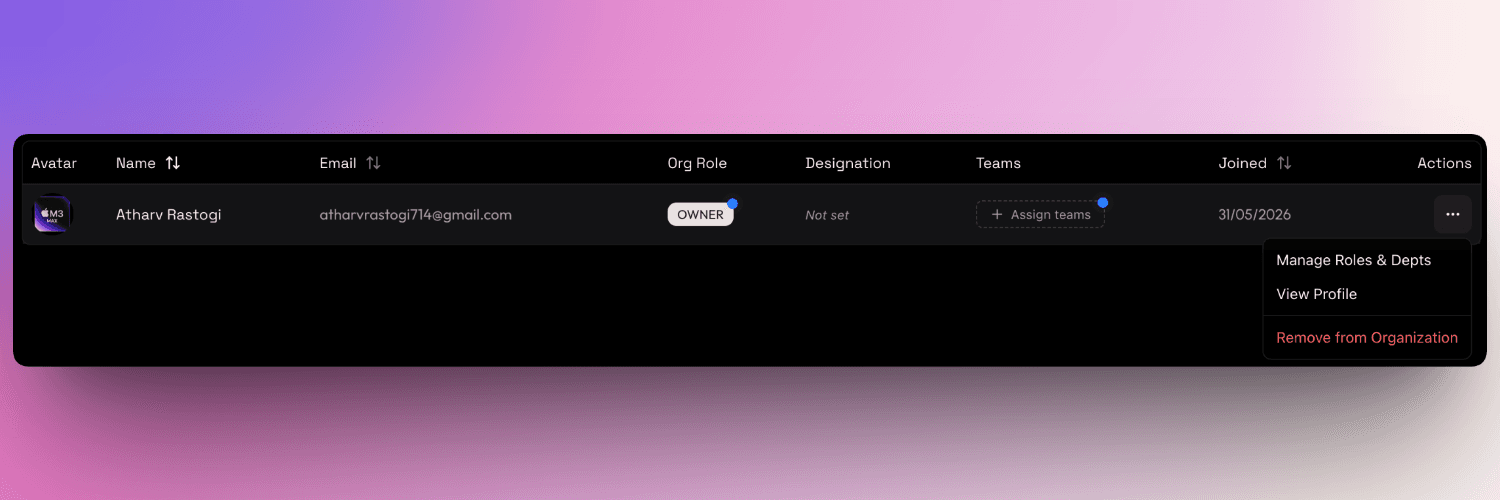
Open Configuration Menu
Click the Settings (three dots) button at the end of a member's row and select Manage Roles & Depts.
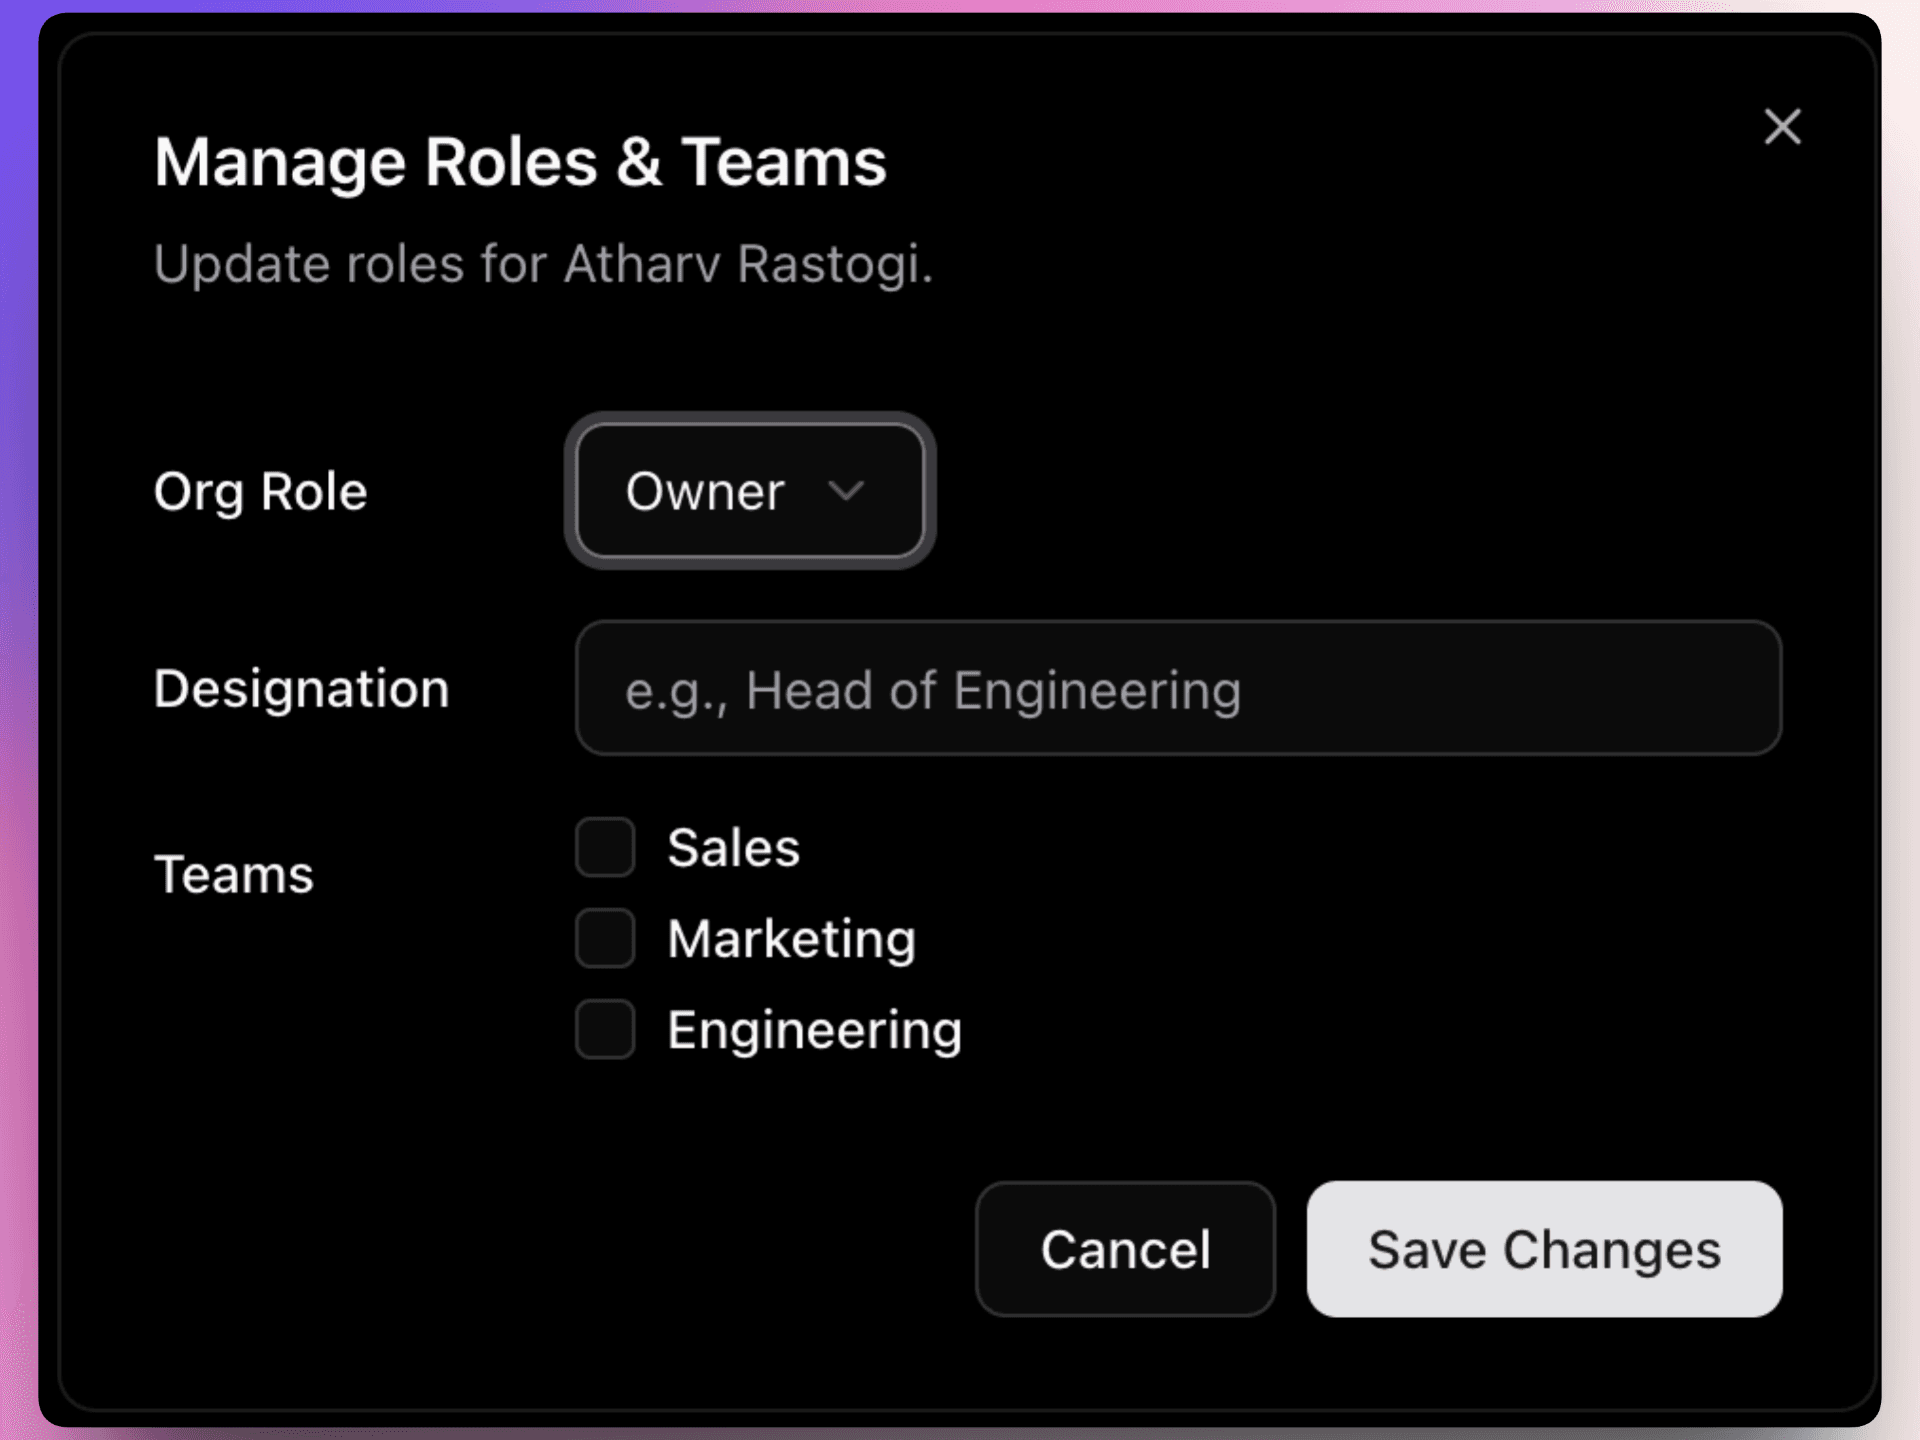
Set Job Designation
Type the colleague's job title in the Designation field (e.g., Lead Designer, Staff Engineer). This title appears next to their name in the sidebar and profile directory.
Assign Teams
Select the checkboxes next to the teams this member should join. This grants them access to the projects and communication channels associated with those departments.
Save Updates
Click Save Changes to apply the updates. The member's permissions and view privileges update instantly.
3.4. Revoking Member Access
If a colleague leaves your team, you can remove them from the workspace.
Select Remove Action
Click the Settings (three dots) button next to the member's name and choose Remove from Organization.
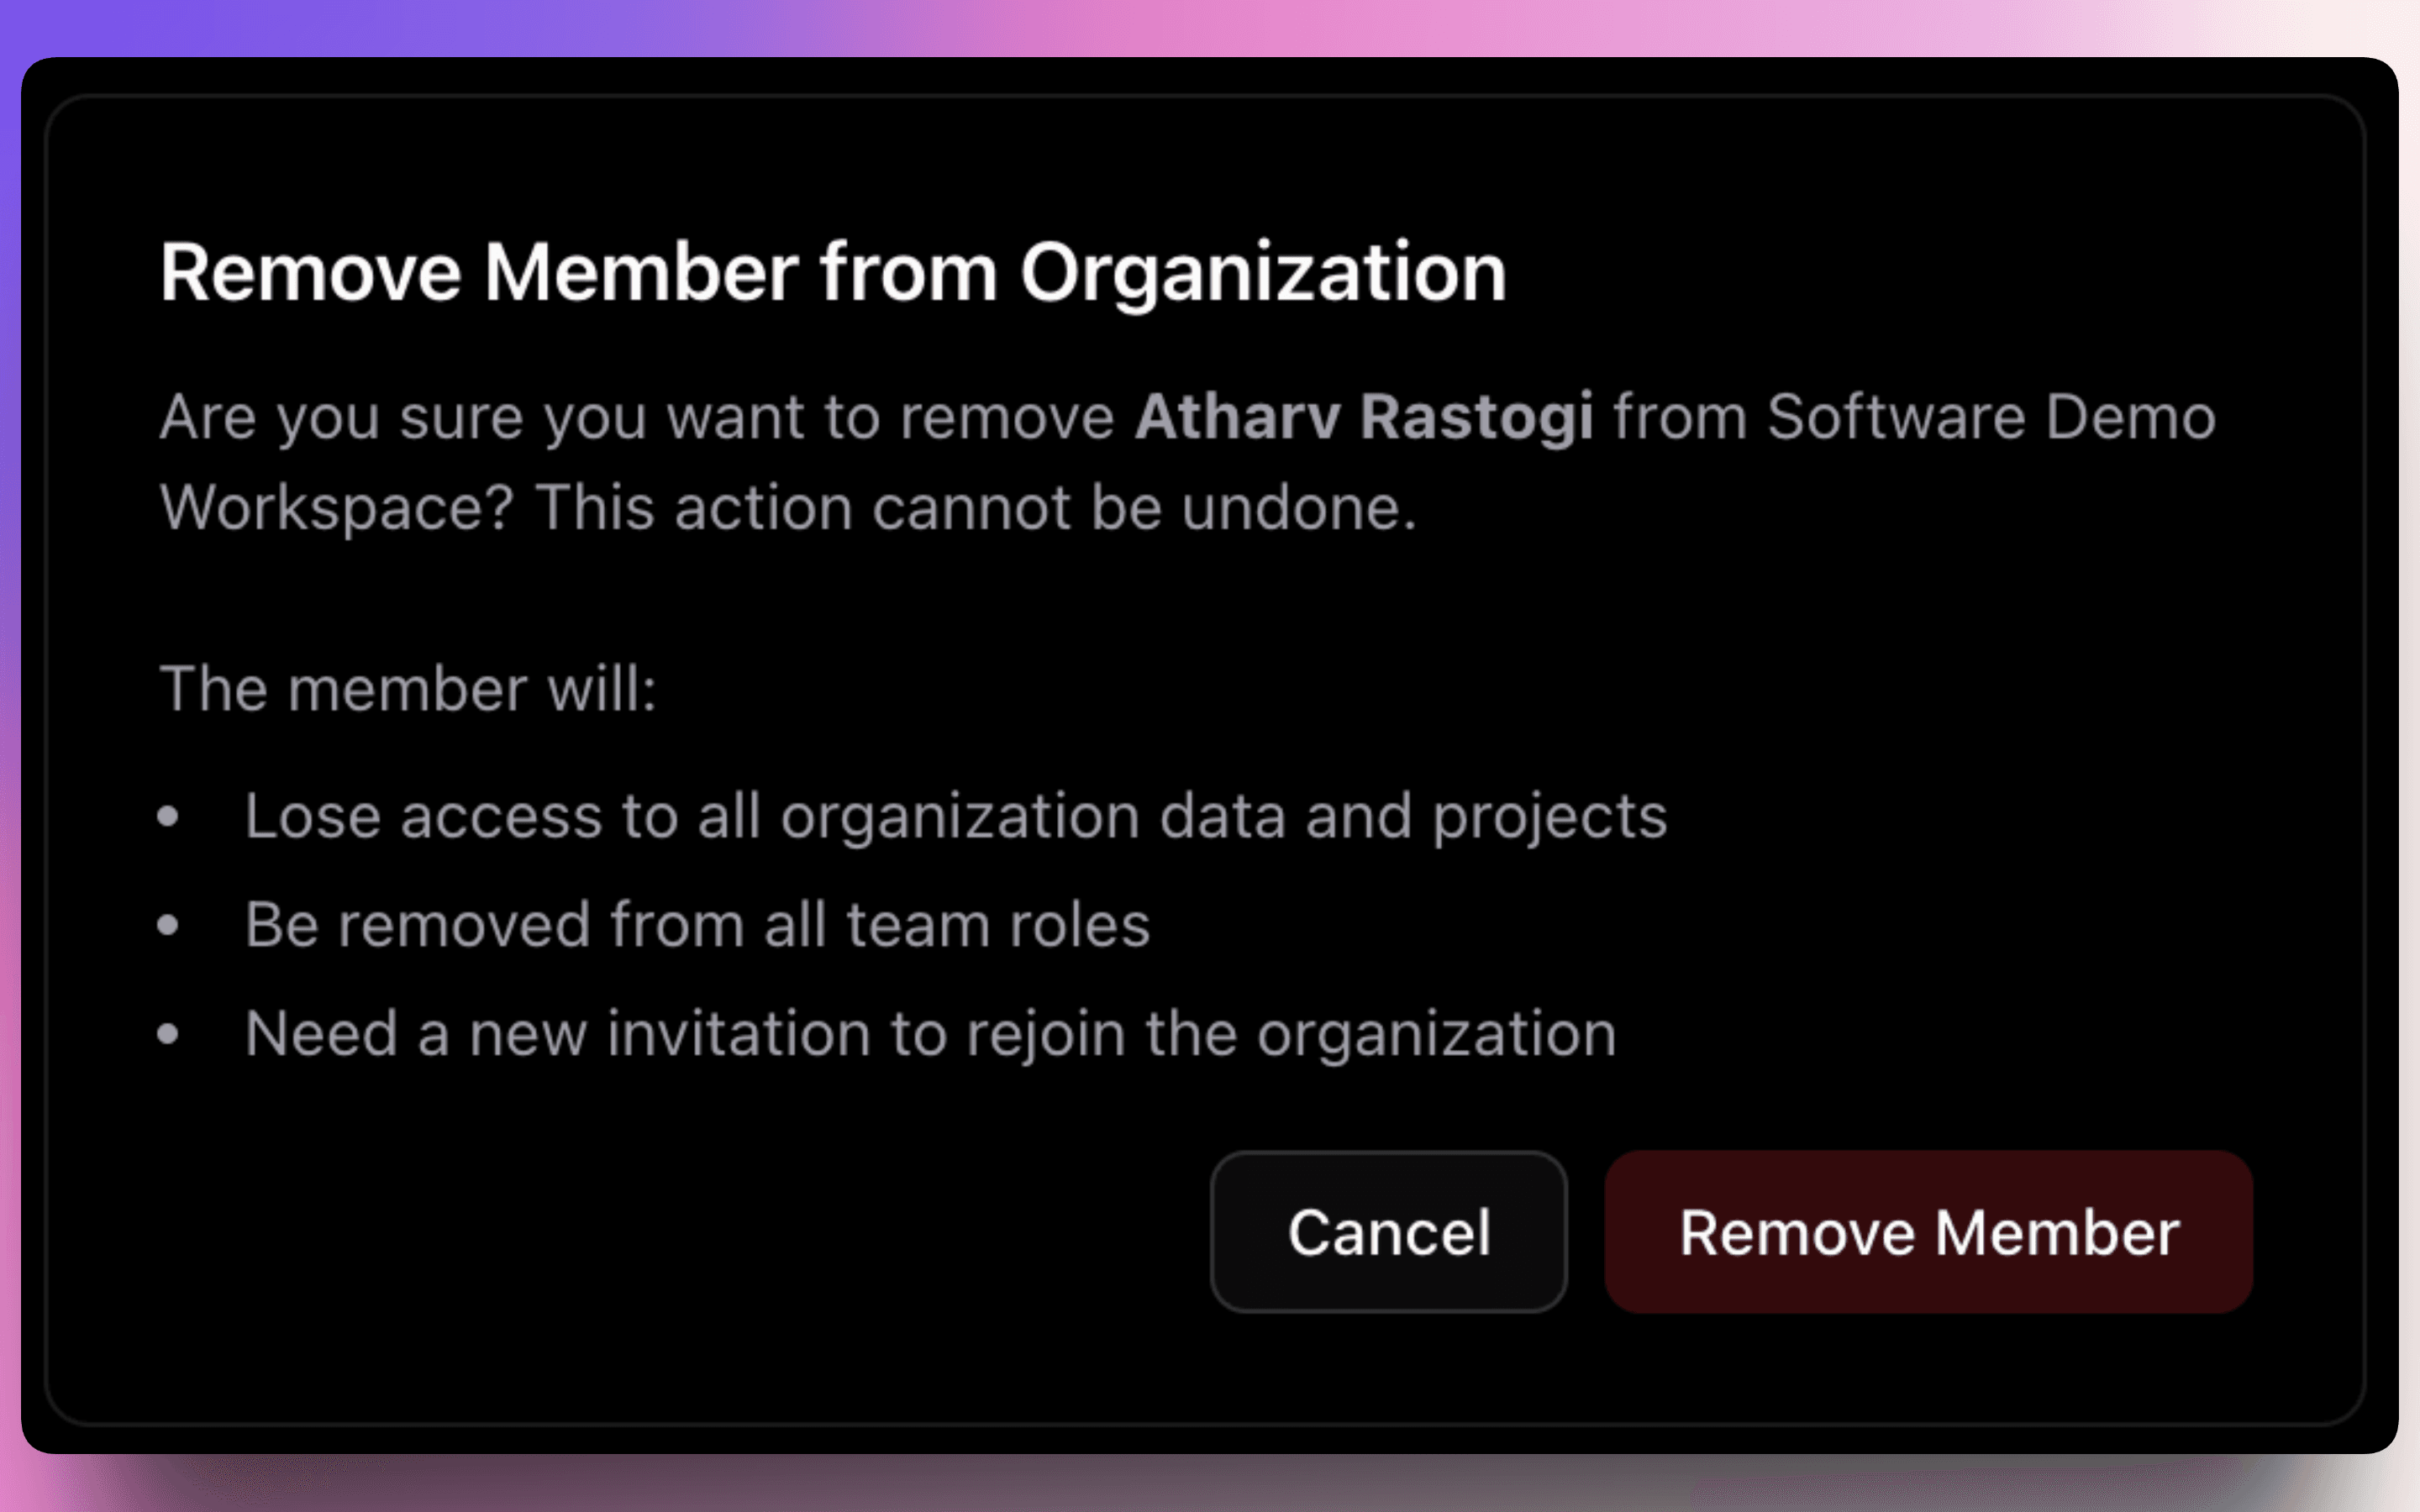
Review the Security Warning
The confirmation prompt outlines the access revocation details:
- The user is logged out of the workspace immediately.
- They are removed from all assigned teams, projects, and directories.
- Their access to all company files and organization resources is revoked.
Confirm Removal
Click Remove Member to complete the process.
Removal Restrictions
- You cannot remove yourself from the workspace.
- You cannot remove the Owner. To change or remove the Owner, you must transfer ownership first.
- Admins cannot remove other Admins or the Owner.
3.5. Finding & Filtering Members
Use the directory toolbar to organize large teams:
- Search: Type a name or email address in the search bar to locate a colleague.
- Filter by Role: Select a specific role (Owner, Admin, Member) to isolate permissions.
- Filter by Team: Filter the directory list by specific departments.
- Sorting: Click the Name, Email, or Joined column headers to sort the table list.
What's Next?
Once your team is onboarded, you can start organizing work:
- Create and organize your first project boards in the Project Workspace guide.
- Understand workspace definitions in the Terminology reference guide.