6. Project Workspace
A complete guide to managing tasks, sub-tasks, and understanding different project views like Table, Board, List, and Timeline.
Once you navigate into a specific project from your Team Workspace, you'll enter the Project Workspace. This is where all the actual work happens.
In this guide, we'll walk you through everything you need to know to manage tasks effectively.

6.1. Understanding Task Properties
Before we dive into creating tasks, it's important to understand the building blocks of a task. Every task can have the following properties to help you stay organized:
- Assignee: The team member responsible for completing the task.
- Due Date: The deadline by which the task must be completed.
- Priority: How urgent the task is (e.g., Low, Medium, High). This helps your team know what to work on first.
- Status: The current stage of the task (e.g., To Do, In Progress, In Review, Completed). This helps track momentum.
- Tags: Custom labels you can apply to tasks (e.g., "Bug", "Enhancement", "Marketing"). Tags make it easy to filter and search for specific types of work.
6.2. Creating Your First Task
Creating a task is simple and can be done from any view in your project.
 Click the "New Task" Button
Look for the prominent + New Task button (usually in the top right corner of the project workspace).
Click the "New Task" Button
Look for the prominent + New Task button (usually in the top right corner of the project workspace).
 Fill in the Details
Give your task a clear Name and Description. You can also set the Assignee, Due Date, Priority, Status, and Tags right from this menu.
Fill in the Details
Give your task a clear Name and Description. You can also set the Assignee, Due Date, Priority, Status, and Tags right from this menu.
Save Click Create to add the task to your project.
Sub-tasks: Tasks can be broken down into smaller pieces called Sub-tasks. You can create, edit, and delete sub-tasks directly from the Context Menu in any of the views described below.
6.3. Navigating Different Views
People work differently, so your project offers multiple ways to visualize and manage your tasks. You can switch between these views using the tabs at the top of the workspace.
1. Table View
The Table View is a powerful spreadsheet-like interface that gives you a high-density overview of all your tasks.
- Inline Editing: You can click directly on properties like Status, Priority, or Due Date in the table to change them instantly without opening the task.
- Opening Sub-tasks: If a task has sub-tasks, you'll see a small dropdown arrow next to the task name. Click it to expand and view the nested sub-tasks.

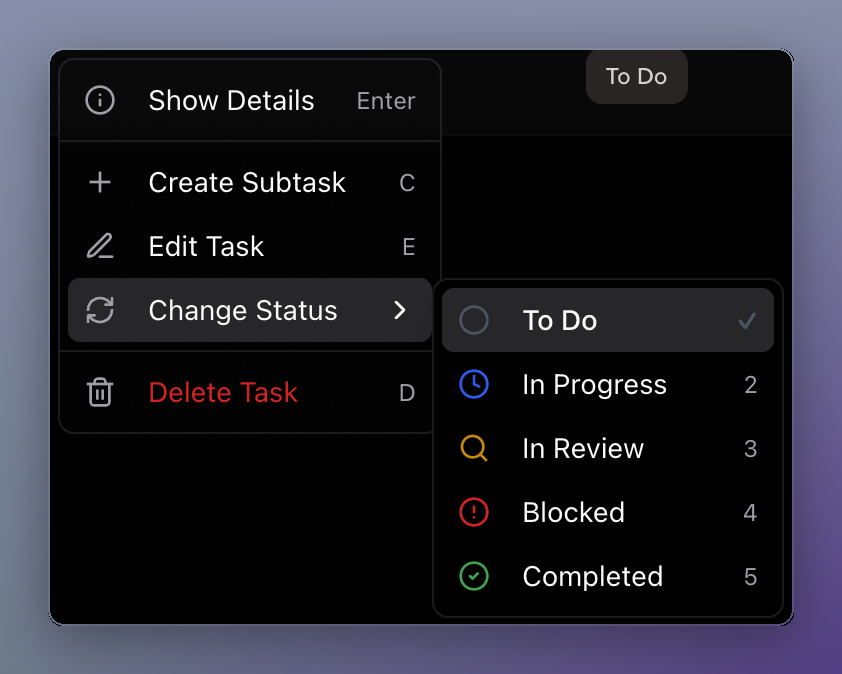
- The Context Menu (Right-Click): Right-click anywhere on a task row to open the Context Menu. From here, you can quickly:
- Edit the task details
- Create a sub-task underneath it
- Delete the task completely
2. Board View
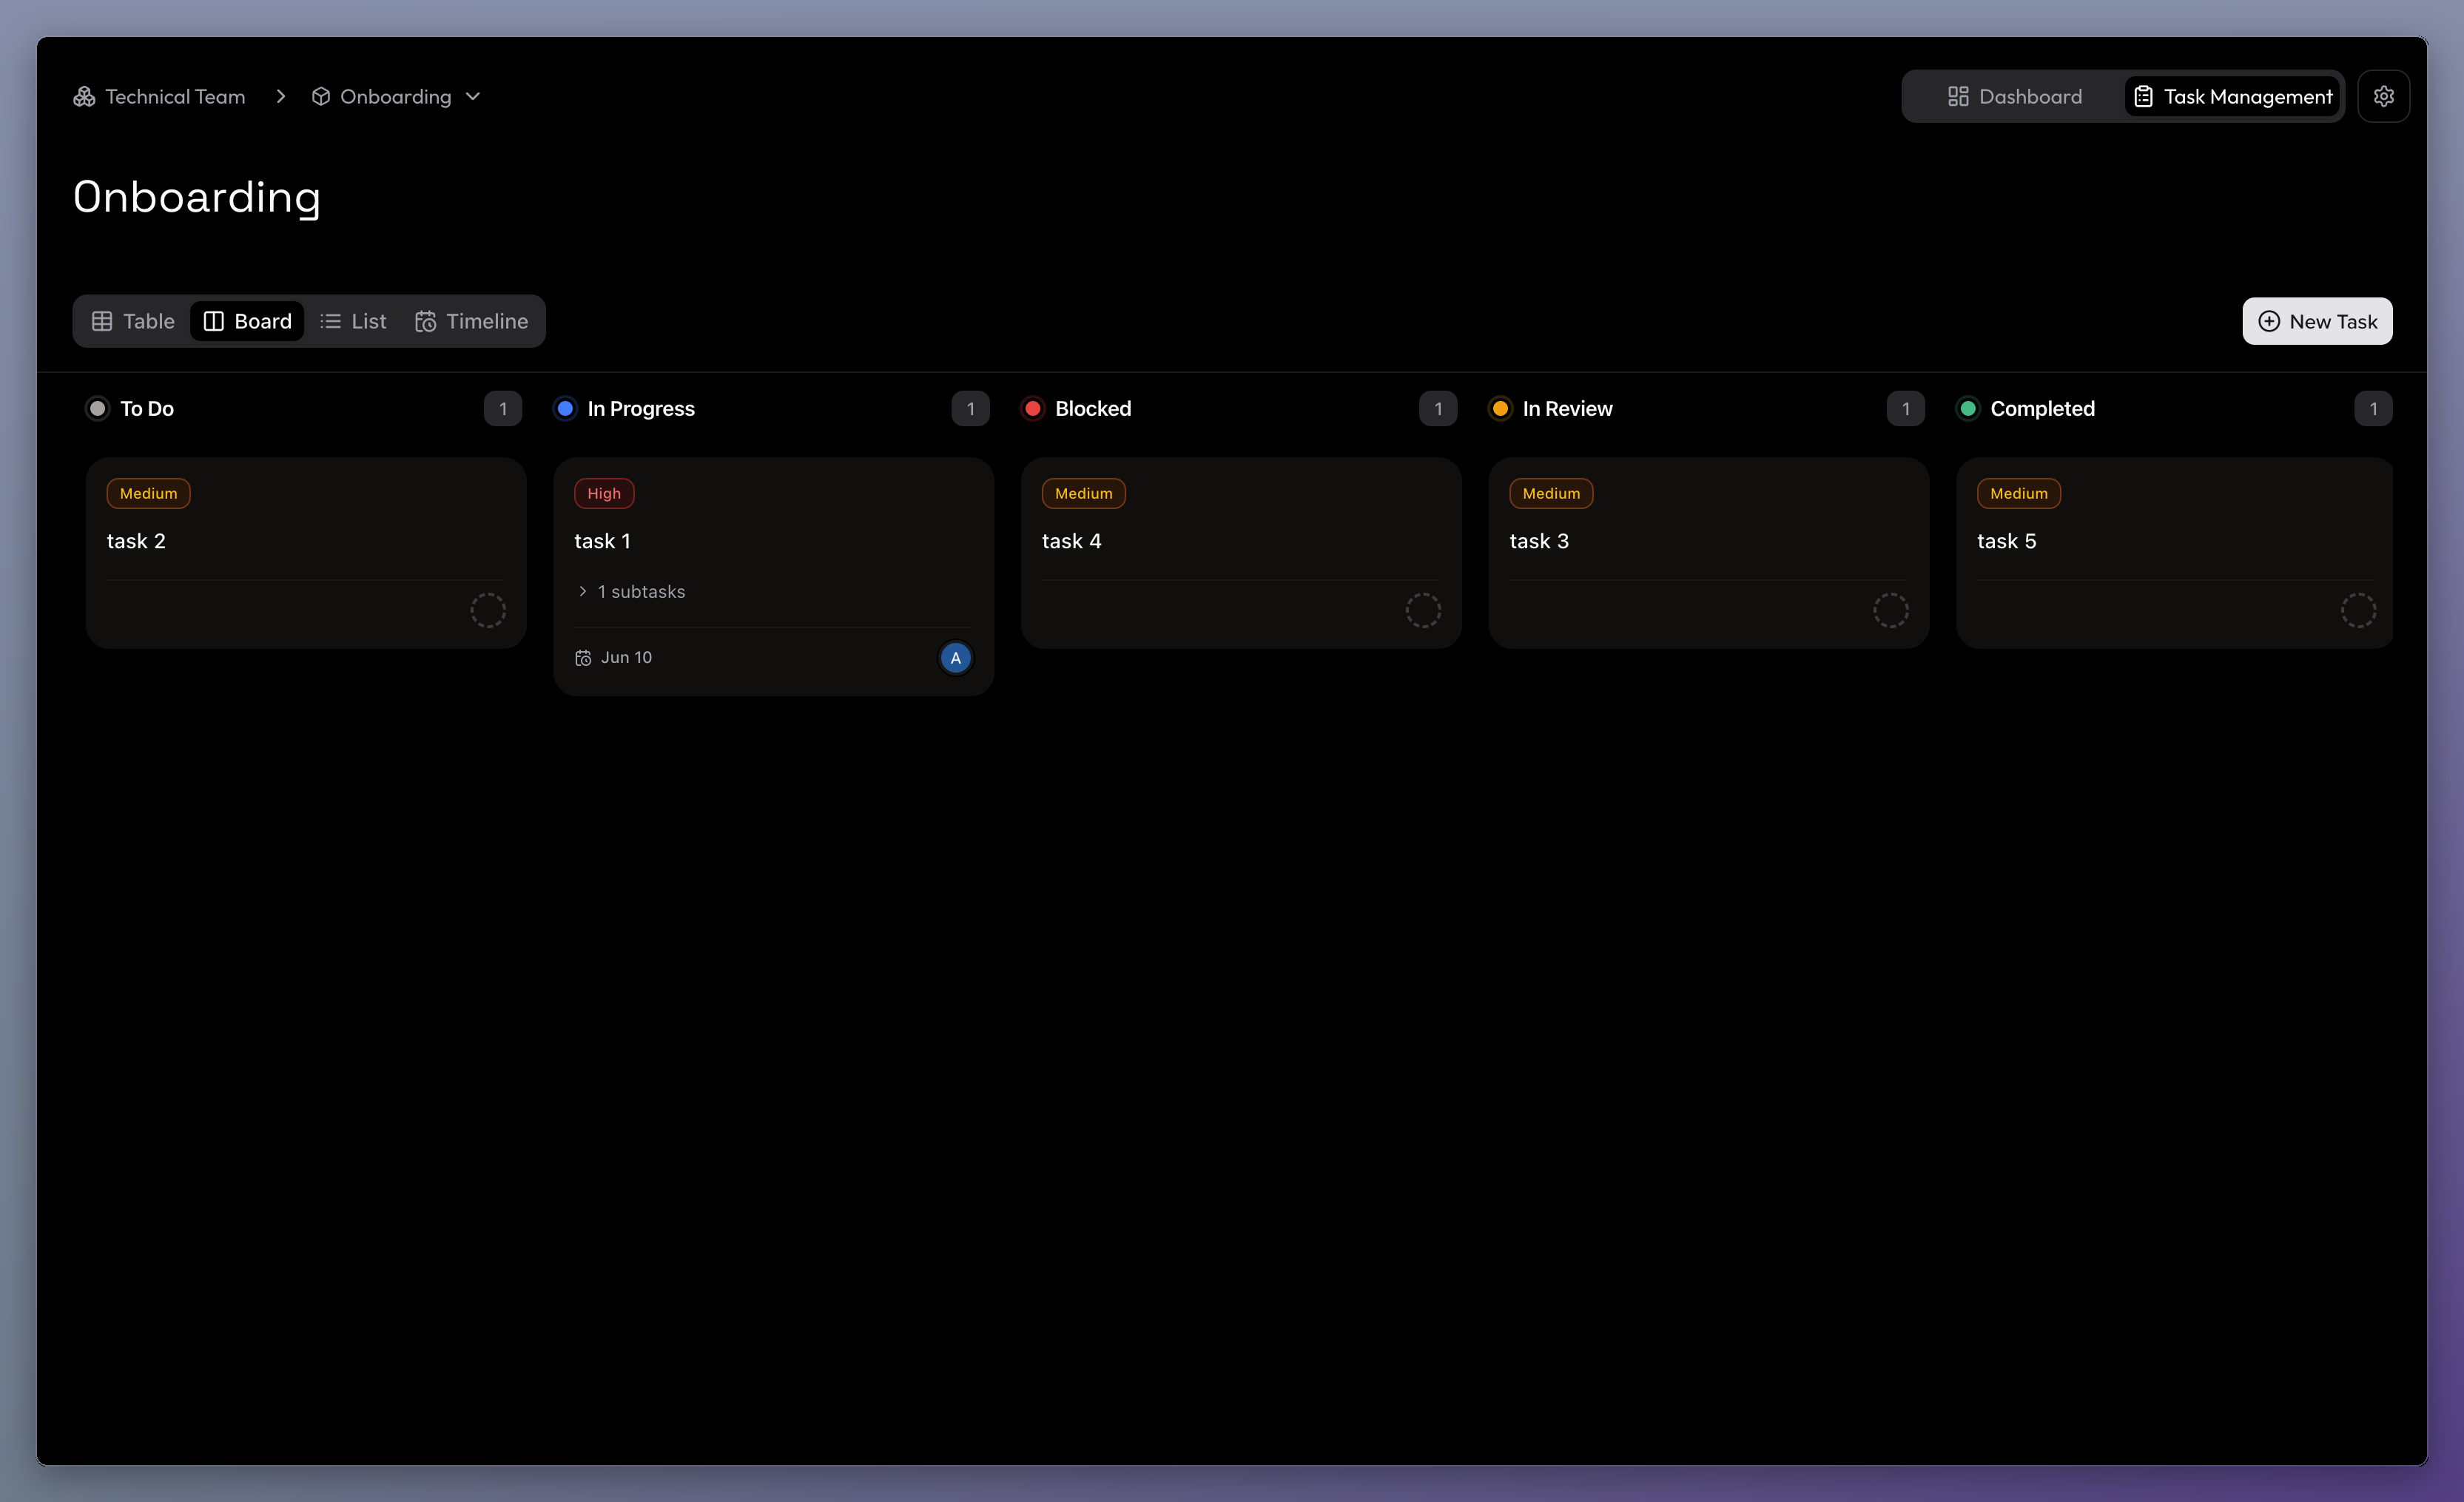
The Board View (or Kanban board) visualizes your workflow by organizing tasks into columns based on their Status (e.g., To Do -> In Progress -> Completed).
- Changing Status: You can easily click and drag a task card from one column to another to update its status instantly.
- The Context Menu: Just like in the Table View, you can Right-click on any task card to open the Context Menu for quick edits, adding sub-tasks, or deleting the task.
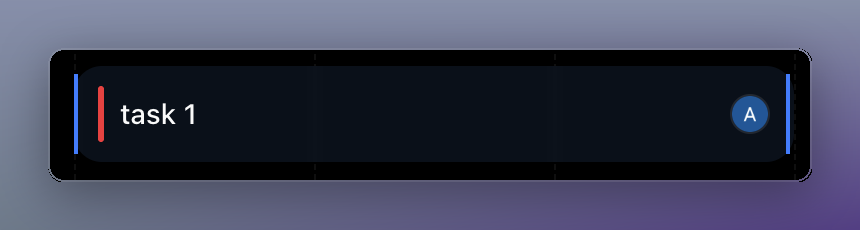
3. List View
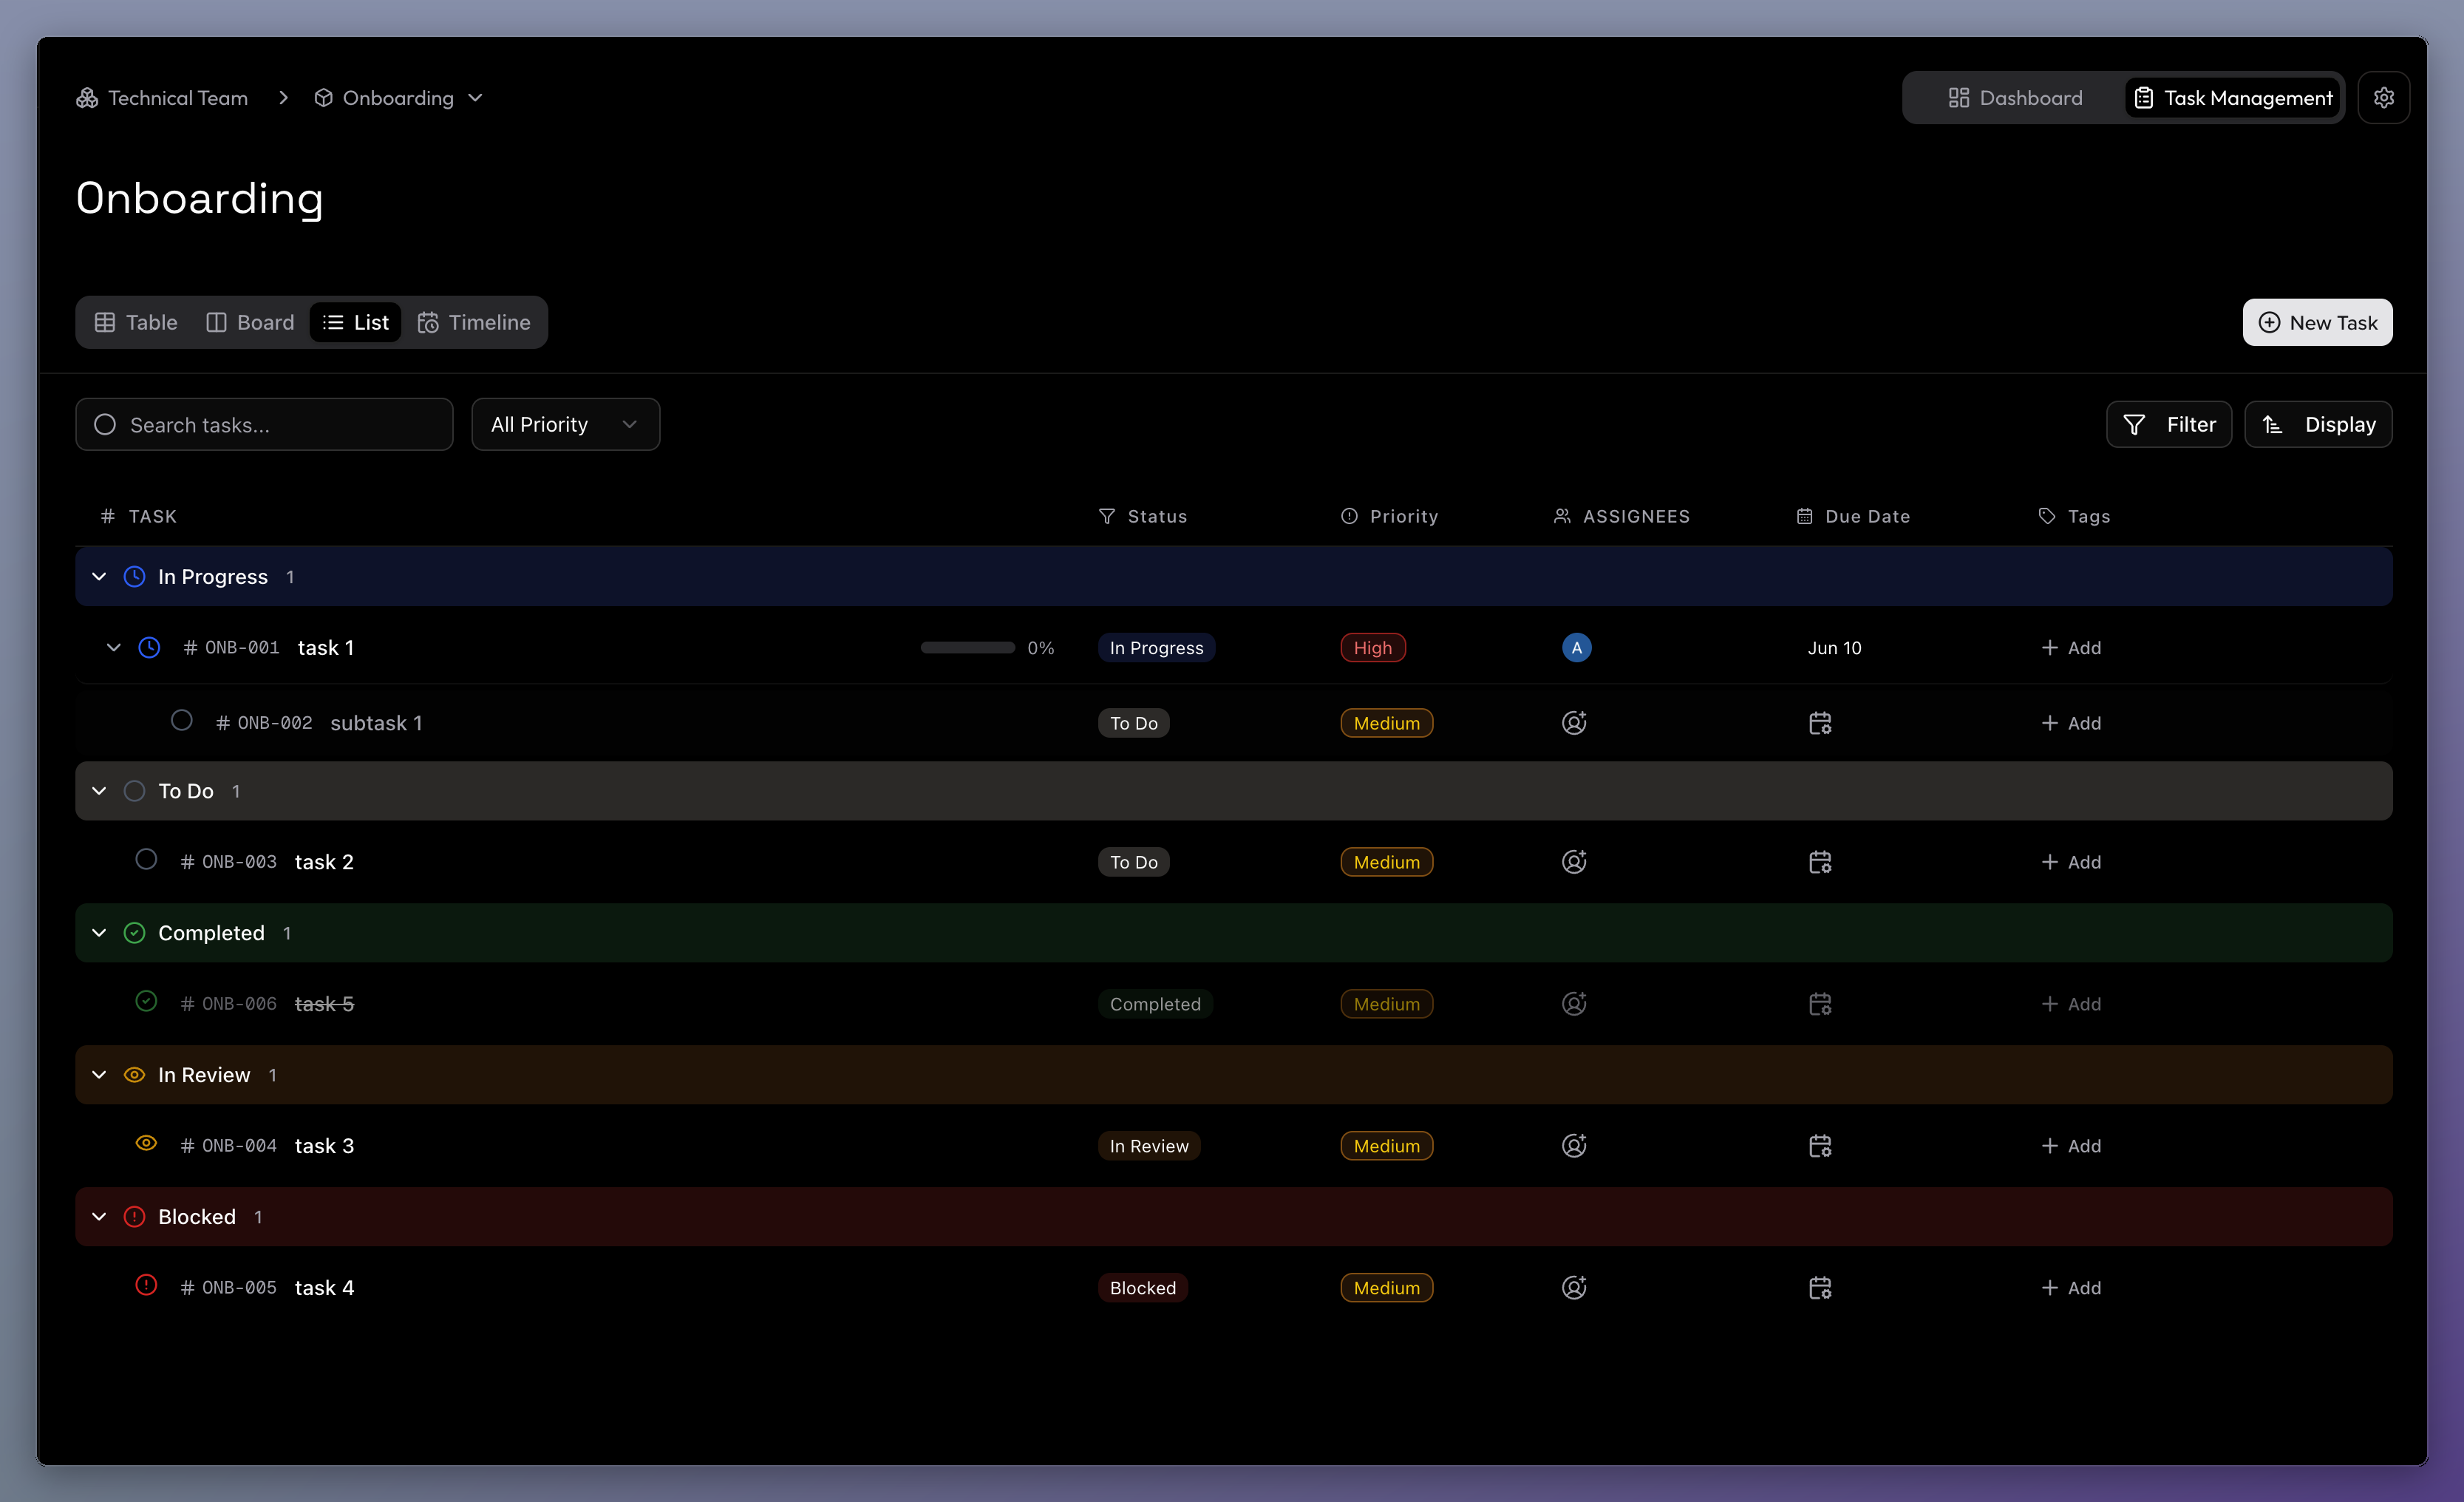
The List View offers a clean, streamlined look at your tasks, organized linearly. It's perfect for quickly scanning through a long backlog of work.
- The Context Menu: Right-click on any task in the list to access the same powerful Context Menu to edit, manage sub-tasks, or delete.
4. Timeline View
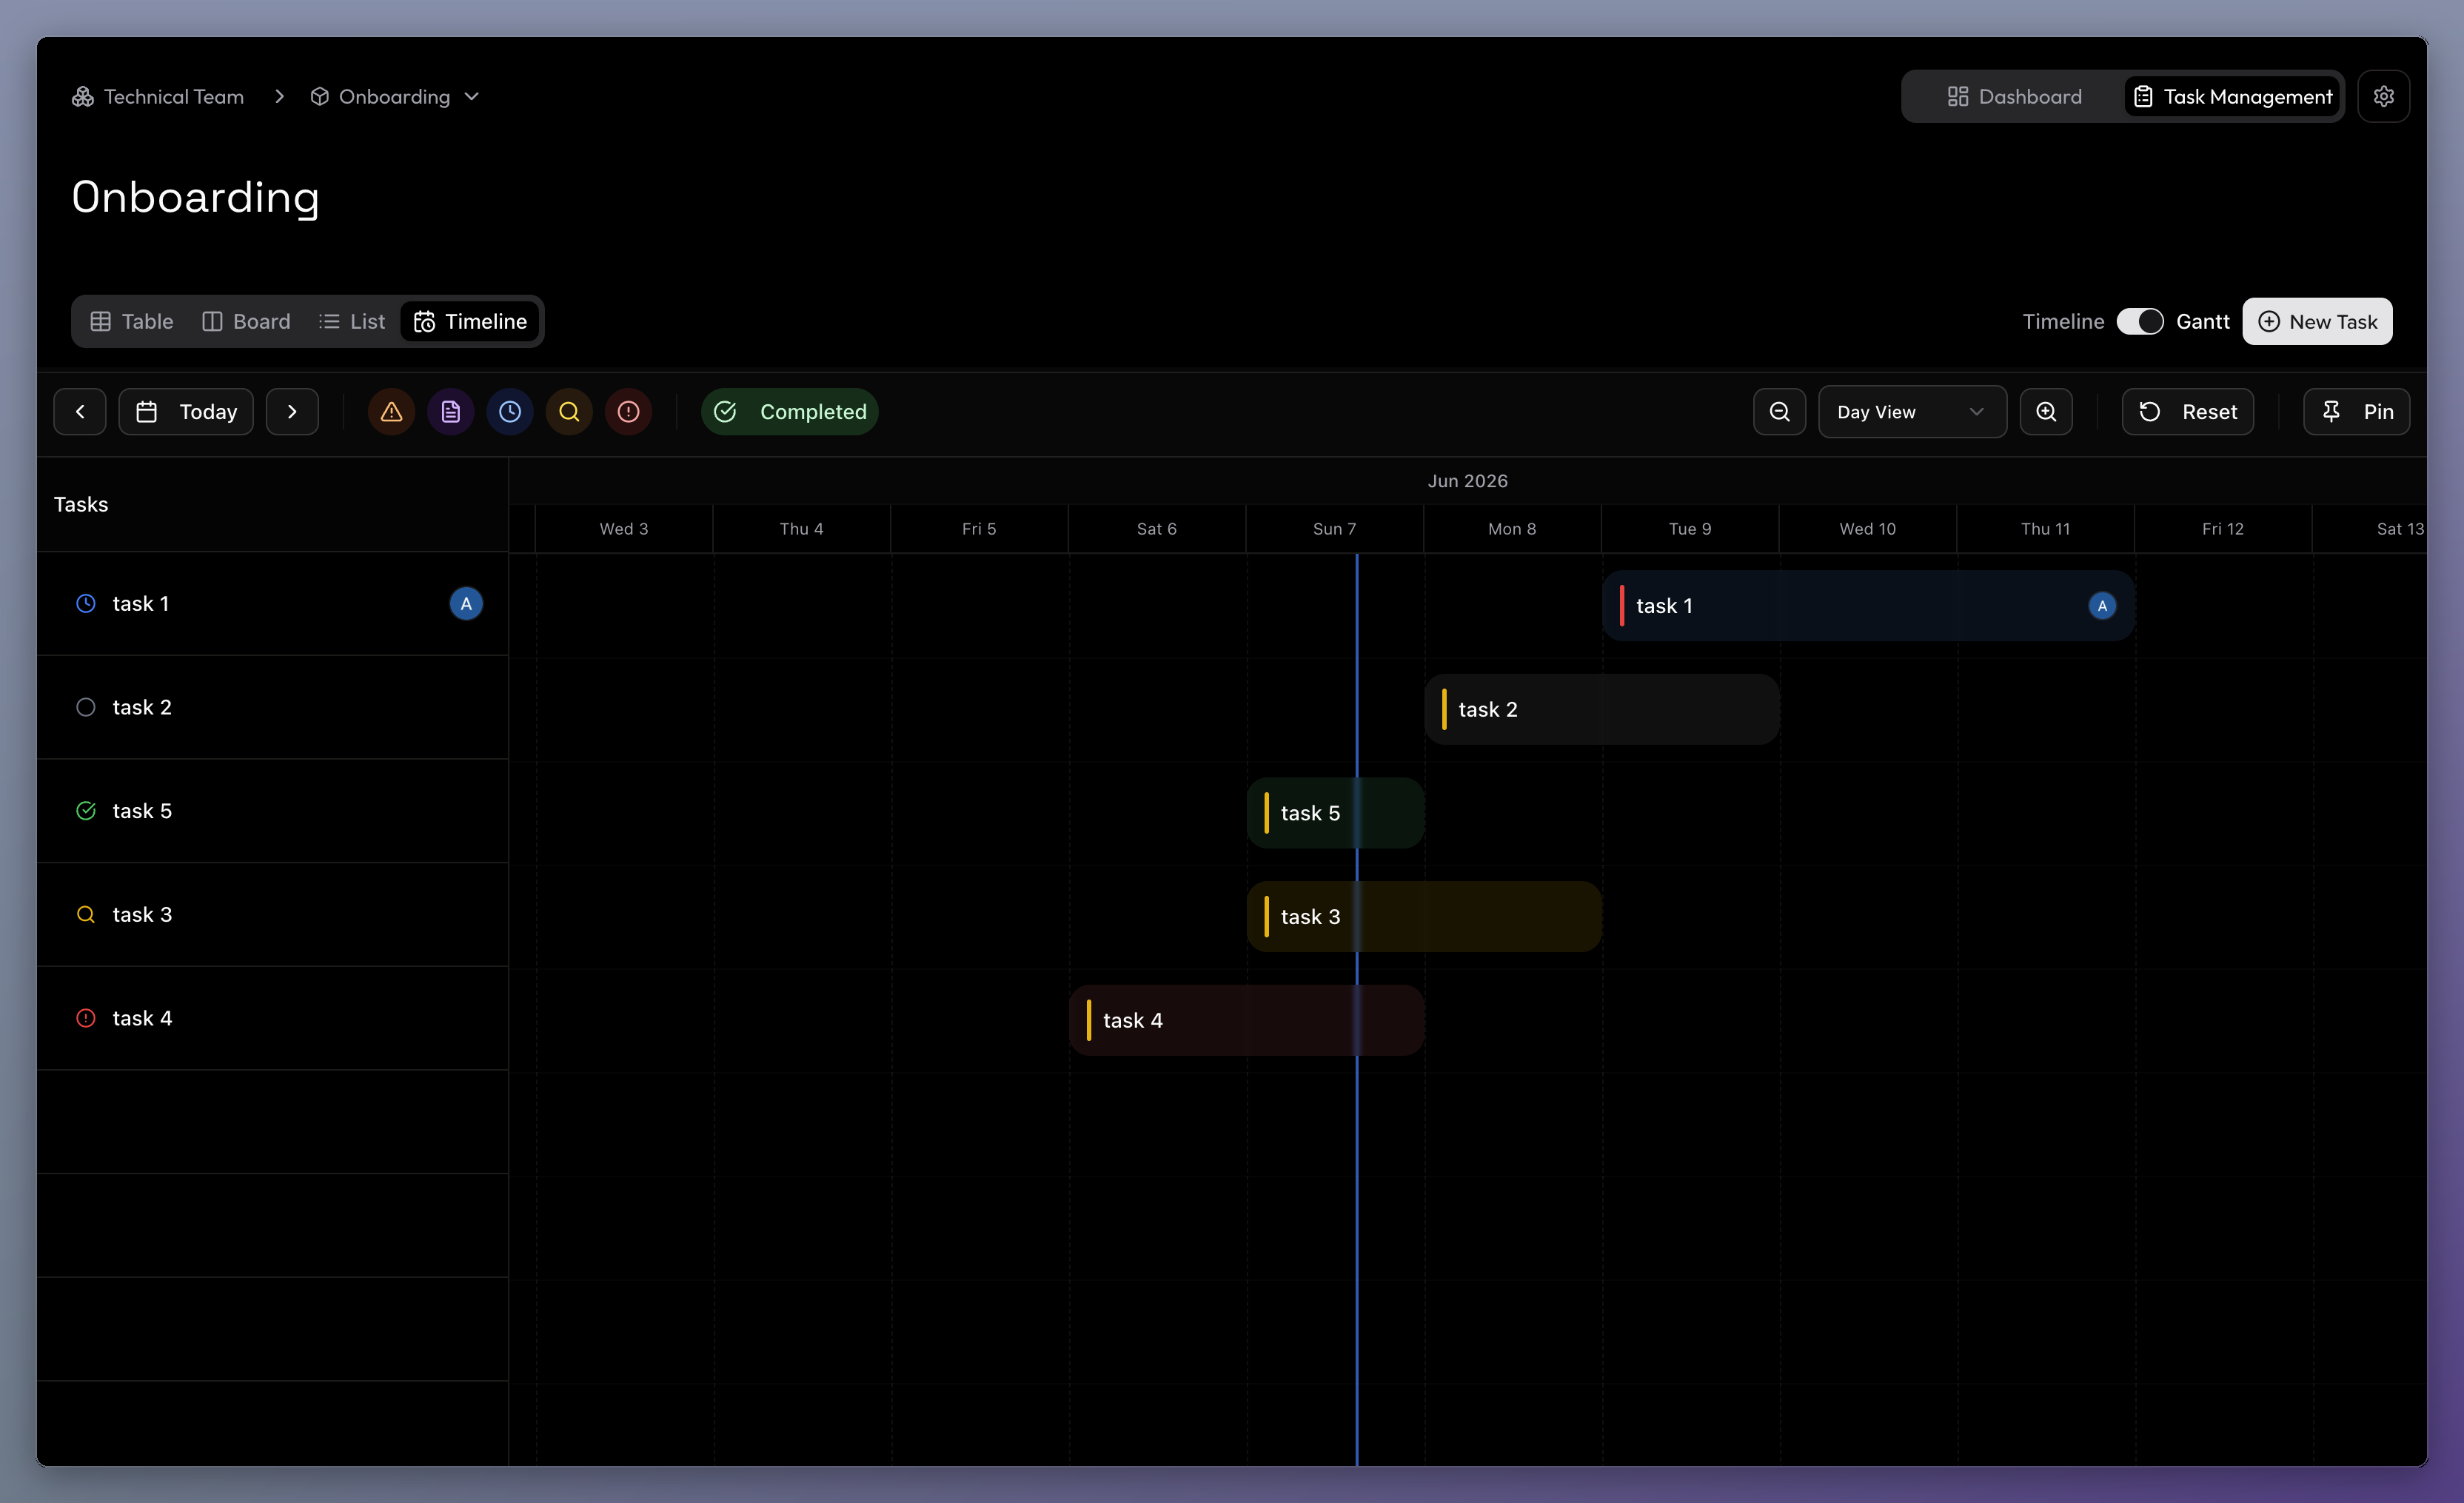
The Timeline View maps your tasks out on a calendar so you can see exactly when work is happening. This view is essential for understanding project schedules, overlaps, and deadlines.
Customizing Your View
At the top of the timeline, you have several controls:
- Navigation: Use the Prev, Today, and Next buttons to quickly jump around the calendar.
- Zooming: Use the Zoom In (+) and Zoom Out (-) buttons to switch between daily, weekly, monthly, and yearly views.
- Filters: Click the status chips (like To Do, In Progress, or Overdue) to instantly filter the timeline. You can also toggle completed tasks on or off.
Completed Tasks are Hidden by Default: To keep your timeline clutter-free, Completed tasks are not shown automatically. You must click the "Completed" chip at the top of the screen to reveal them.
Scheduling Tasks Visually
You don't need to open a task to change its schedule. The timeline is completely interactive:
- Adjusting Deadlines: Hover over the left or right edge of any task bar. Click and drag the edges to seamlessly extend or shorten the task's start and due dates.
- The Context Menu: Just like other views, you can Right-click on any task bar on the timeline to bring up the Context Menu to edit details, add sub-tasks, or delete the task.
6.4. Optional Features
To keep things simple, your projects start with just the essentials. However, as your team's workflow grows more advanced, Project Leads or Managers can turn on additional tools.
How to enable them:
- Click the Settings icon at the top right of your project workspace.
- Go to the Features tab.
- Toggle on Story Points or Cycles (Sprints).
1. Story Points
Sometimes, a simple due date doesn't capture how difficult a task actually is. Story Points allow your team to estimate task complexity. Instead of estimating in hours or days, you assign a point value (like 1, 2, 3, 5, or 8) based on effort. A higher number means a more complex task.
How to use Story Points:
- When creating new tasks: When you will create any new task, you'll see a new Points property. Click it to set a number.
- In Table View and List view: A new Points column will automatically appear. You can click directly on the points cell for any task to inline edit it, just like you would with priority or status!
2. Cycles (Sprints)
If your team prefers to work in focused bursts, you can enable Cycles (also known as Sprints). Cycles help you organize your tasks into fixed timeboxes (for example, a 2-week cycle).
How to use Cycles:
- Creating a Cycle: At the top of your project workspace, you'll see a new Cycles dropdown. Click it and select Create Cycle. Give it a name and choose your start and end dates.
- Assigning Tasks: Once your cycle is created, you can select it from inside any task's properties.
- Easy Rollovers: At the end of a cycle, if you have unfinished tasks, the system will automatically prompt you with a banner. You can click to instantly roll those unfinished tasks over into your next cycle so nothing slips through the cracks!
7. Project Dashboard
While Task Management is where the actual work happens, the Project Dashboard provides you with a bird's-eye view of your project's overall health and progress.
You can switch between these two modes at any time using the toggle buttons at the top right of your screen (Dashboard / Task Management).
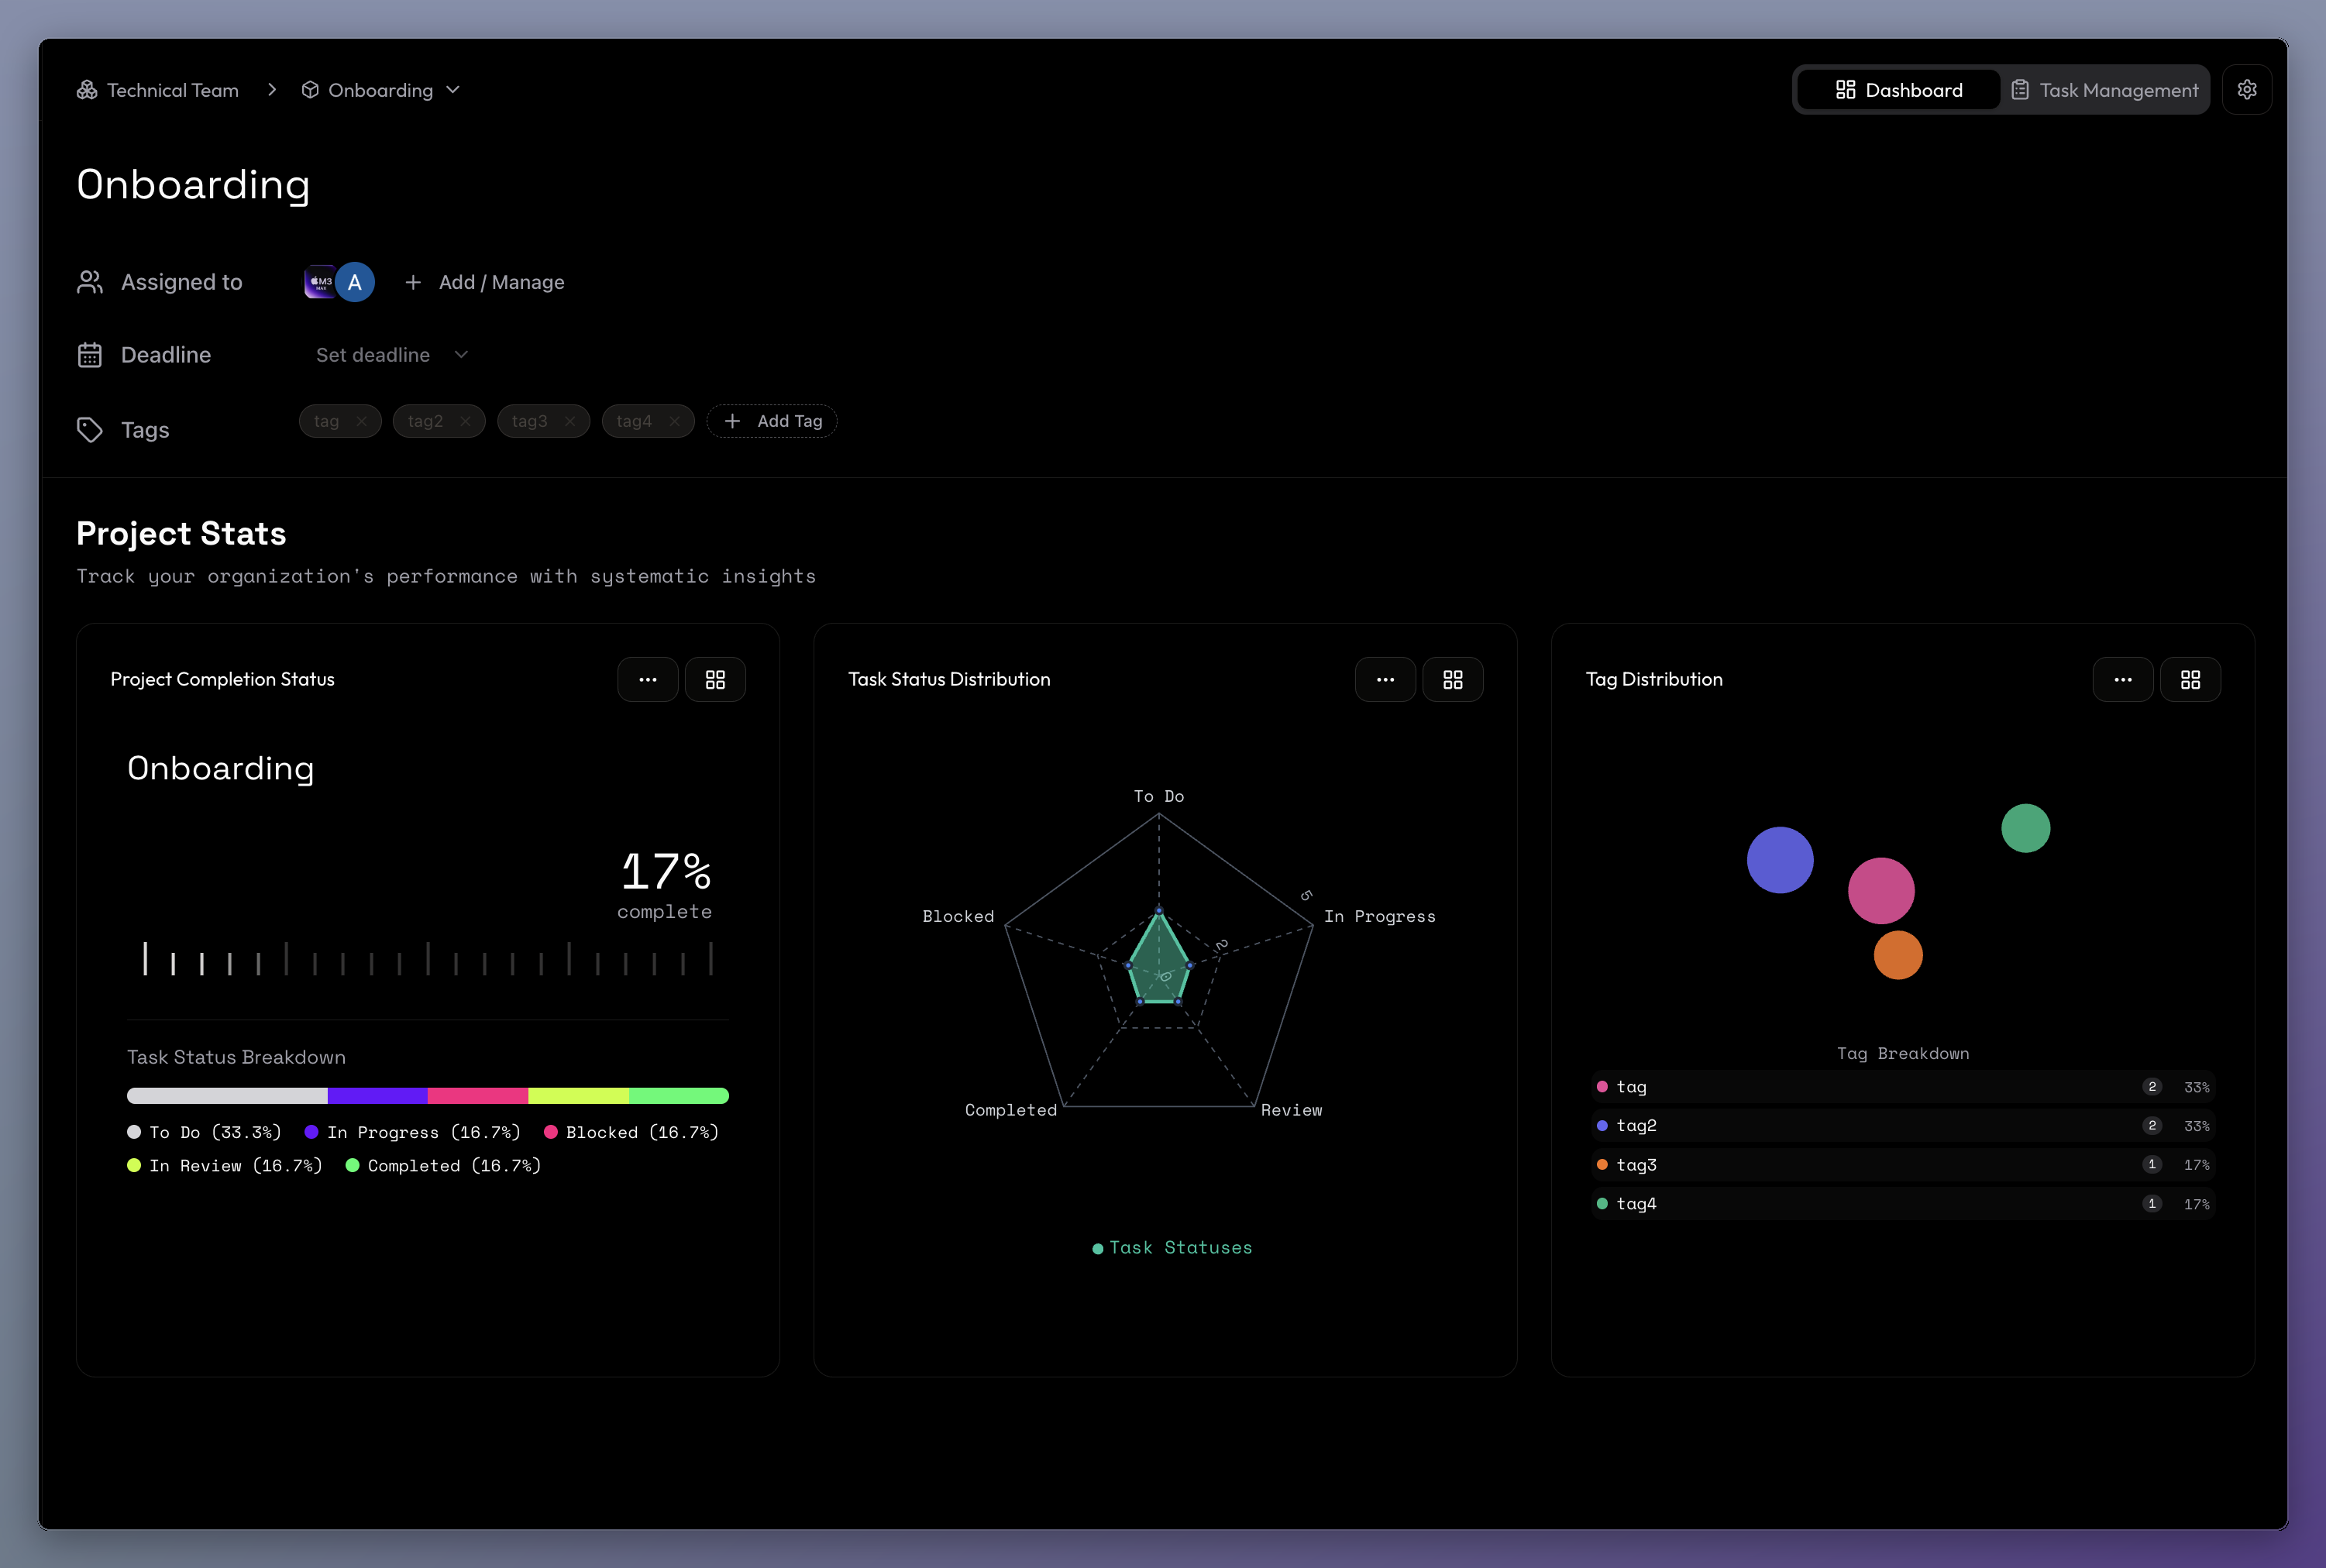
Visualizing Your Progress
The dashboard tracks your project's performance with systematic insights. It includes several key widgets:
- Project Completion Status: A progress bar that calculates exactly how much of your project is finished. It breaks down your tasks into a color-coded legend so you can see the percentage of tasks in "To Do", "In Progress", "Blocked", "Review", and "Completed" states.
- Task Status Distribution: A dynamic radar chart that gives you a quick visual pulse of where your tasks might be bottlenecking.
- Tag Distribution: A breakdown of how your tasks are categorized by tags, helping you understand where your team's efforts are concentrated.
How Optional Features Power Up Your Dashboard
If you've enabled Story Points or Cycles (Sprints), your dashboard instantly becomes even smarter:
- Cycles (Sprints) Filter: When Cycles are enabled, a new "Filter view by" dropdown appears at the top of your dashboard. You can use this to switch your entire dashboard's focus from the whole project to just your currently active cycle! This is incredibly useful for tracking your short-term goals.
- Story Points (Effort Plan): If Story Points are enabled, your dashboard will automatically add an Effort Plan widget. Instead of just counting the sheer number of tasks, this widget calculates your progress based on the actual complexity of the work (Story Points). This gives you a much more accurate picture of how much heavy lifting your team has completed versus how much is remaining.
8. Project Settings
The Project Settings dashboard allows Project Leads, Managers, and Admins to configure project defaults, enable optional features, manage team access, and customize permission levels.
To open these settings, click the Settings gear icon in the top-right corner of your project workspace.
8.1. General Settings
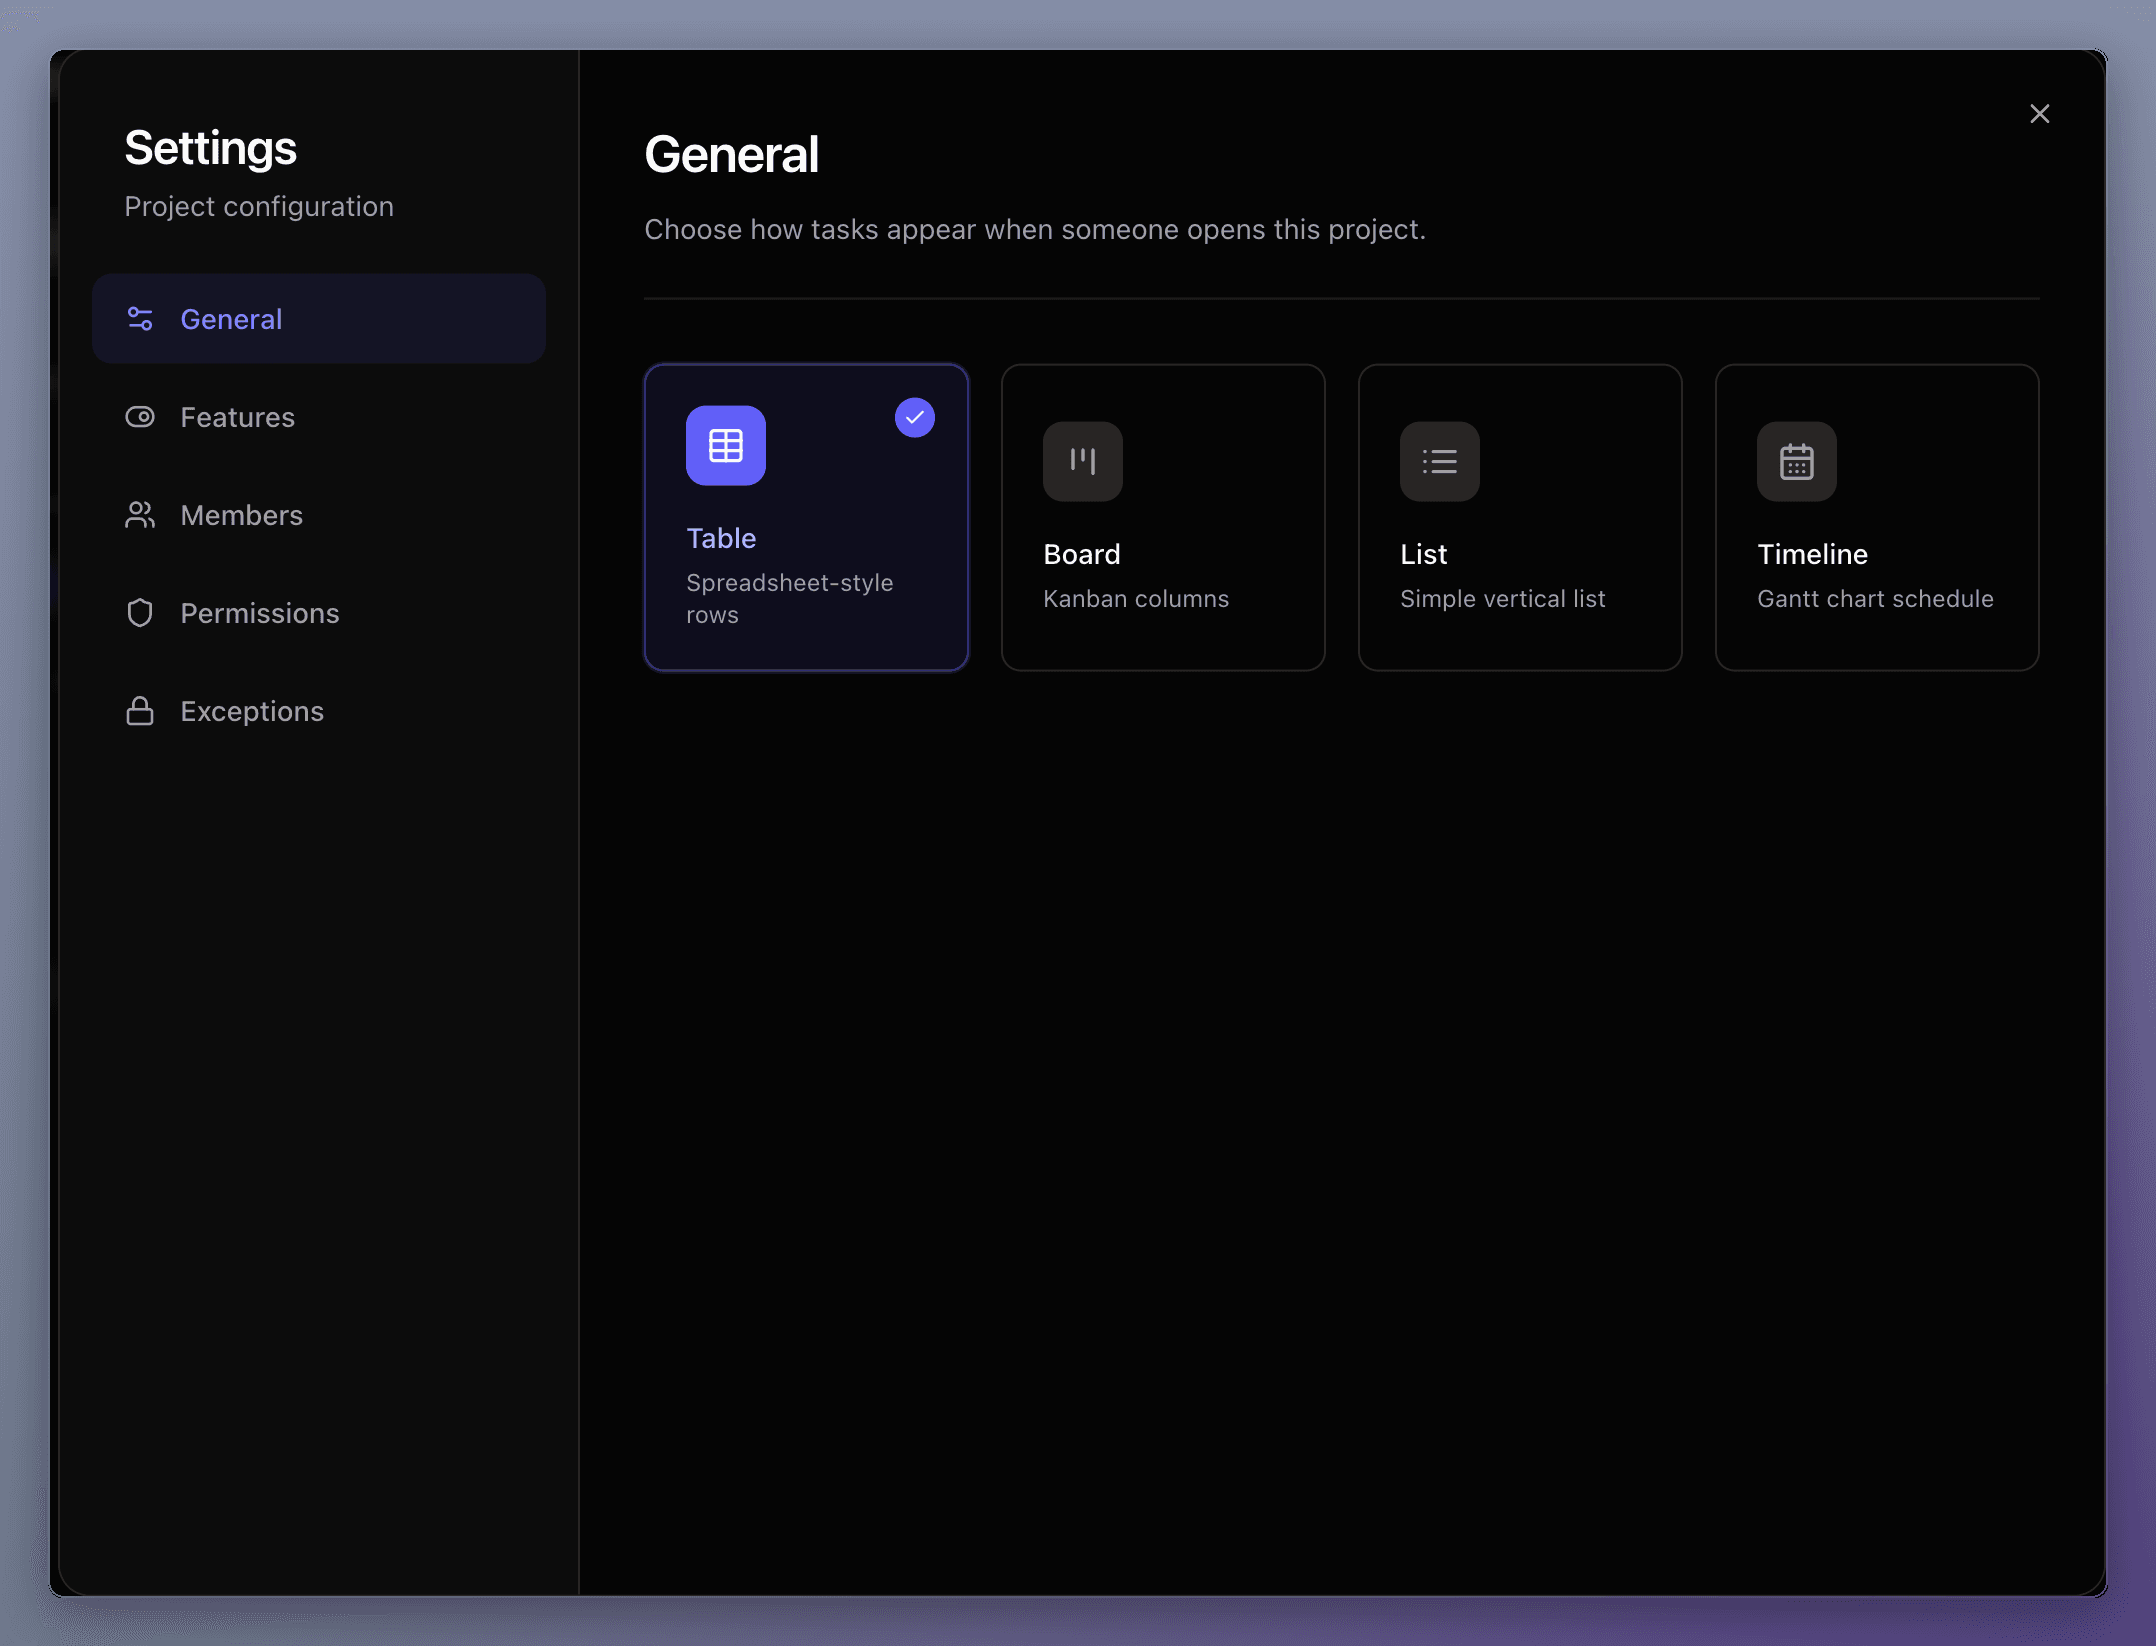
Under the General settings tab, you can set the default layout for the project:
- Default Project View: Choose which task layout (Table, Board, List, or Timeline) opens by default for the project.
- Global vs. Personal Defaults: When a Project Lead or Manager changes this setting, it updates the default starting view globally for everyone. When a standard member changes this, it only saves their personal layout preference.
8.2. Optional Features
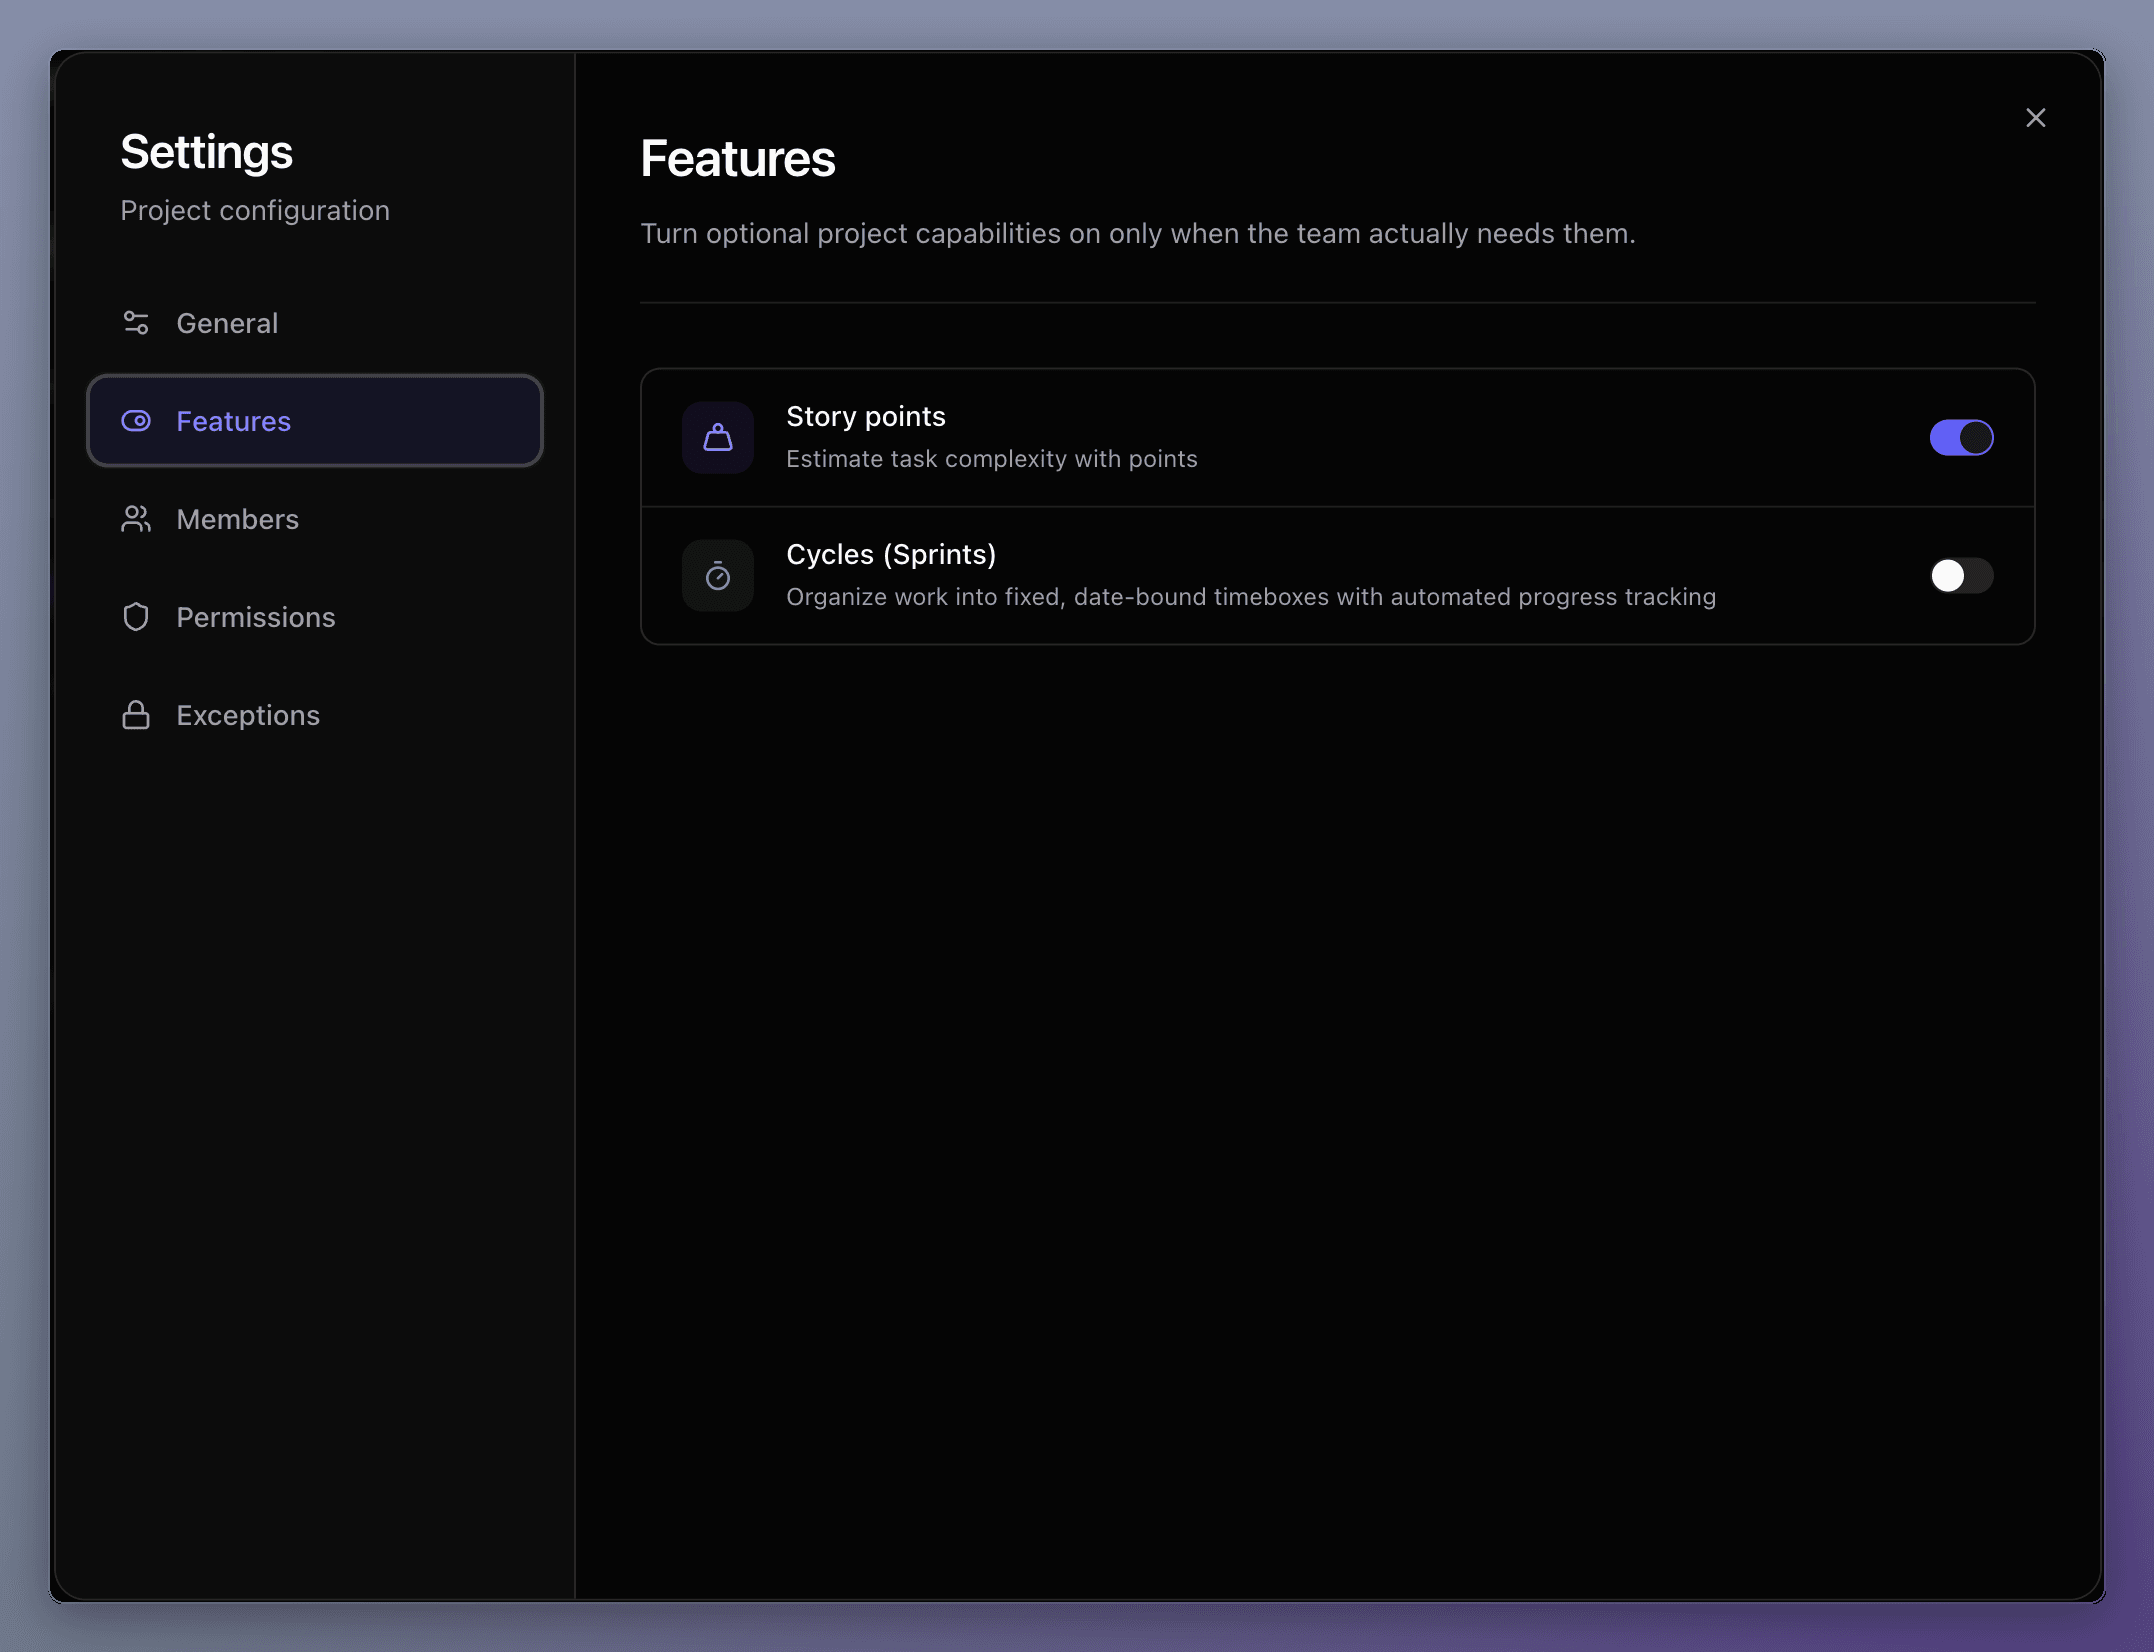
The Features tab lets you toggle optional functionalities on or off to keep your workspace simple or add power when needed:
- Story Points: Enable this to estimate task complexity using effort points (e.g. 1, 2, 3, 5, 8) rather than simple hours or days. This activates a "Points" column in task views and adds the Effort Plan progress widget to the dashboard.
- Cycles (Sprints): Group tasks into focused, date-bound timeboxes. This adds a cycles selector, sprint progress charts, and rollover banners to shift unfinished tasks into the next cycle.
8.3. Members & Roles
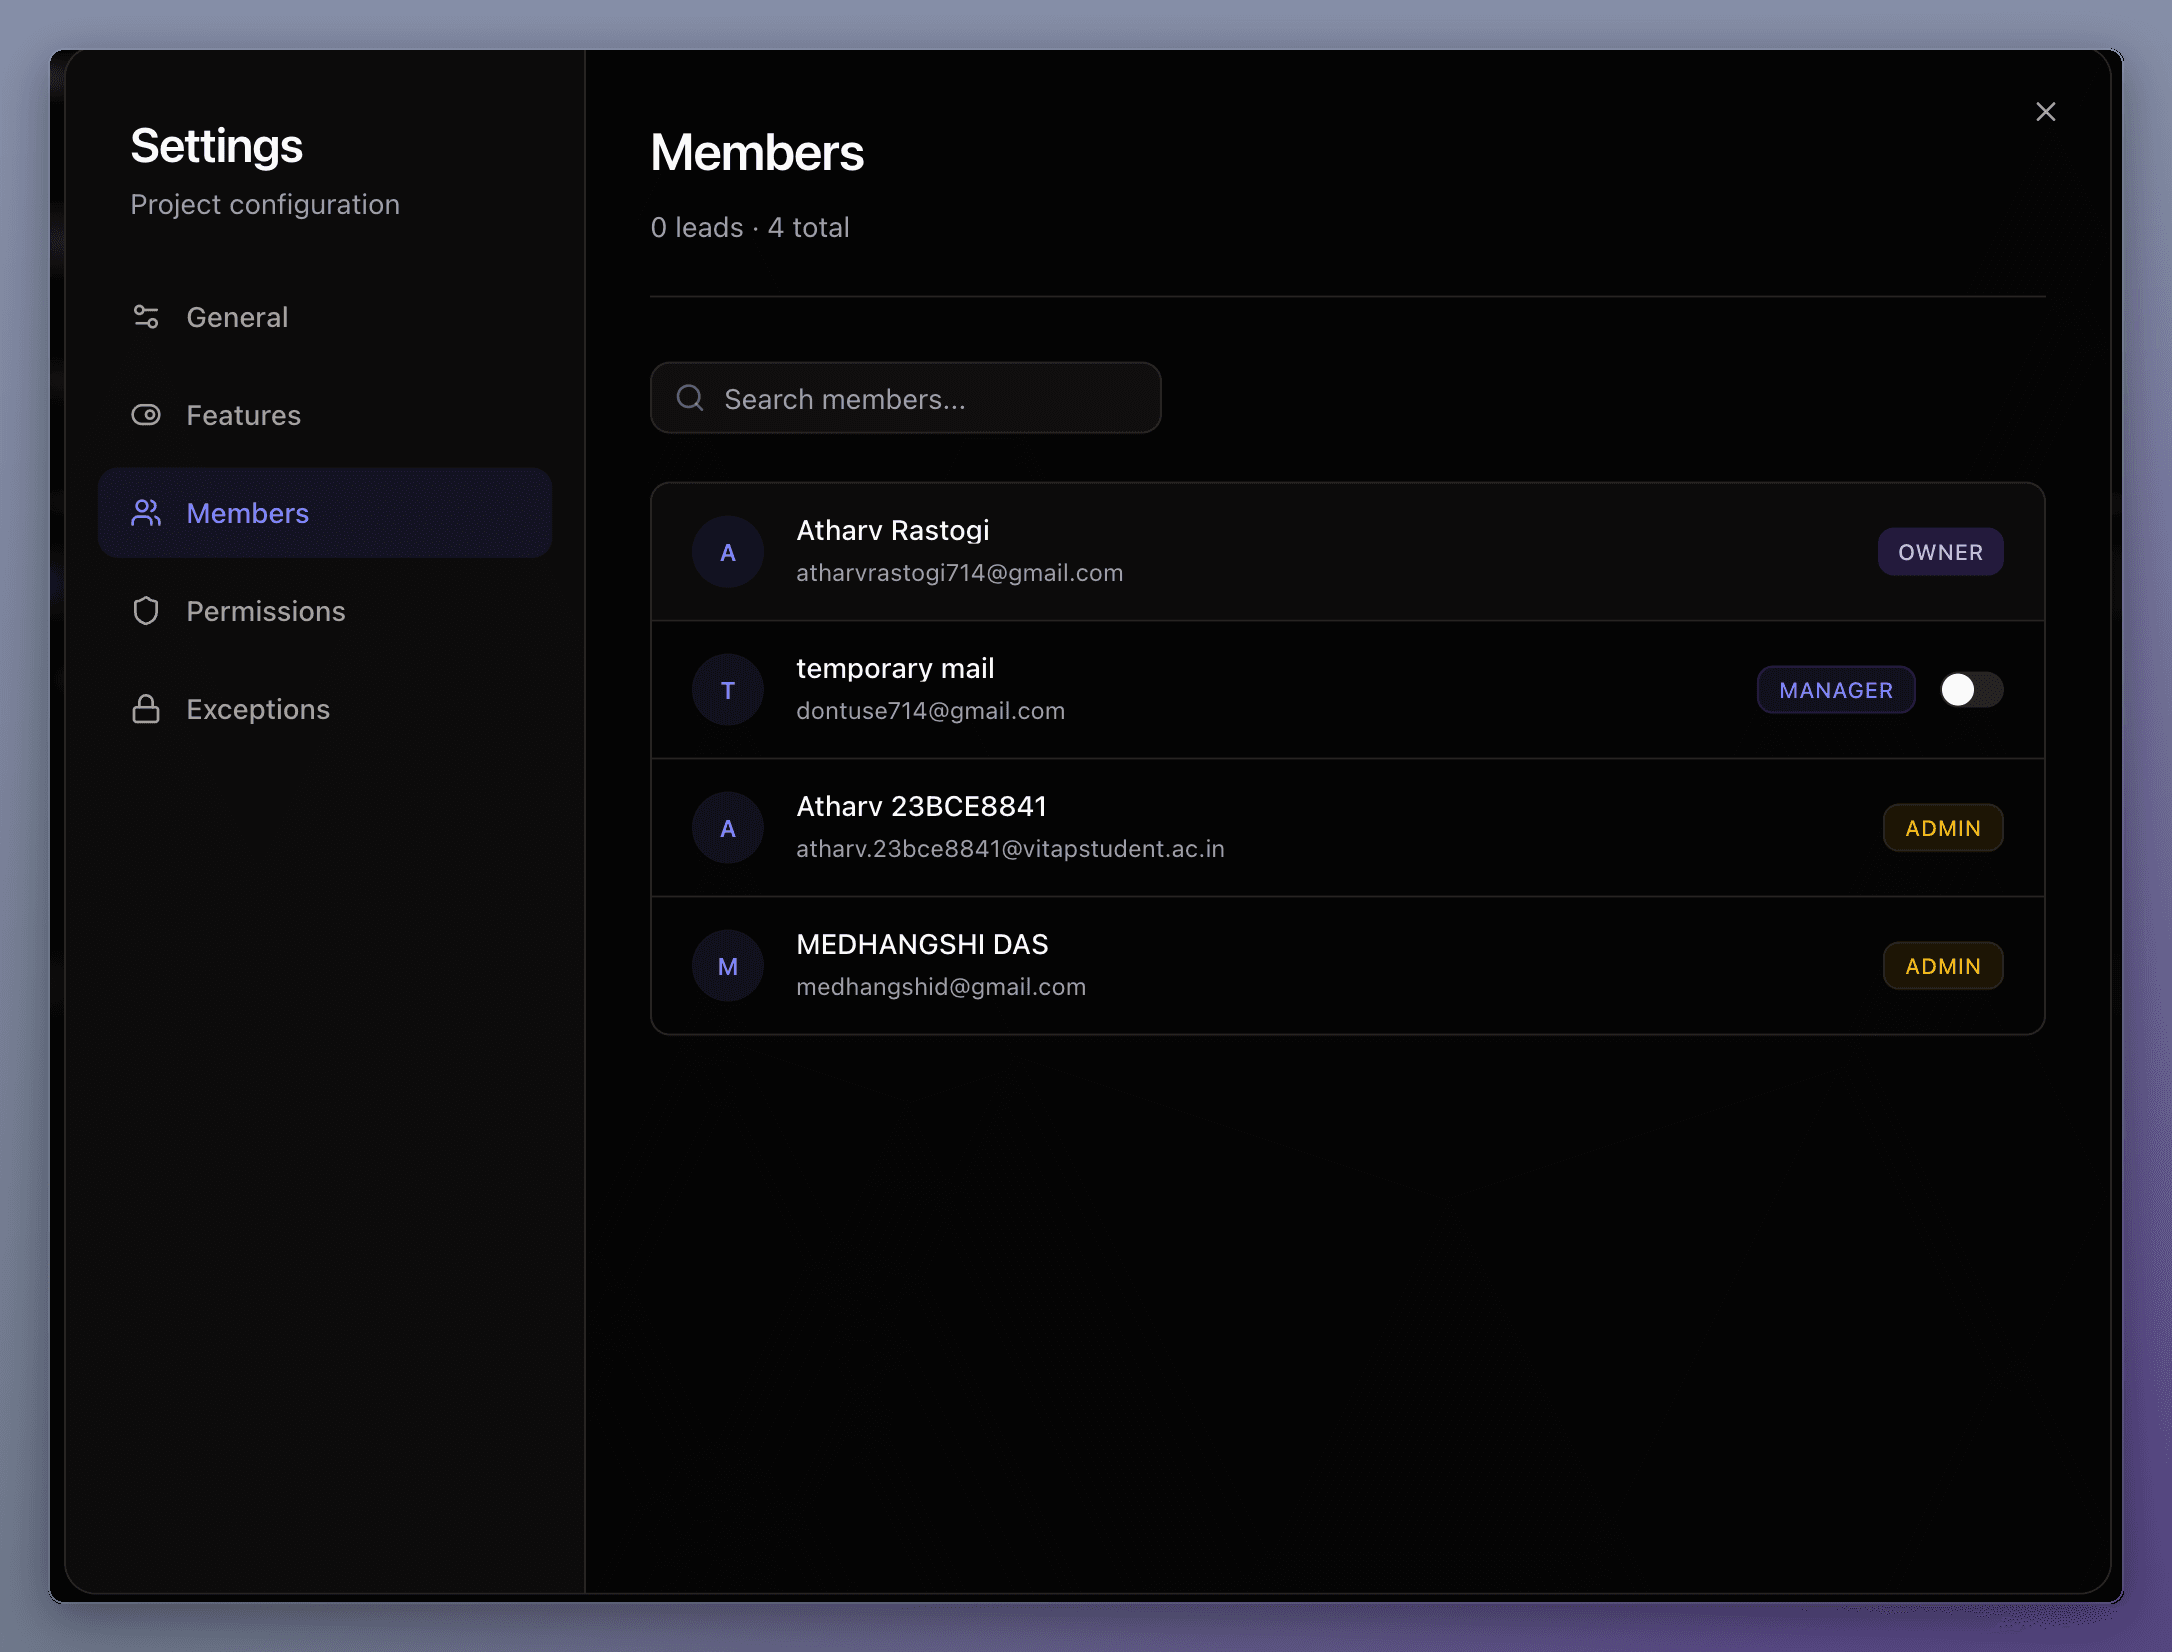
The Members tab provides a directory of everyone with access to the project:
- Search & View Roles: Easily search through members and view their clear role badges (Owner, Admin, Manager, Lead, Member).
- Assigning Project Leads: Project Leads and Managers can toggle the lead switch next to members to grant or revoke Project Lead capabilities.
8.4. Permissions

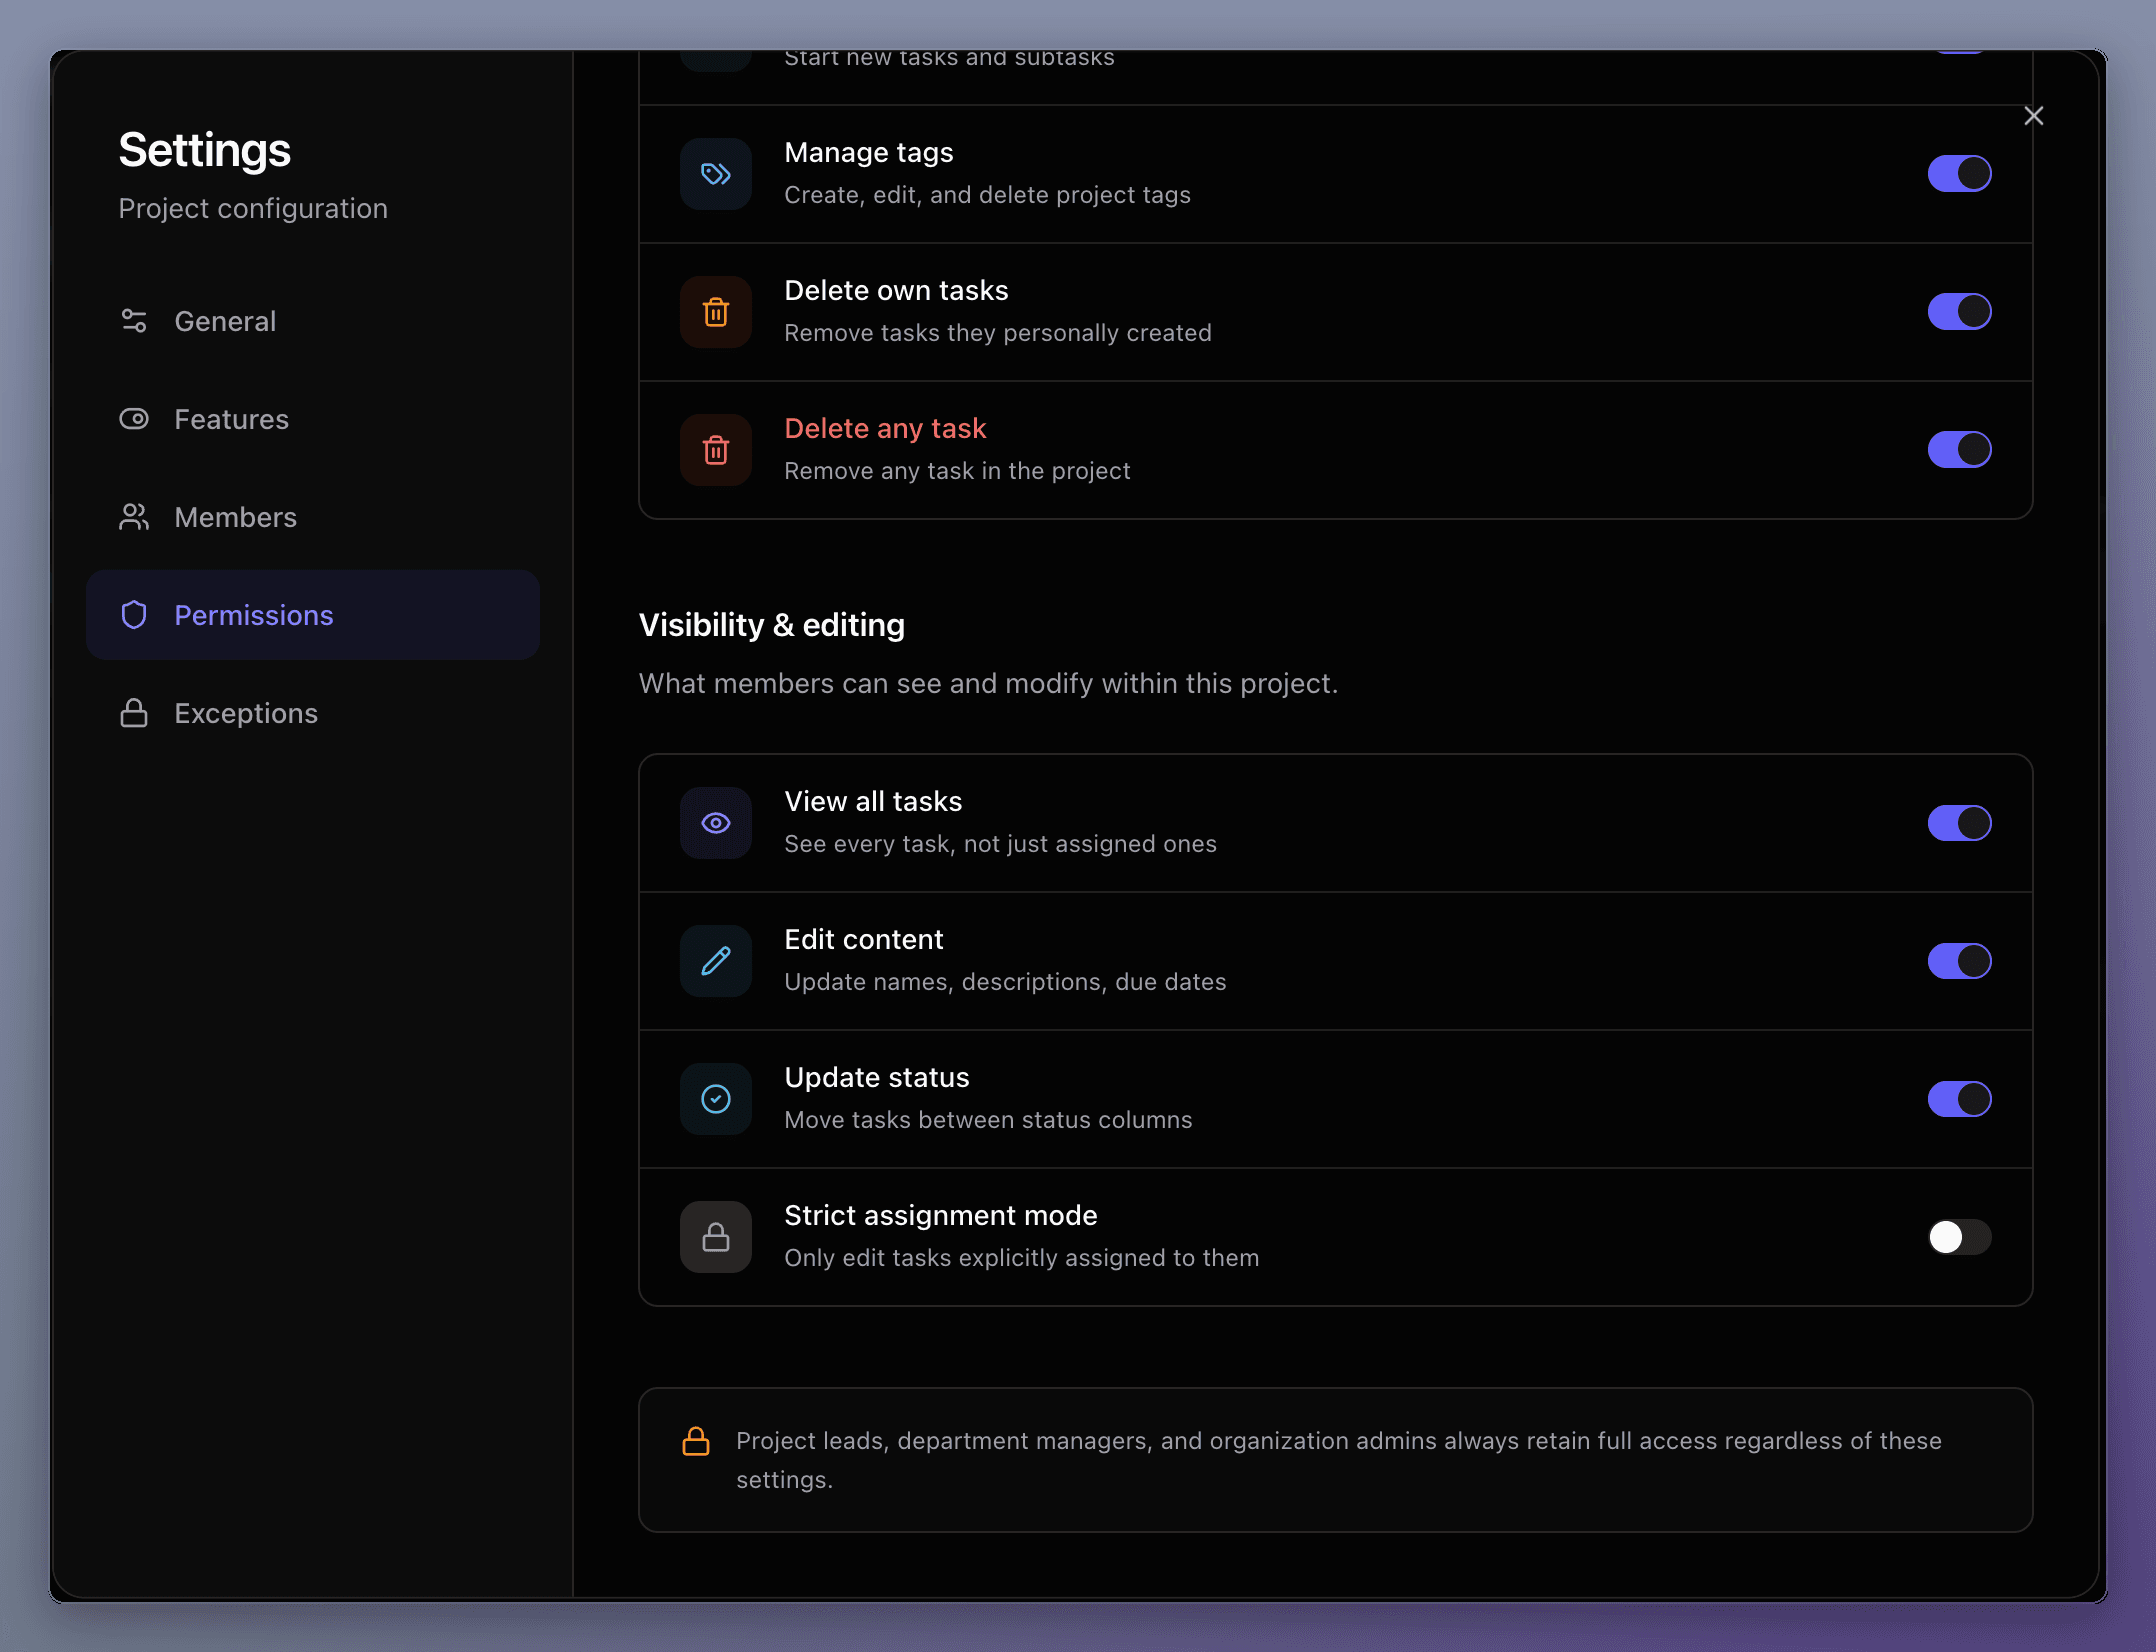
The Permissions tab allows Project Leads and Managers to establish default permission levels for non-lead members:
- Core Actions: Control whether members can create tasks, manage tags, delete their own tasks, or delete any task in the project.
- Visibility & Editing: Manage if members can see all project tasks, edit task content (names, descriptions, due dates), or update status. Turn on Strict Assignment Mode if you want members to only be able to modify tasks that are explicitly assigned to them.
- Note: Project Leads, Managers, and Admins always retain full management capabilities regardless of default permission switches.
8.5. Custom Overrides (Exceptions)
If certain team members require different access levels than the default permissions, you can create custom overrides.
Step 1: View Exceptions List
 If no overrides are configured, the list will indicate that everyone is following default rules. Click Add exception to customize permissions for specific members.
Step 2: Select Members
 Choose one or more team members from the searchable selection box to apply the custom override to.
Step 3: Set Specific Permissions
 Toggle individual switches to grant or restrict specific actions for the selected members. Click Save to apply the exception.
What's Next?
Now that you know how to manage tasks, use the dashboard, and configure project settings, you're ready to collaborate with your team effectively!
5. Inside the Team Workspace
A complete guide to navigating a dedicated Team Dashboard, tracking projects, managing sub-teams, and utilizing powerful analytics widgets.
7. Task Details
A comprehensive guide to managing task properties, collaborating via comments, creating documents, assigning sub-tasks, and adding attachments.